Deleted
Deleted Member
Posts: 0
|
Post by Deleted on Mar 21, 2020 7:29:20 GMT -5
Thanks for clearing that up for me, now I'll be looking for an intake and Valve covers. If your counting votes, I say not chopped. The height is what makes it look so cool.
Robert
|
|
|
|
Post by jbwelda on Mar 21, 2020 12:01:50 GMT -5
Thank you Robert, I tend to agree on the chop.
jb
|
|
|
|
Post by TooOld on Mar 24, 2020 5:27:02 GMT -5
Lookin' really good JB ! I think those boat anchors are really great looking engines when they're dressed up a bit .  |
|
|
|
Post by jbwelda on Oct 25, 2020 21:02:50 GMT -5
Soon to return!
jb
|
|
|
|
Post by patw on Oct 29, 2020 12:00:04 GMT -5
S'lookin good jb!
|
|
|
|
Post by fordrodnkustom on Oct 29, 2020 12:14:26 GMT -5
Bring it on!  |
|
|
|
Post by jbwelda on Mar 9, 2021 21:56:17 GMT -5
Planning and some actual work has been done, going to seriously attack this after done with the split window VW, stay tuned! Here is a pic of the rear end, which is going to hang out in back of the frame on this one. You can also see the bench seat taped up inside the cab, its been modified quite a bit to fit in there, next to figure out how exactly to build a floorboard for this. Since it is so channeled, the body is wider where the floor will be than it is at its bottom ledge, which makes having a removable body not possible. Think I will build the floorboard up into the cab and then be able to remove the body with the floorboard inside. Its one of the sticking points right now. Note also the Tweedy Pie gas tank in resin. 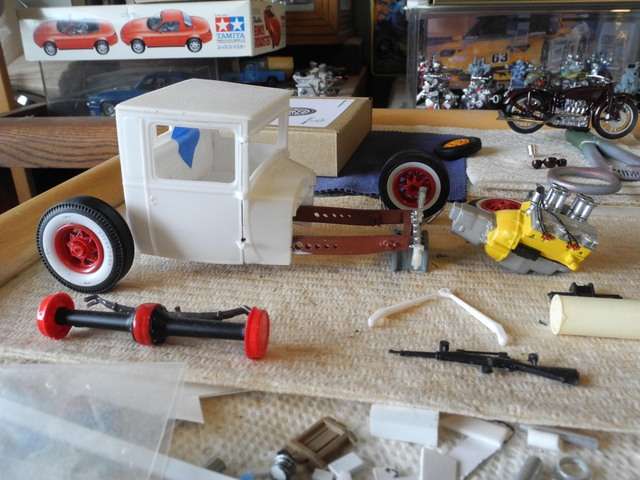 jb |
|
|
|
Post by lo51merc on Mar 14, 2021 16:34:51 GMT -5
Why, in my minds eye, am I seeing this body sitting on the frame like Norm Grabowski's T Roadster? Oops, second page missed. See ya!
|
|
|
|
Post by lo51merc on Mar 14, 2021 16:37:50 GMT -5
Back! Still seeing it like I said but It's gonna look sweet the way YOU see it, not me. Staying tuned....
Gary
|
|
|
|
Post by jbwelda on Mar 19, 2021 17:34:04 GMT -5
I like em low to the ground, lower than real life would allow. I kind of always thought the Kookie T looked a little funny because it was so high. I liked that it was short and stubby, but sitting so high looked awkward to me. Of course it was the original so it defined the genre, but at least now a days, I prefer them as low as I can get them.
Did you happen to see my post of the Uncertain T I was building, and one night I was posing this body looking similar to the UCT. Kinda weird how it reminded me of it.
thanks for your comments and insights!
jb
|
|
|
|
Post by fordrodnkustom on Mar 21, 2021 17:39:33 GMT -5
I like where you're going with this. Are you going to use the wire wheels shown in the pic? I agree the Grabowski/Kookie T did sit a bit high in the rear, looks like the frame had quite a kick, most likely to accommodate that huge buggy spring. It does give it a kind of "jaunty" look though. 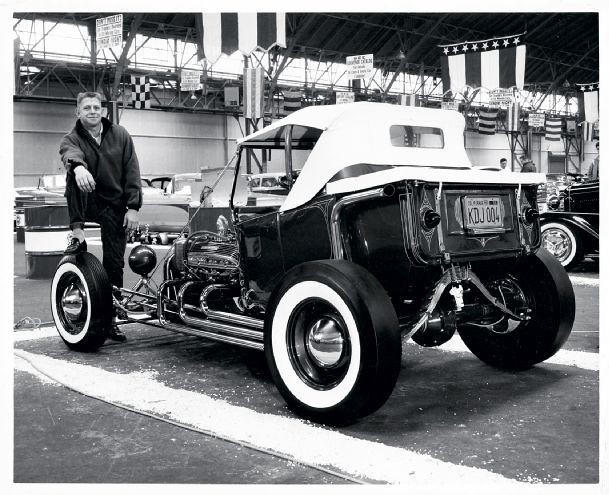 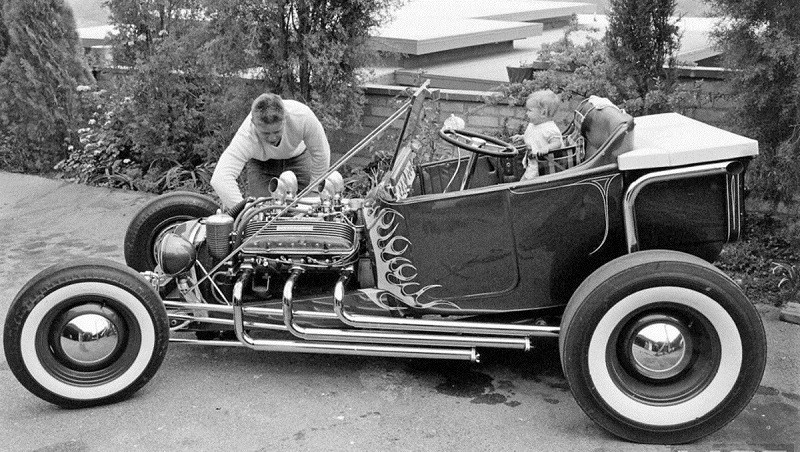 |
|
|
|
Post by jbwelda on Mar 21, 2021 18:00:14 GMT -5
Yep the red wires are from the Monogram (think it was) woody and have some nice chrome center caps to finish them off.
Slightly off topic, even thought its not really exactly my preferred style in Ts, I have been trying to score a Danbury Mint (or is it Franklin?) Kookie T for some time now. No luck I don't need box and papers and would like to spend less than a hundred on it but just haven't managed to be right place at right time.
jb
|
|
|
|
Post by jbwelda on Apr 29, 2021 17:21:00 GMT -5
Quite some progress on this, even if sometimes it doesn't seem so. First off, am rethinking the red wheels. Too common a treatment. So possibly whatever body color I go with (Tamiya orange metallic over silver with orange clear is what I am thinking of), or maybe just black. Got the frame straightened away, all the suspension pieces have been fitted and painted, although they are awaiting the frame itself being painted (same as body) to be attached. Just finished up the floorboard with a hump grafted in to clear the transmission and bell housing. I am using the bench seat you see in a photo background, I have added material to it to fit better in the cab against the back wall. I had a problem figuring out how to make a floorboard as the area up in the cab where the floor sits is way wider than it is at the bottom of the cab. Usually I try to make the body removable but in this case the floor will have to go along with it because it will not lift off past the floor because of the width issue. So I measured some appropriate angles on the inside of the cab and made some styrene floor supports. So I will build the dash, attach it, detail the interior seats and sidepanels and roof, put in the glass, then put the seat in the cab and follow it with the floor piece. Glue the floor piece to the supports and then push the seat into place through the open side windows. I think I will put a glob of blu-tack on the back of the seat to hold it in place by squeezing it between the seat and the back cab panel. Hope it doesn't show when you turn it upside down! Am going to build a blanking plate for the underside of the seat to complete the floorboard setup. I also sanded the top of the cab smooth, it had a vinyl top appearance to it but I want it solid color like the body. Also fabbed a firewall extension of the proper length and relieved it for the transmission and bell housing. Here are some photos, this is how the cab is going to sit on the frame although the frame is going to sit a lot lower to the ground. Note I grafted a detailed front axle mount to the front crossmember, and fabbed some fuel tank mounts. The axle will sit behind the rear crossmember so to increase the wheelbase a bit. 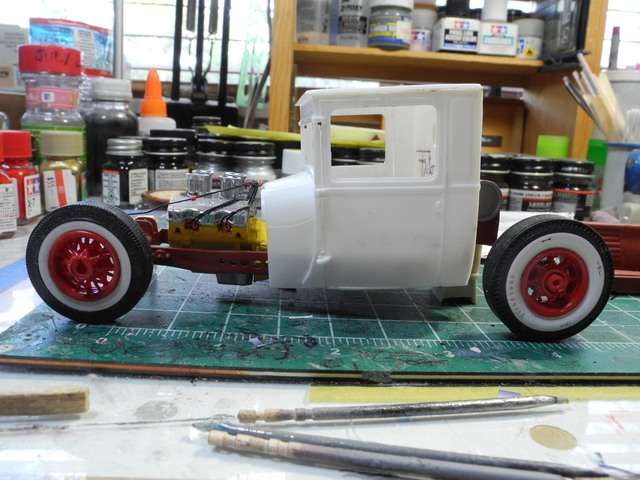 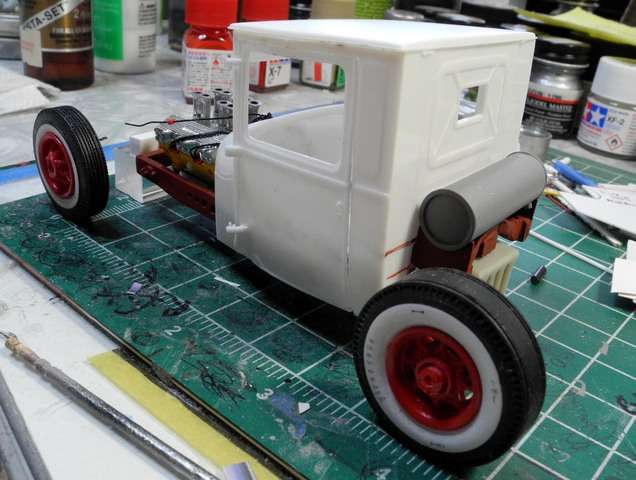 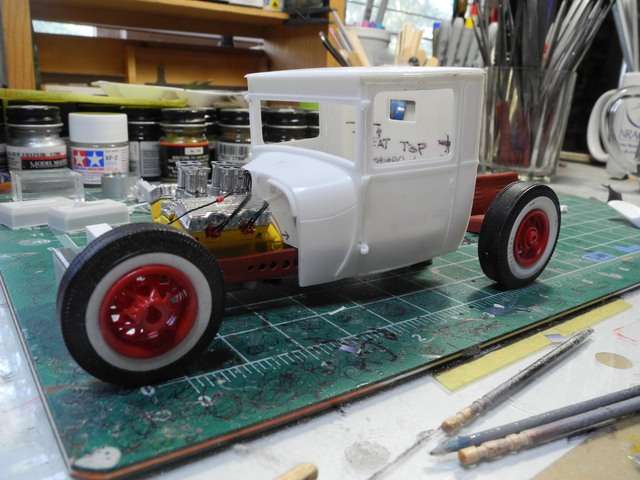 Look down into the cab and you can see the floorboard with the grafted on hump. Planning on plain black embossing powder for the floor although am also considering a pure pearl white interior in which chase I might try white or light pink carpet. 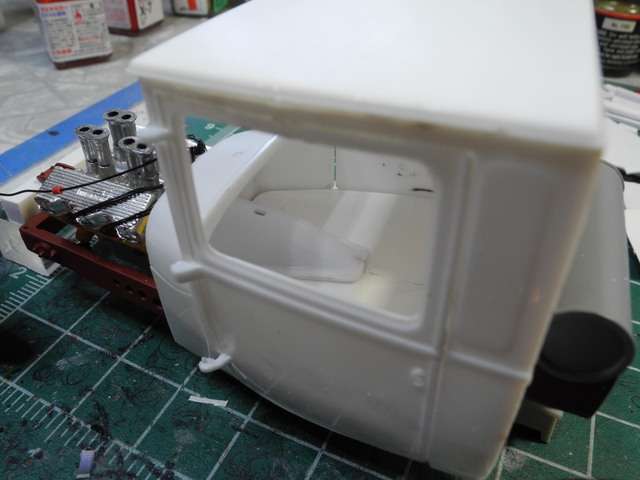 OK thanks for looking and any and all comments welcome! jb |
|
|
|
Post by Dave from Pleasanton on May 11, 2021 20:16:49 GMT -5
First, I love your build. One suggestion and a couple of comments.
For the seat back you could add some Evergreen to the back side that fits against the cab wall, put the seat in place and then drill through the cab body into the Evergreen. Then install plastic pegs into the Evergreen and cut them flush with the cab wall. Then glue them either to the seat and when installing it you push it through the cab or glue them to the cab wall and finish it and then plug the seat onto the pegs. The first version only works since you have a fuel tank hiding the area. The second is cleaner, but you have the difficulty of trying to align the seat to the pegs.
409s were not boat anchors back in the day. They were kicking butt and taking names of the Ford 406 and Chrysler 413. GM officially got out of racing and Chevy went to everything small block until they came out with the rat motors. The reason you see very little of any engine but small blocks in the real world, is that the hot rod market place can sell gobs of Chevy small block stuff for every one of something else. We hobbyists find speed shop parts for every obsolete engine out there because most of the kits were done back in the 60s. Works fine for me. I have no interest in putting a LS3 into anything even though if I was to build a real hot rod it would be the go to motor. The 348/409 are the coolest model engines just because you so seldom see them.
As far as the Kookie T is concerned, an earlier version had the rear of the body closer to Tommy Ivo's T. I prefer the look of Ivo's T over the Kookie T.
|
|
|
|
Post by jbwelda on Jun 18, 2021 18:42:15 GMT -5
I think I might do something like you describe, Dave, pretty soon probably because I am getting to the point where I need to get the body done and painted. Meanwhile have been wondering what I was going to do for the grille and radiator and headlamps. My original thought was a Tweedy Pie cut down deuce shell and grille, but I've done that before and since this is basically based on the Tweedy Pie, I wanted to depart from that look as much as I could. So one day noticed a farm implement kinda shell from Maple Works resin up in Canada, available through Shapeways. Got it and started fitting it, and I think it kinda fits. Also had no idea what to do about headlamps but remembered I had a set of strange farm implement-y things from Australia, and they seem to fit the look pretty well. Note I had to chop notches in both sides to get to snuggle into the engine where I want it. Also note the exhaust manifolds, am going to run exhausts vertically right behind the cab I think. Was difficult to fit any kind of headers inside the frame rails but these stock ones will work great. 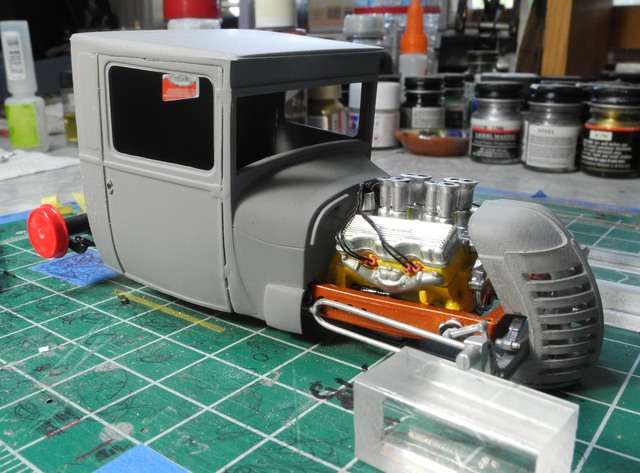 You might note that I paid for the expensive material, but still the striations were visible and they are kind of hard to erase into a nice surface simply by sanding. What you see in the photo is after I attempted to sand it with some rough sanding stick. Ought to smooth out with some work though, we'll see tonite. 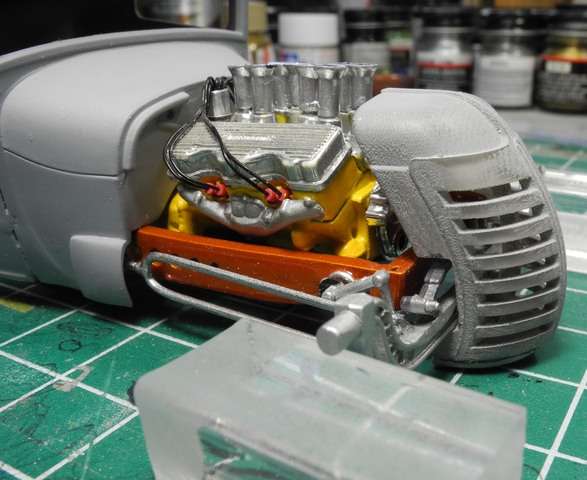 Headlamps, from Parts Box in Australia, complete with little detailed lenses and large mounting bosses. Am going to mount them on the shell, right above the top of the notch. 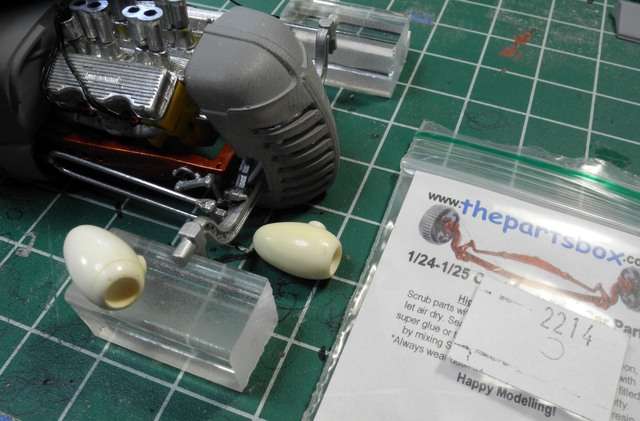 Thanks for looking and comments always appreciated! jb |
|