|
|
Post by TooOld on Feb 26, 2018 18:10:09 GMT -5
Not exactly sure what to call this so for now it's a "Never Was" build since Monogram did the Big Rod but never a Little Rod . I'll be using a collection of parts but mainly the front & rear suspension and tires from a Little "T" . The body , frame , and engine I'm using are from a Boomer Bucket since the white will be easier to paint yellow . Front wheels and chrome engine goodies are Little "T" , rear wheels are from a Li'  Coffin , and the chopped '32 radiator shell is from a Tweedy Pie II . The headers will be scratchbuilt although I do have a couple sets that may work as a starting point . I'm also planning on making new top for it . Here's what I have . I also had some fun editing a new box art . 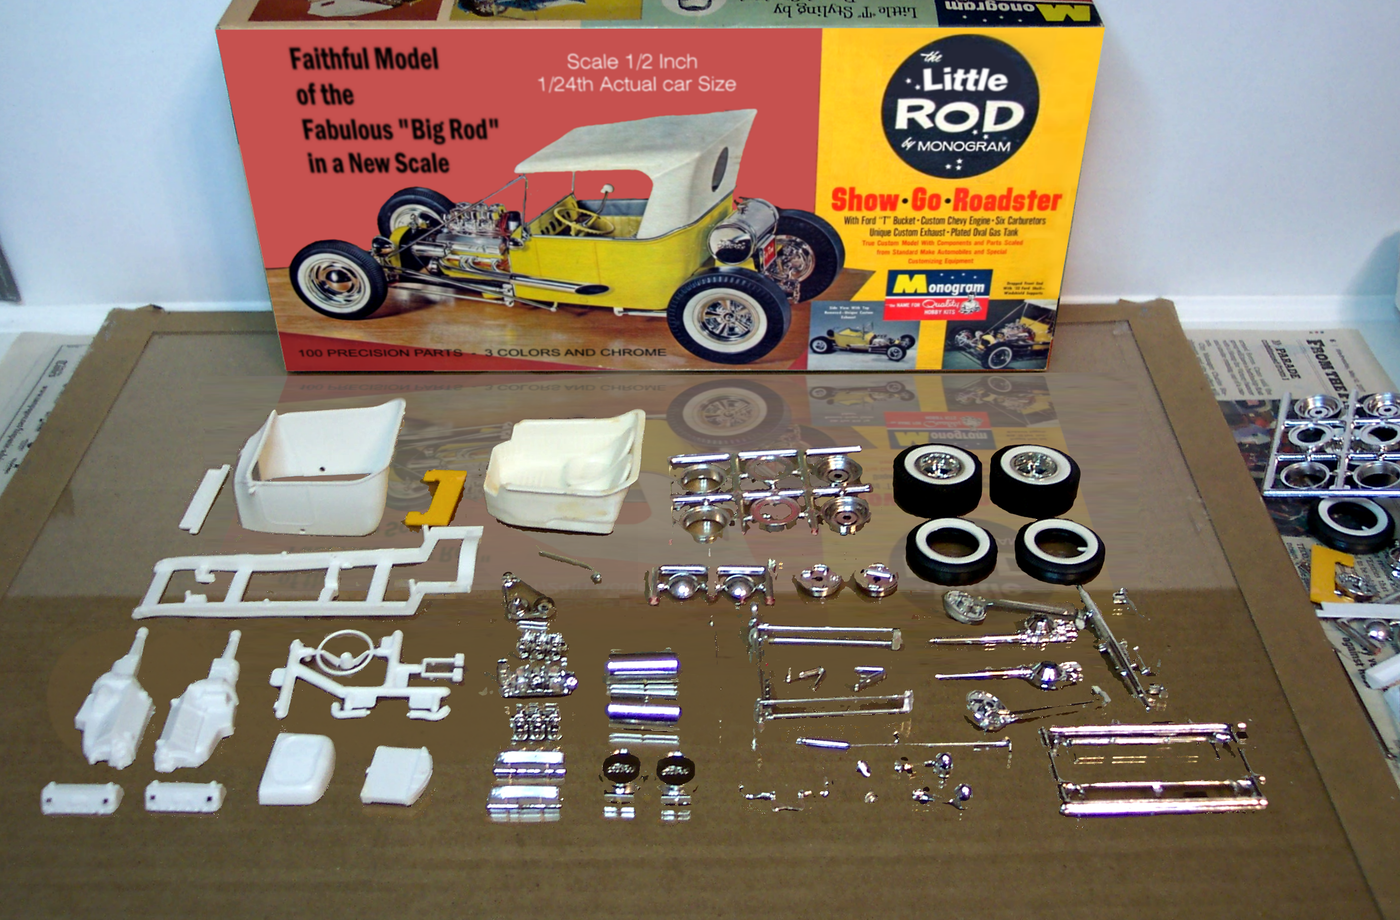 |
|
|
|
Post by falconwagon on Feb 26, 2018 20:58:53 GMT -5
great idea looking good
|
|
|
|
Post by Bernard Kron on Feb 26, 2018 21:19:27 GMT -5
I think the box re-do is absolutely brilliant. Could you walk us through its creation and some of the ideas you had regarding the additions and changes you made? It's totally spot-on not only from a period recreation/modifications perspectives, but it resonates perfectly from a marketing point of view. "Faithful Model of the Fabulous Big Rod In a New Scale", indeed!
|
|
|
|
Post by TooOld on Feb 27, 2018 8:04:43 GMT -5
I think the box re-do is absolutely brilliant. Could you walk us through its creation and some of the ideas you had regarding the additions and changes you made? It's totally spot-on not only from a period recreation/modifications perspectives, but it resonates perfectly from a marketing point of view. "Faithful Model of the Fabulous Big Rod In a New Scale", indeed! Thanks Bernard , but not really so brilliant as the "Faithful Model" phrase was taken right off of the Little "T" box , as was the other text I added . I actually spent more time looking for the correct fonts than I did adding them to the box art . I started with the Big Rod box art and changed the dimensions before adding the 'Little' in place of 'Big' , then removing the background and making it a solid color . The whole process took a couple of hours . 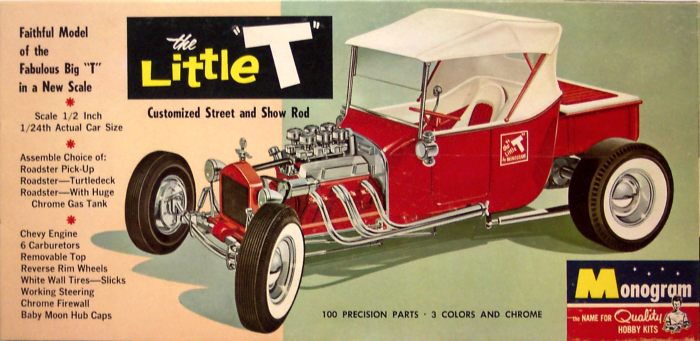 |
|
|
|
Post by Bernard Kron on Feb 27, 2018 13:29:22 GMT -5
Thanks Bob! Knowing your subject, as you clearly do, can go a long way. The result is a real winner! Now on to the build!
|
|
|
|
Post by fordrodnkustom on Feb 27, 2018 17:23:44 GMT -5
This is gonna be great. I'll be watching with much interest. That box is just brilliant!
|
|
|
|
Post by TooOld on Feb 28, 2018 15:13:09 GMT -5
This is gonna be great. I'll be watching with much interest. That box is just brilliant! Thanks Ron ! To get started the radiator shell has a flange molded on the inside that needs to be removed , a couple of seconds on my trusty sanding plate is all it took . You can see in the photo how thick this part is , don't know why it's molded like that but it looks terrible ! The top tank of the radiator had to be ground down and reshaped to fit inside the shell . After doing this it dawned on me that I could Vac-U-Form a new shell and have it nice and thin . . . have to see if I have another spare radiator ! 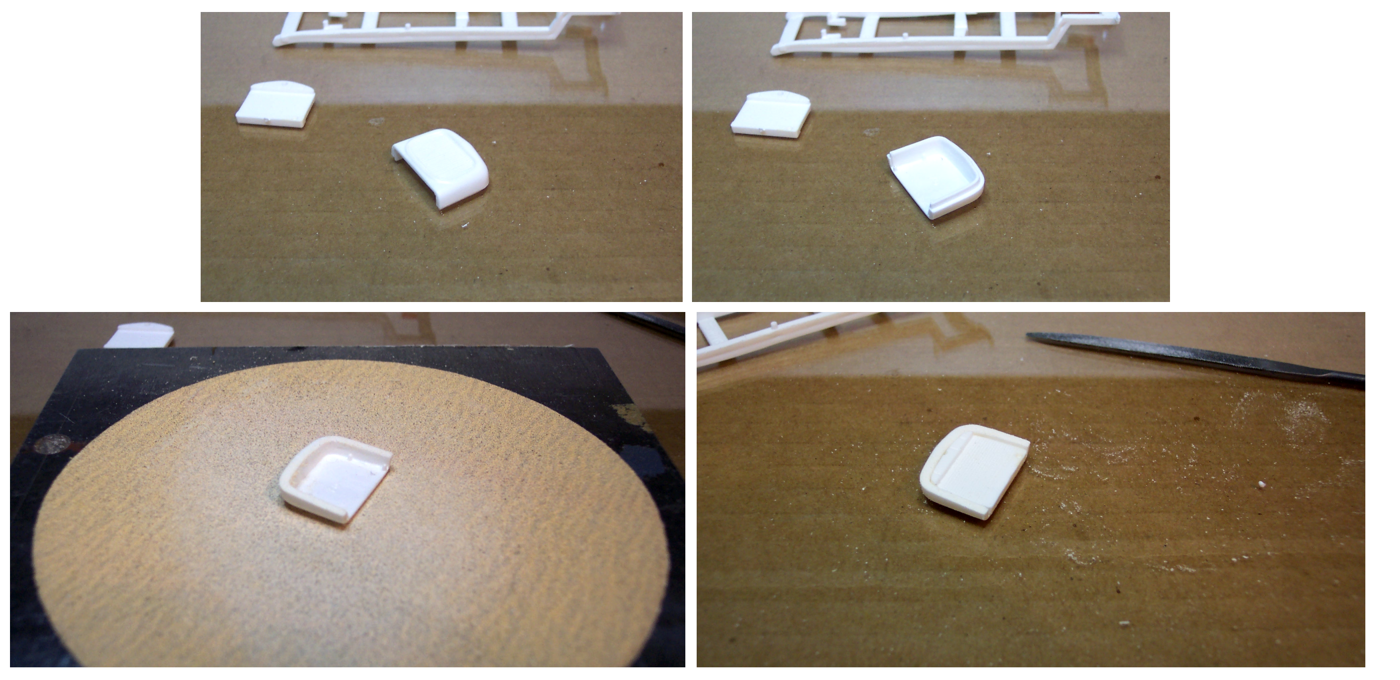 The radiator shell also needs to be notched to sit at the proper height in the frame . 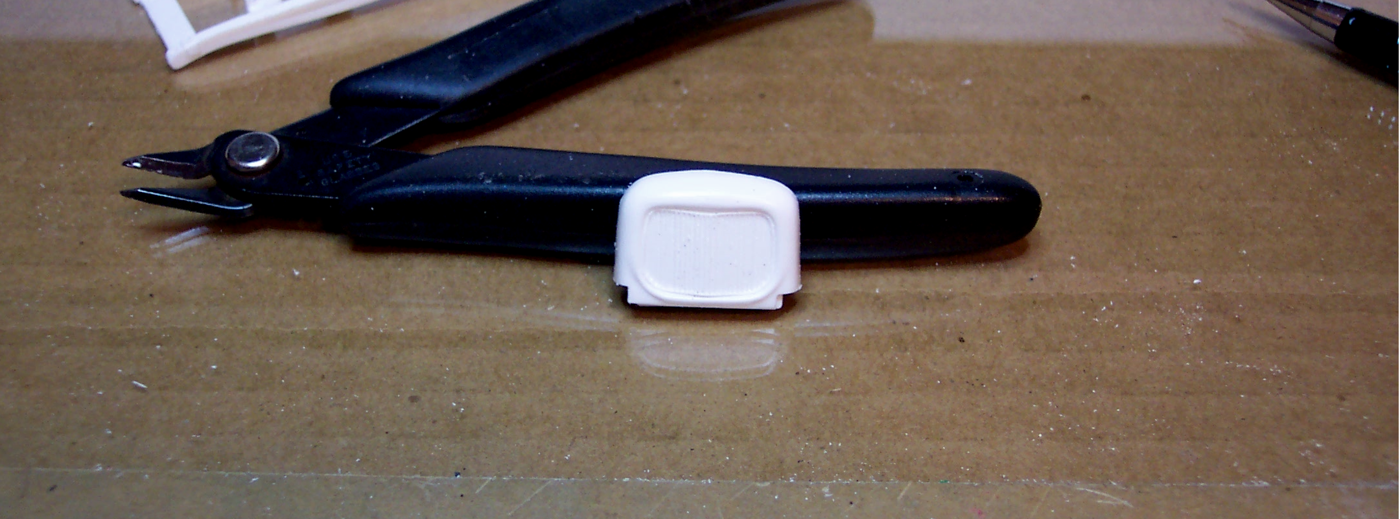 All the parts that will be painted yellow have been cleaned and polished . 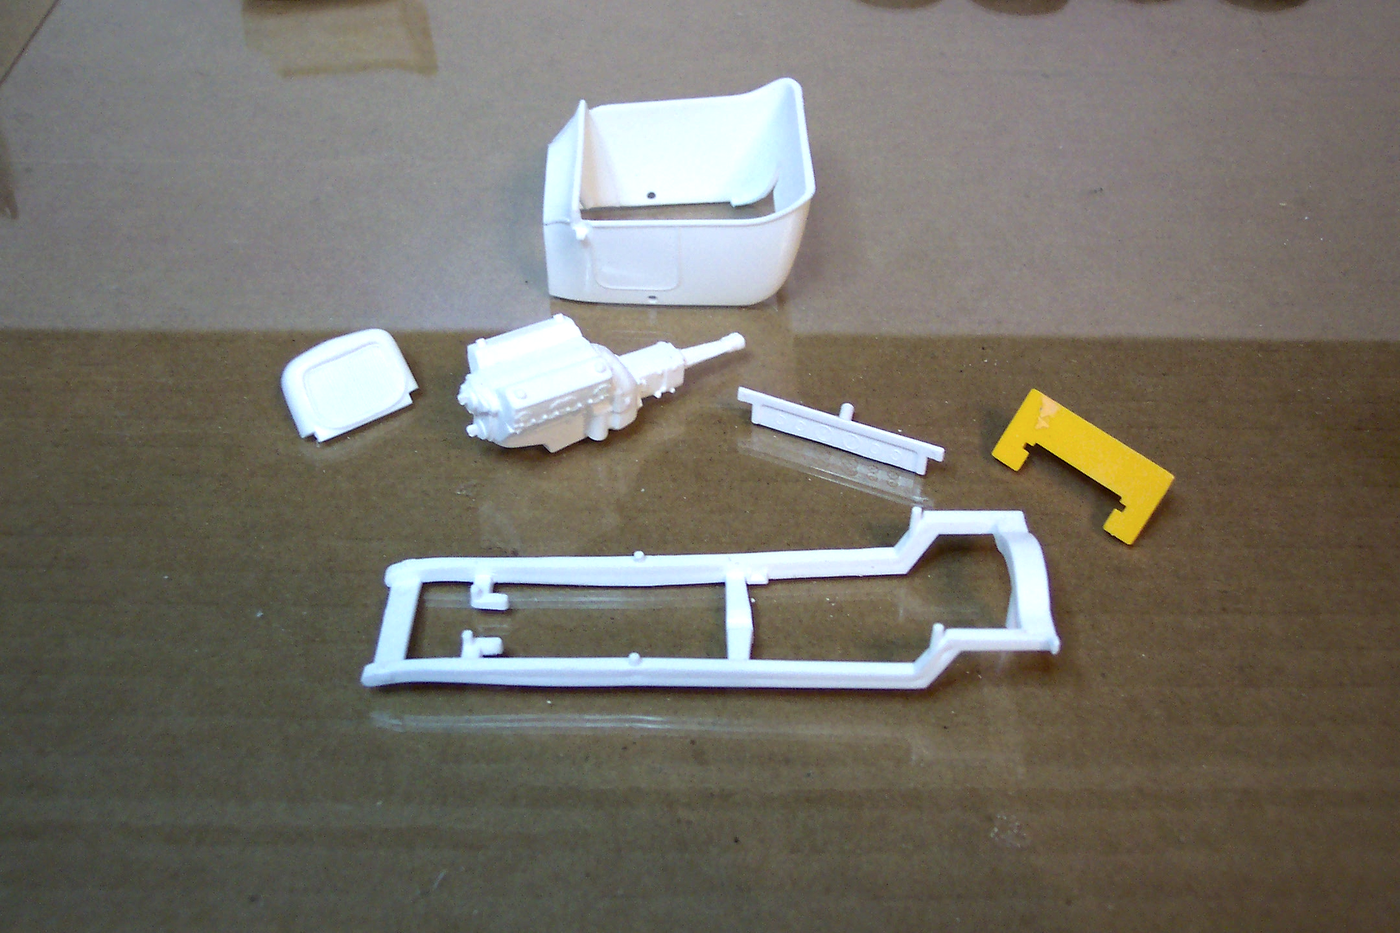 Woops , almost forgot to fill the small holes in the body where the Little "T" exhaust passes through . The ears for mounting the coach lamps also need to be removed . 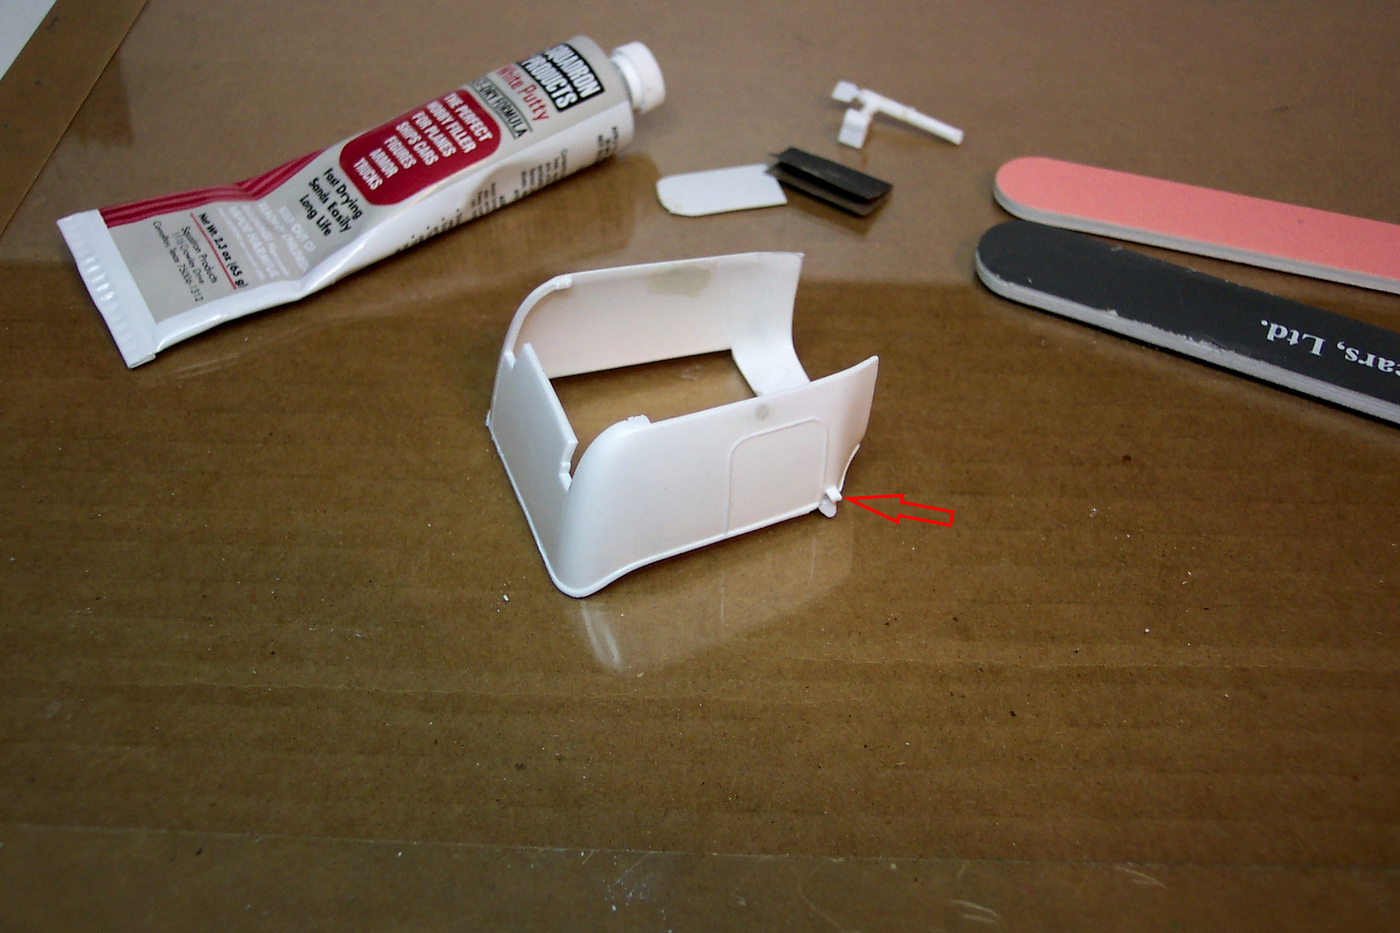 Parts were painted with Tamiya TS-16 Yellow directly onto the polished plastic with no primer . 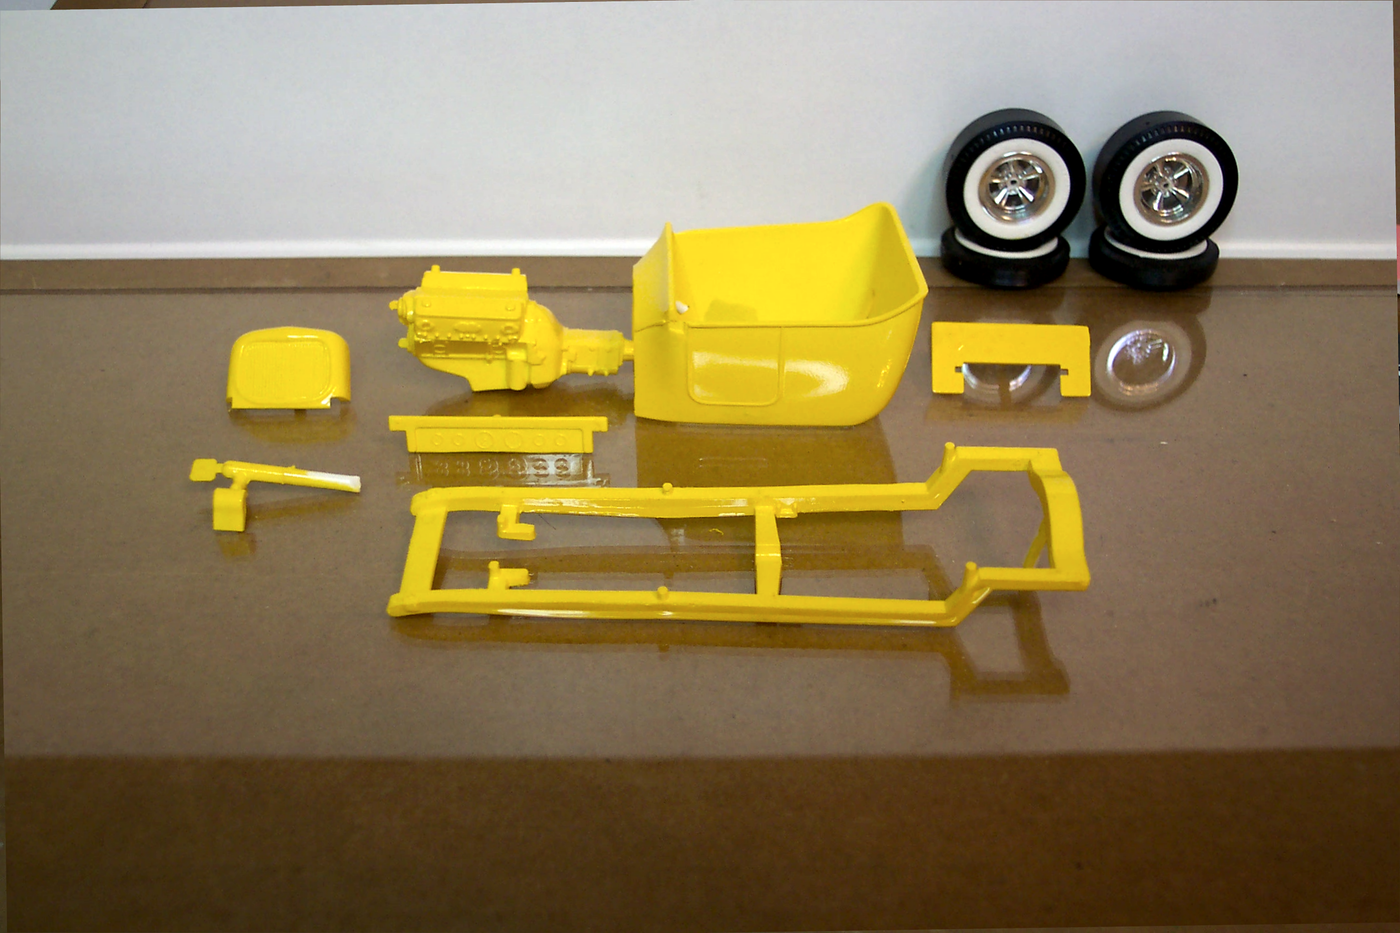 That's all for now |
|
|
|
Post by Mr.409 on Mar 1, 2018 15:35:03 GMT -5
This is going to be a very cool project! I like how the Monogram Big Rod looks, so I can't wait to see your build on this smaller version. The box art is simply beautiful. I'm sure if you posted that somewhere without telling that it's home made, there would be several guys who were thinking "Oh I never knew they did that kit!". I'm sure I'd be one of them at least....  The paint job on the body looks very good too. I've heard it before that those Tamiya TS-Sprays work the best when they're sprayed directly on polished plastic. So looks like it is true. Have you, or has anyone else tried if it works the same way if sprayed on polished coat of primer? Because several times I do some body mods on my builds and then some primer is needed to get an even color for the body and to check if more bodywork is needed... |
|
|
|
Post by TooOld on Mar 1, 2018 19:05:21 GMT -5
Thanks Niko !
I almost always use the Tamiya TS spray paints and have gotten great results with them . They work best with very light/thin coats and whatever is underneath does show thru so the shine of the polished plastic is ideal . When I have to do body work I try to use a white or light color filler and then white primer which is sanded and polished before spraying . I think a lot of people don't like the Tamiya paints because they're used to spraying full wet coats to get coverage and the Tamiya paints don't like that .
|
|
|
|
Post by Mr.409 on Mar 2, 2018 9:02:05 GMT -5
Thanks for the information!
I've used Tamiya TS Sprays on a few of my builds too and have had a great success with them. I agree that several very light coats of paint is the key for a good result. I've usually used grey primer, I think I'll try polishing that next time when I'm painting a model with these Tamiya sprays then. One more question though - when you polish the primer, how far do you polish? Do you stop at 3200 grit for example, or go all the way up to 8000 or something like that?
|
|
|
|
Post by jffj on Mar 2, 2018 9:40:54 GMT -5
Very cool project. Especially the box art bash!👍👍
John
|
|
|
|
Post by constructionbob on Mar 2, 2018 10:19:01 GMT -5
A lot of fun watching such a nonboxbuild! Tnx.
|
|
|
|
Post by TooOld on Mar 2, 2018 18:18:10 GMT -5
Thanks for the information! I've used Tamiya TS Sprays on a few of my builds too and have had a great success with them. I agree that several very light coats of paint is the key for a good result. I've usually used grey primer, I think I'll try polishing that next time when I'm painting a model with these Tamiya sprays then. One more question though - when you polish the primer, how far do you polish? Do you stop at 3200 grit for example, or go all the way up to 8000 or something like that? I usually finish polishing by using some polishing sticks I found , basically the same as the 2" sq. pads but much easier to use . I'd have to check but I think they go up to 18000 and 24000 grit , basically so fine that you can't feel it but they sure do make what's being polished shine ! |
|
|
|
Post by TooOld on Mar 3, 2018 16:09:43 GMT -5
Spent the morning cleaning up suspension pieces and doing a little trim paint work . The front suspension is all Little "T" pieces and the chrome was in really good shape so just a little touch-up was needed . The rear is new pieces from a Boomer Bucket just to save the Little "T" pieces for later . The axle and drivshaft housings were sprayed with Dull-Cote . 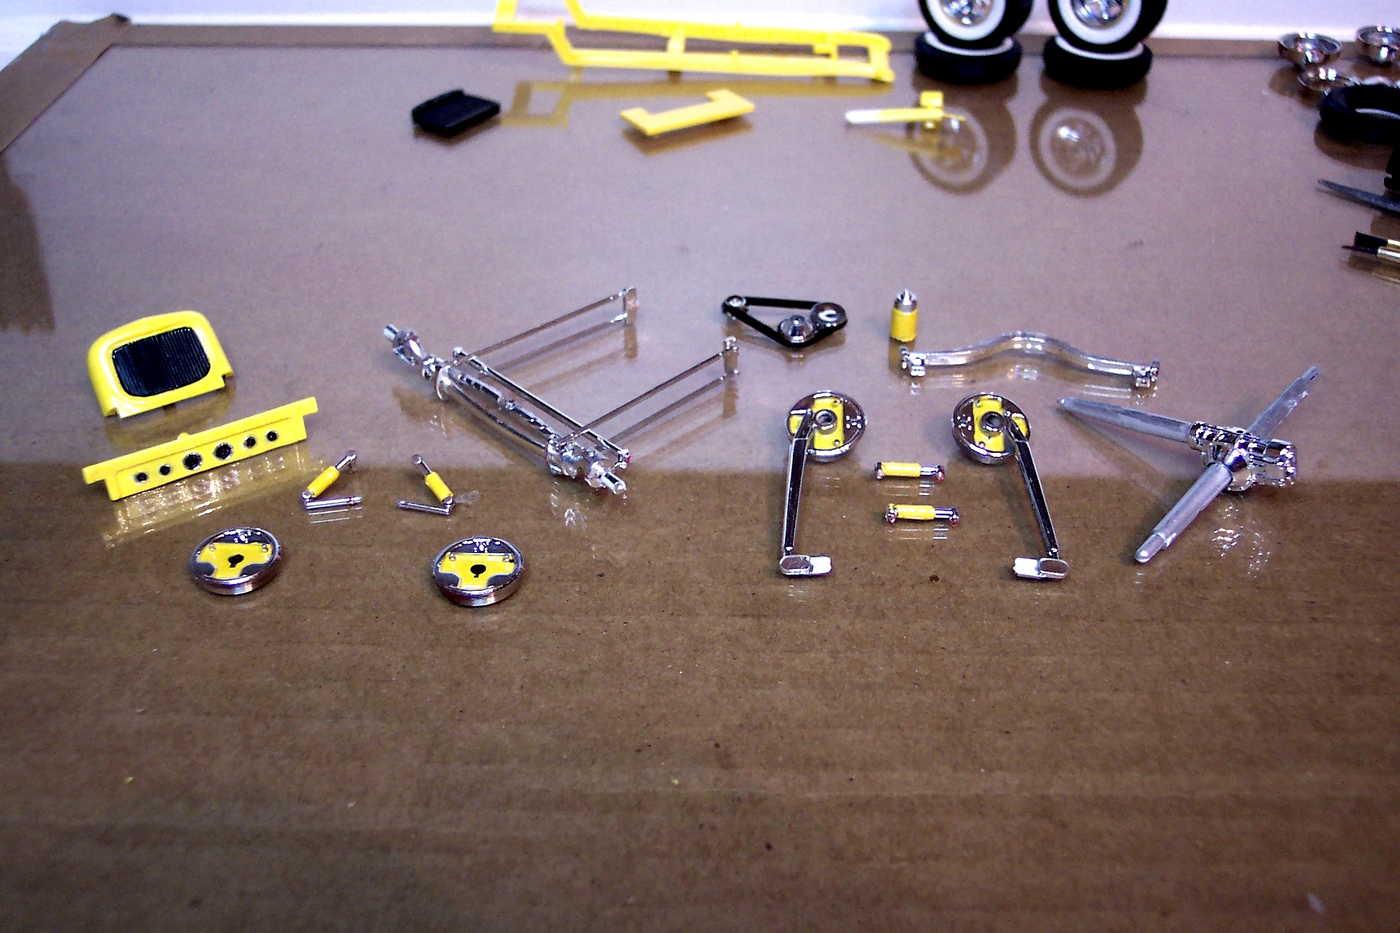 Also worked on the engine . 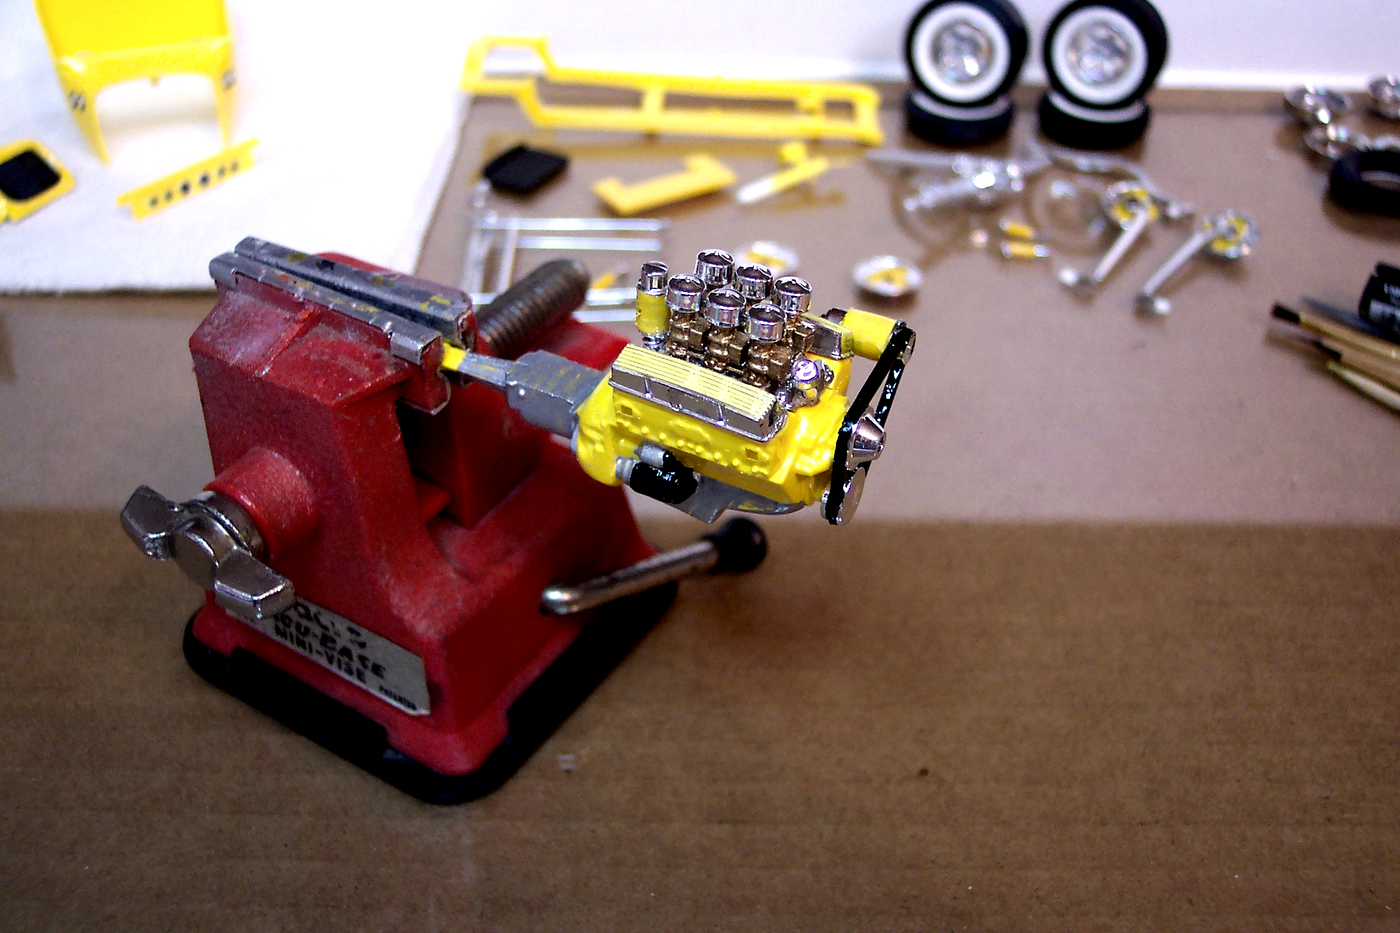 I always spend some time on the tires . Here I sanded and cut two grooves using a razor saw , then the tread area was masked off and the side wall sprayed with Dull-Cote . It doesn't really dull the tire but it knocks the shine off of it . My Silverado in the driveway looks great with shiny tires but on my models shiny = toy . Here's a before and after photo . 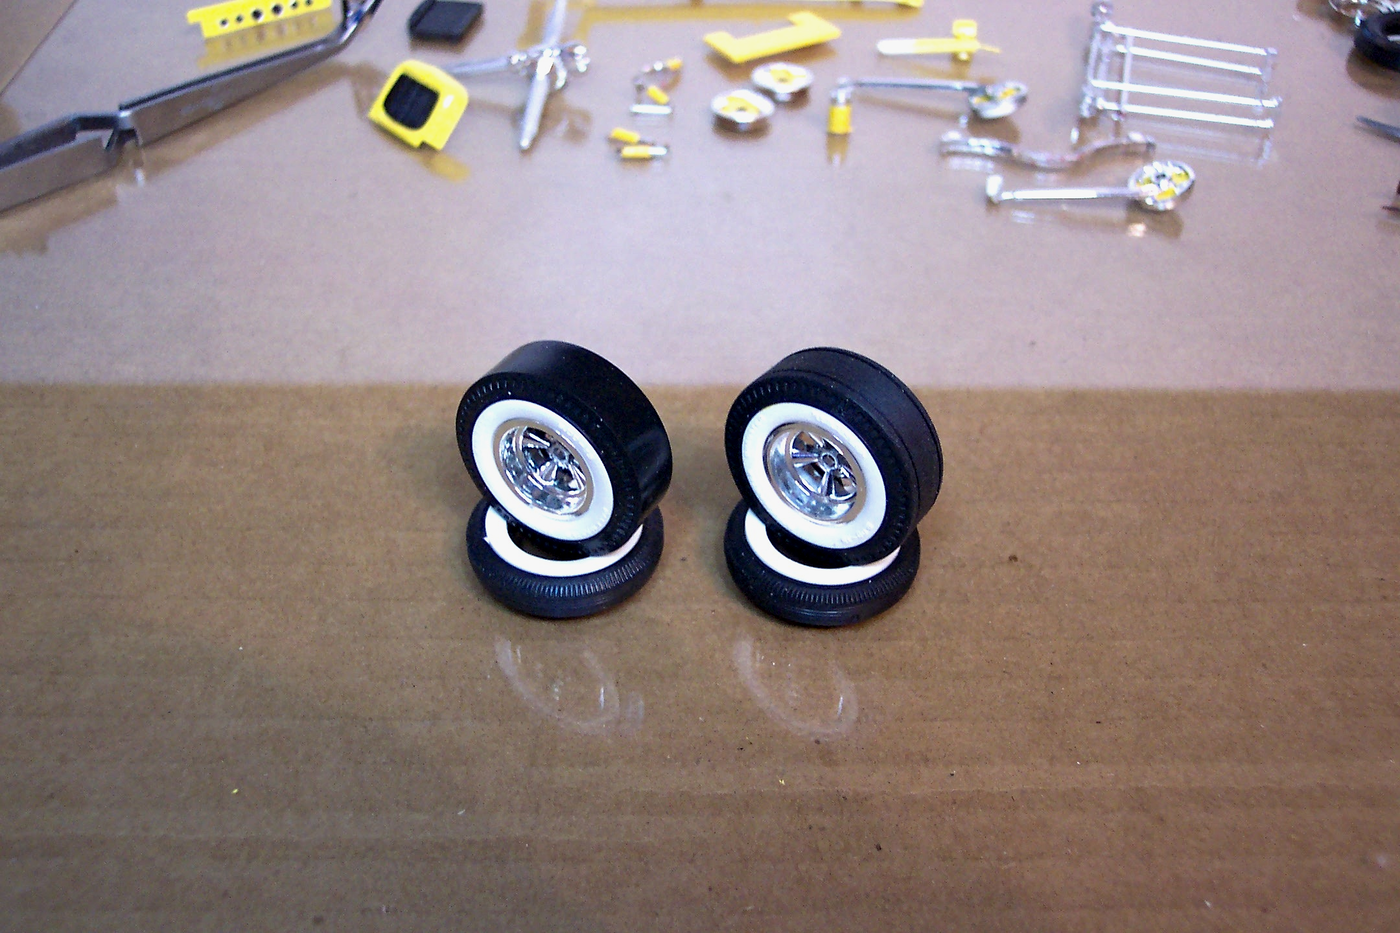 To be continued . . . |
|
|
|
Post by Bernard Kron on Mar 3, 2018 18:10:16 GMT -5
I love the meticulous attention you give to these projects. I think it's key to the type of results you achieve. Everything lines up for maximum effect. My worry here is that the Tweedy Pie grill is not right - because you've retained the lower round corner part, it still looks uniquely like the Tweedy Pie grill. Finding a proper front 3/4 view of a genuine Big Rod on the internet isn't easy. The best I could find is the one below. It looks to me like it has a simple cut down Deuce shell with the normal grill bars and cut straight across the bottom. Am I wrong about that?  |
|