|
|
Post by jbwelda on Aug 25, 2020 23:50:35 GMT -5
Have been moving forward on this project this month. I have done something I don't recall doing in a long time if ever: test fitting the car to the point of gluing it all together to check the final fit. I am sure I am forgetting something, but I have gained some confidence in the fact this thing might actually go together and look like I want it. So then I stripped it all down and planned the side panel paint job, seeing as it spans all the way from the trunk in the rear up to the engine compartment in the front. Meanwhile used some embossing powder to simulate carpeting (not entirely satisfied with it but it should look ok when done) and built up the interior and trunk area. I might run a nice fat seam of glue front to rear just to make sure things don't break apart when I attempt to squeeze the body over the chassis, interior and engine area. Believe me, it was pretty scary test fitting it without things being really put together for reals. Used some tapered coffee stir sticks for levers all around. But will cross that bridge when I get to it I guess. The other thing I did is raised the rear axle to lower the rear so it matches the front drop. Looks pretty mean but I didn't take any photos of it when I had it together for the test fit. As with the rest of this kit, once you scrape away or otherwise remove all the flash and parting lines, not to mention ejector pin marks, the parts actually look pretty nice, not at all the blobs I figured they would be. Some quick photos of the assembly. I am planning on painting the body the shade of gunmetal you see in the engine compartment and on the dashboard. Of course seats and steering wheel etc are still to be installed. 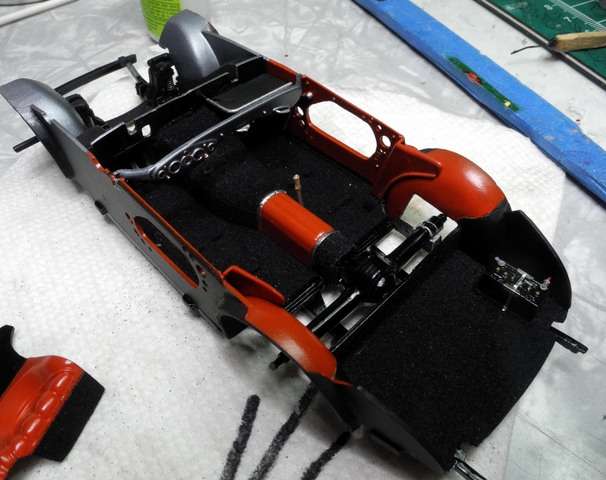 See that nice little tray that I so neatly trimmed in chrome? Will never see it again, it will be totally buried under the body once assembled. Its wise to use your remaining moments productively. The thing is, I am not convinced the dashboard should actually be that far back, but it seems to line up with the body/interior cavity. It is one thing I did not test fit (wouldn't cha know), and it sure would look better about a quarter inch forward of where it is. But it is in the notches that it is supposed to be in. So it is glued with white glue in case I have to reposition it later. And the rear separator/seat panel is not properly in place, that is going to have to wait until the body is mated to the chassis. 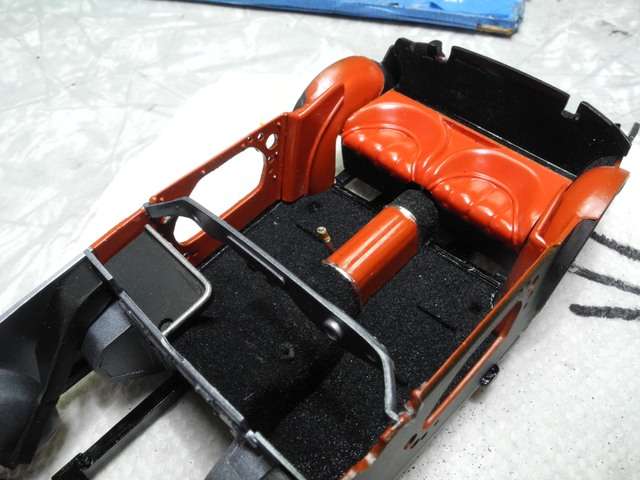 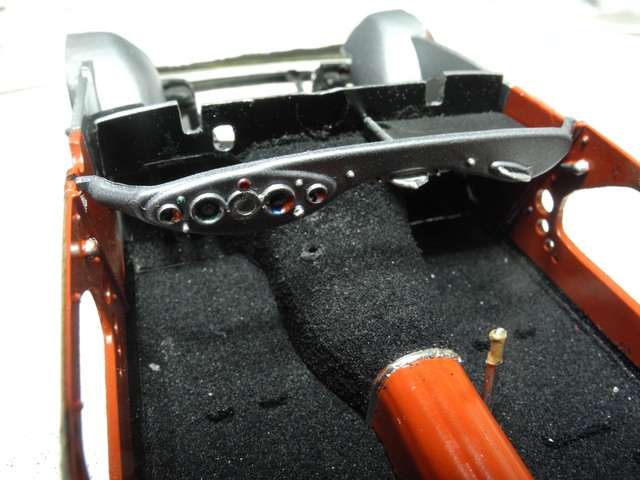 I am prepping the Buick mill, going to use a single 4 bbl with some kind of air cleaner, first I was thinking of a big stockish one but have been thinking more of a smaller one you see in the photo of the pieces. The headers come from a white metal version of the British variant and match up to the ports on the block well. Not sure what that bulge is on the front of each, probably some smog equipment, it might have to go... 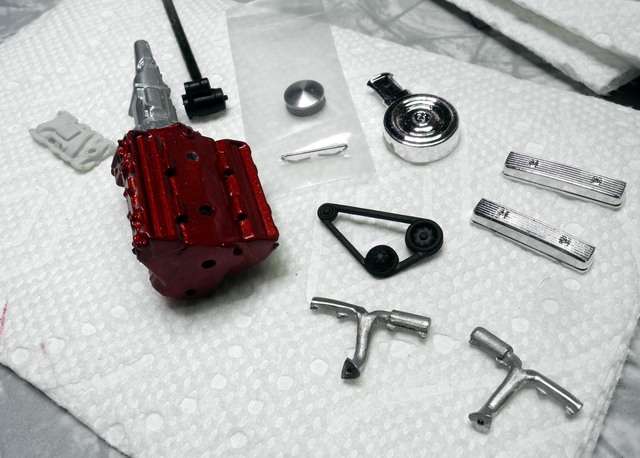 Thanks again for looking and all comments appreciated! jb |
|
|
|
Post by Jerry55 on Aug 30, 2020 7:21:15 GMT -5
 Keeping my eye on this one!... Keeping my eye on this one!... |
|
|
|
Post by jbwelda on Sept 7, 2020 14:10:10 GMT -5
Got the engine stuffed in there, its tight but it clears. Am using a Fireball Resins Carter AFB on an incorrect I am sure manifold, but it will mostly be covered by an aircleaner I came up with somewhere. Just need to connect up a fuel line, the coil wire, do the radiator (kit one fits perfect still but I am going to turn it around so the tank overhang faces the engine, and will add a fan to the engine), and make an exhaust system and then finish up the body. 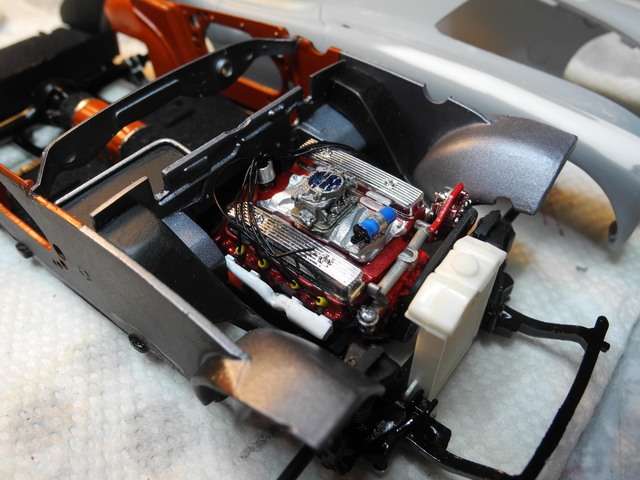 With the air cleaner, I will make it removable but not sure how to hold it in place without gluing it. 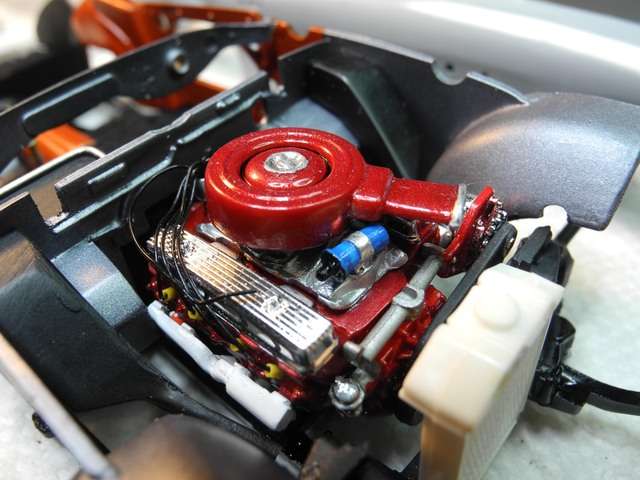 A look underneath shows the block hugger headers are fitting perfect. 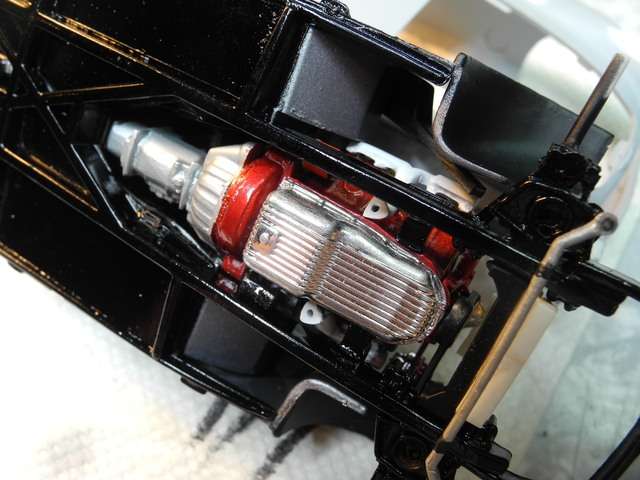 Side by side comparison with the body to show where the chassis components sit relative to the body. 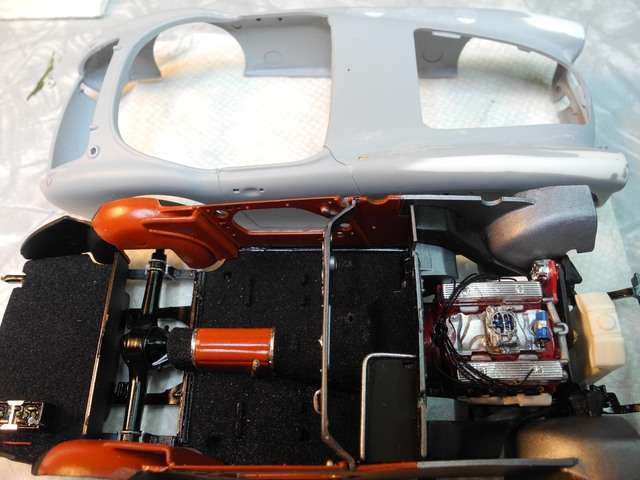 Also there is a wired voltage regulator and a couple of washer fluid and brake fluid containers to add a little more detail to the engine compartment. Thanks again for looking! jb |
|
|
|
Post by jbwelda on Oct 4, 2020 21:49:27 GMT -5
And, I got the Healey body into paint, Tamiya TS-100 Semi Gloss Bright Gun Metal, covered with a couple coats of TS-13 Clear. Looks pretty nice to my eyes, might be able to skip the polish stage but I will have to give it the hairy eyeball later on to see. Have been busy with other projects but this one should be wrapping up pretty soon. 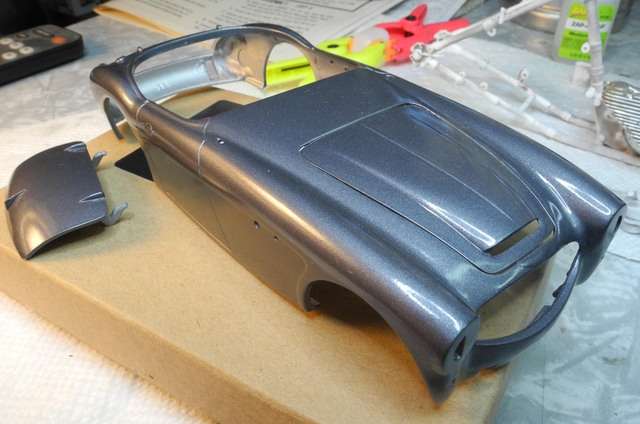 And might as well give Model Builders Warehouse a visual plug as a kind reminder of their excellent Boranni wire wheels I am using on this one. 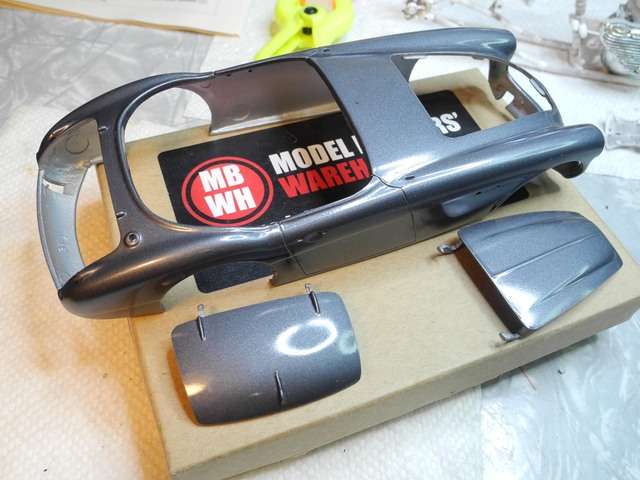 Thanks again for looking and of course its all open to comment! jb |
|
|
|
Post by constructionbob on Oct 5, 2020 10:27:38 GMT -5
Me likes!
|
|
|
|
Post by harron68 on Oct 6, 2020 8:14:02 GMT -5
Excellent work on all aspects, model idea, fotos and great description!!!! It's indeed an ancient kit, but of a rare brand and worth putting in your time. Thanx a lot for posting, too few builds going on online these days. Many thanks to you!
|
|
|
|
Post by fordrodnkustom on Oct 6, 2020 11:16:09 GMT -5
Nice work all around. The Buick mill looks like it was born there and the paint looks great from here.
|
|
|
|
Post by jbwelda on Nov 13, 2020 23:57:32 GMT -5
I have been dreading trying to fit the body to the chassis based on previous trials without everything in place but this evening after a brew to two, sat down and started fiddling around and next thing I knew it was together! Only one or two fit issues, one necessitated removing a detail I had made, but you could hardly see it and it was fouling the generator and keeping the chassis from coming up into the body. Everything fits pretty well, but if you look up under the cowl through the open hood, you can see inadequate sheet metal to keep you from seeing into the interior. If I were doing it again I think I would build a little flat black partition up in there blocking the view if not improving the fit. I stuck some wheels on the right side and posed it a bit, still needs some doing all around including installing the brakes and the rest of the interior, and some detailing, oh and building an exhaust system of some sort. Also might not use the stock bumpers; might find some curved early Corvette type bumperettes for the rear and maybe use the front brackets to mount some driving lights and ditch the bumper up front. Anyway, some progress pics... 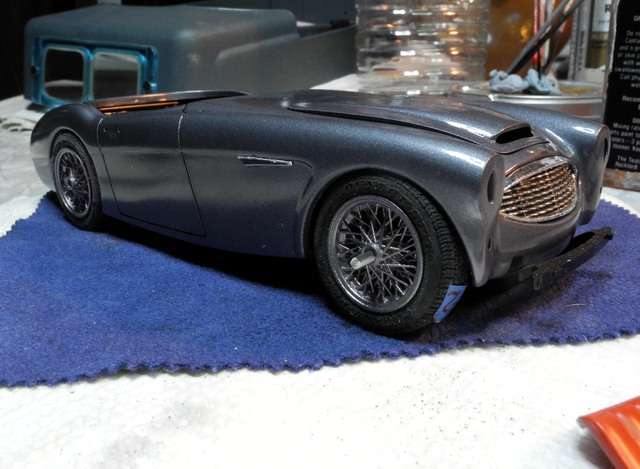 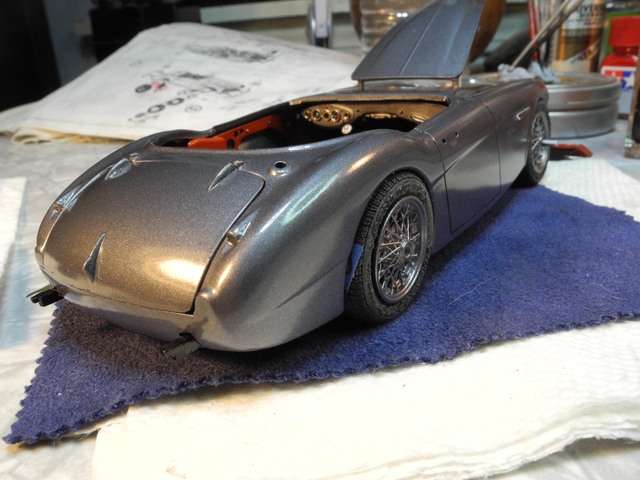 Interior and door panels, plus can see how the dashboard ended up, looks pretty good for what I feared it might end up looking... 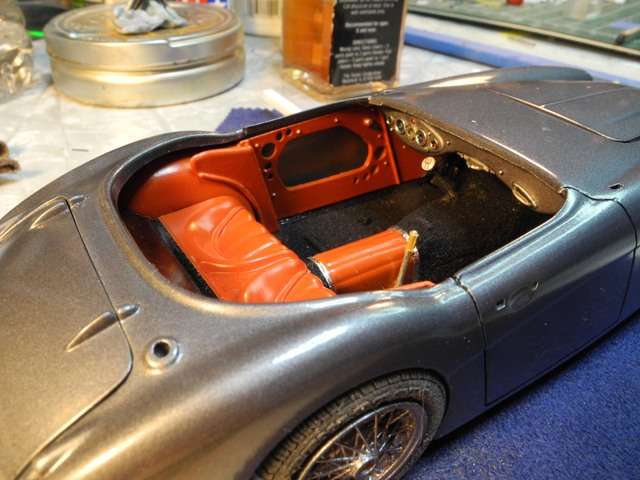 Engine looks right at home under the bonnet... 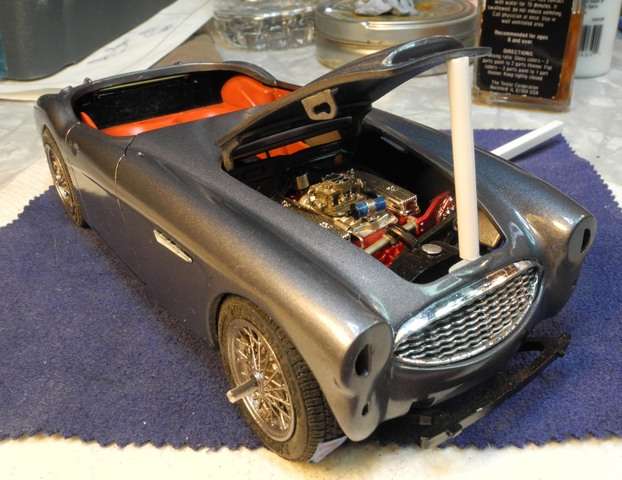 Closer look, of course that white plastic rod is just temporary. 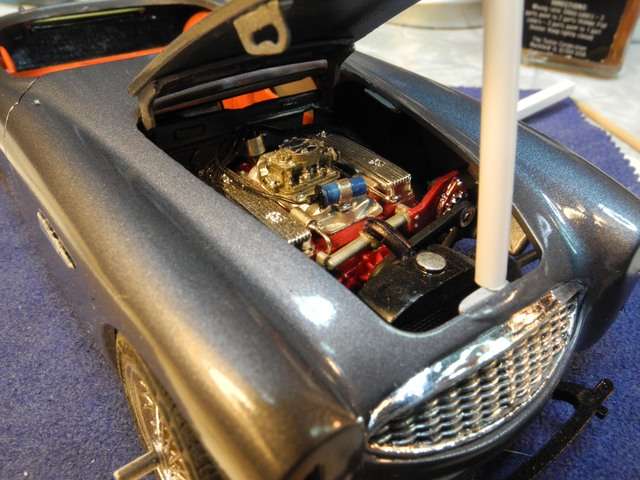 The headlamps are a bit of a problem: the kit ones are molded together and chromed, no lenses or anything. And they look kind of funny. So I thought about carving out some holes and making or finding some buckets and lenses but after searching around for an evening came up empty handed, EXCEPT for another pair of one piece chromed headlamps, but these looked much more realistic and with some better detail than the kind of worn-out-tool piece that came with the kit. So, its a compromise, but I think I will just use canopy glue to affix them so they will be easy to replace if I decide to later. A couple of other things tho...the fit of the bonnet lid is kind of unfortunate. And I took some pains to avoid that so I am not sure how that happened. The photos possibly make it look worse than it does in real life, and if you press on it it does snuggle down some more. Maybe I can put a mini magnet as a latch still, will look into that. The other thing bothering me is that I totally slimmed down and tried to minimize the footprint of the little (not so little in the photo) place to put a hood prop rod on the bottom of the hood. But it just looks way big there in place, and believe me, I removed at least 50% of what was there out of the box in all dimensions. But it just looks too big still. But I gotta say, the chassis/body assembly being done, and seeing how it fits pretty well, I am much more optimistic about this baby looking good finished despite the little nits to pick! Thanks again for looking and comments always appreciated! |
|
|
|
Post by fordrodnkustom on Nov 14, 2020 18:36:09 GMT -5
This looks great and veddy British. The color choices , paint execution and those exquisite wheels and tires really nail it. Conjures up images of sporting around the countryside and a stop at a local pub for a pint of Whatney's Red Barrel. Great work going on there. Thanks for sharing here.   |
|
|
|
Post by mack2856 on Nov 14, 2020 21:39:42 GMT -5
Very shagadelic yah... top drawer building going on here.
|
|
|
|
Post by jbwelda on Nov 22, 2020 22:49:57 GMT -5
Thanks again, tried fabricating some exhaust pipes and using what I could of the kit exhaust system. Turned out pretty good, never could get solder to look right, always ends up with some gouges in them but this layout is serviceable at least. At least there is something resembling an exhaust system down there. 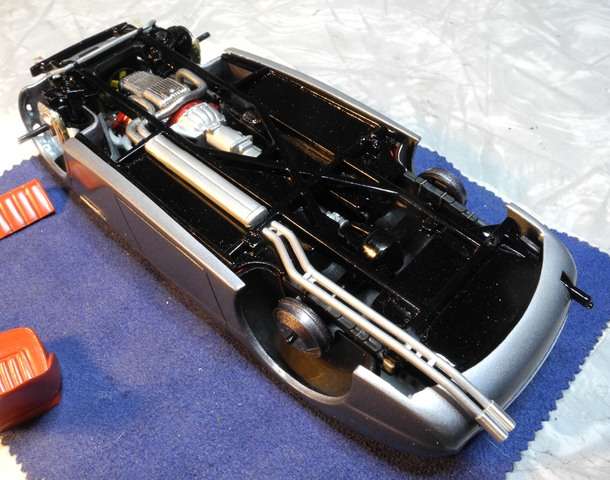 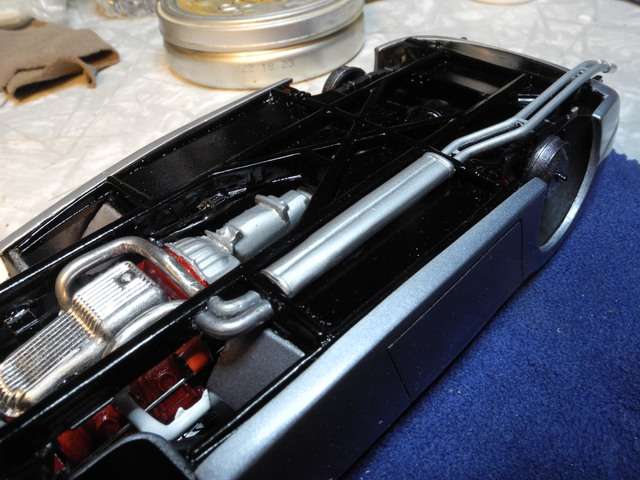 Some polished aluminum tubing for exhaust tips: 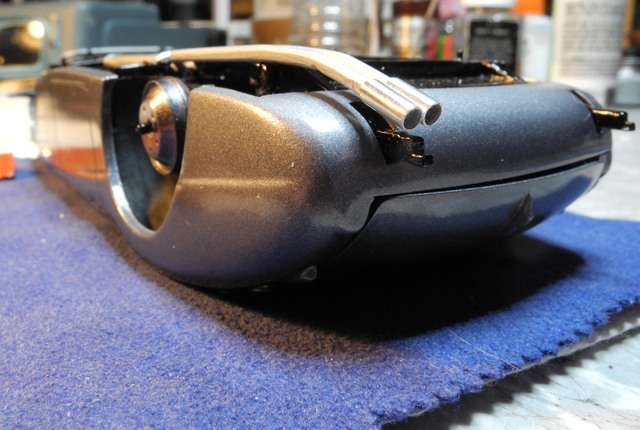 Meanwhile, some 40 Ford rear brake drums to upgrade the Brit ones, from Rep and Min of Maryland: 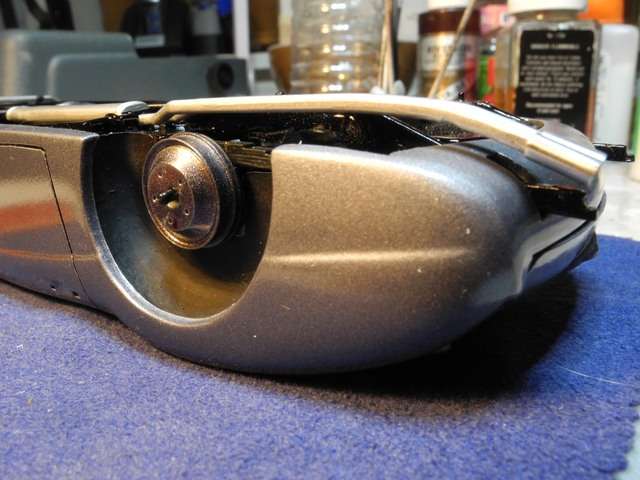 And some big drilled disks up front to slow the thing down: 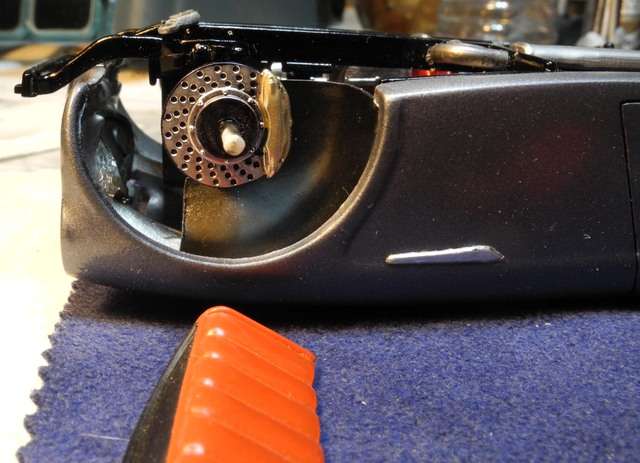 Gonna finish up the interior, do a few details like headlamps and road lights up front and the tiny beehive taillamps, then mount up the wheels and tires and be pretty close to done with this one! Thanks again for looking and all comments welcome and appreciated. jb |
|
|
|
Post by jbwelda on Dec 15, 2020 0:26:50 GMT -5
Just got the wheels and tires on and aside from a couple small details, this baby is almost done! Here are some sneak low light photos I took of the front wheels setting up. 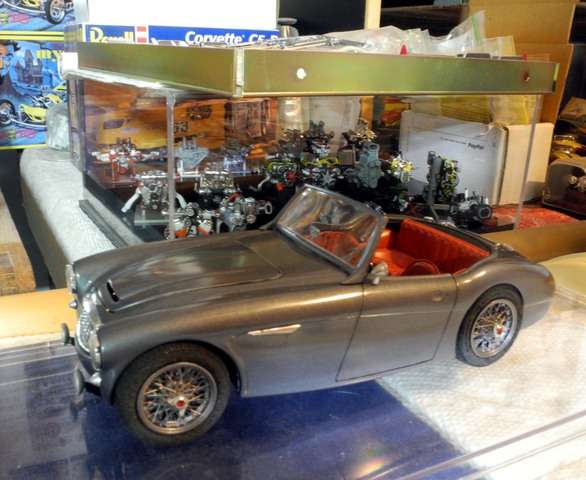 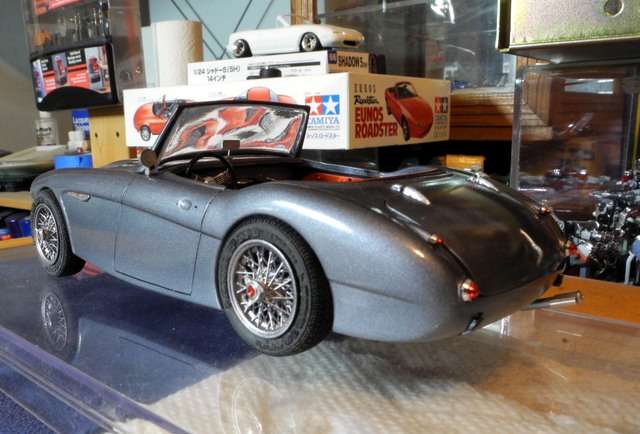 Thanks for looking and all comments appreciated! jb |
|
|
|
Post by mack2856 on Dec 15, 2020 22:28:41 GMT -5
Those wires are bitchin! You should be happy with the way it turned out.
|
|
|
|
Post by jbwelda on Dec 19, 2020 20:35:12 GMT -5
Well its kind of let down by the front end and the fit of the hood, but overall I think it turned out pretty good. Gonna send a couple snaps over to Model Builder Warehouse so he can see I put his wheels to good use. 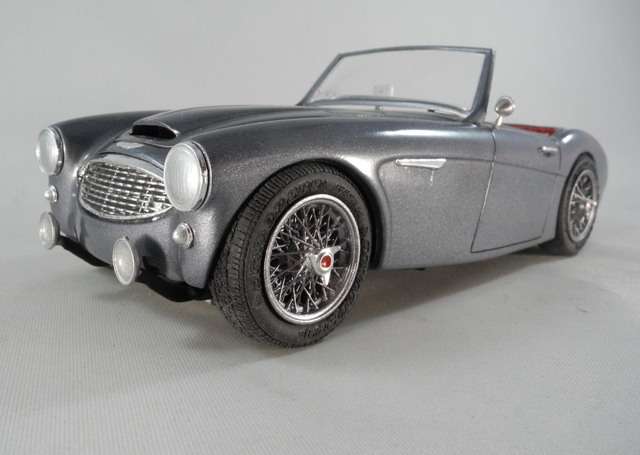 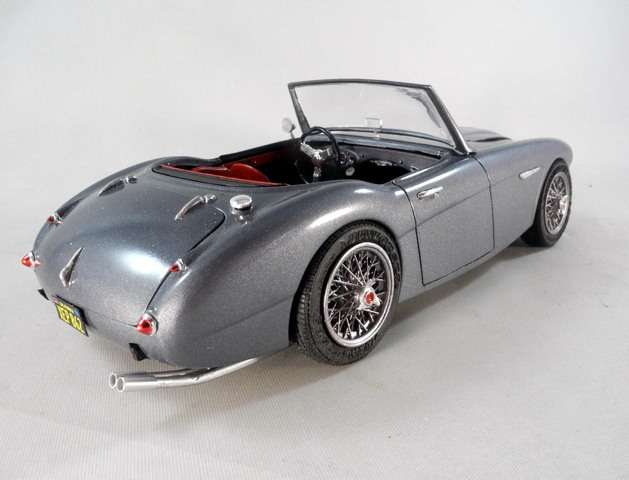 More pics on a finished thread, thanks for looking and following along! jb |
|



 Keeping my eye on this one!...


 It's an interweb thing.....