|
|
Post by jbwelda on May 30, 2020 23:52:26 GMT -5
Picked up this body transkit a while ago based mostly on the look of the front end, from C1 Models in Europe. Uses the Tamiya Porsche 911 GT3 as the donor kit.  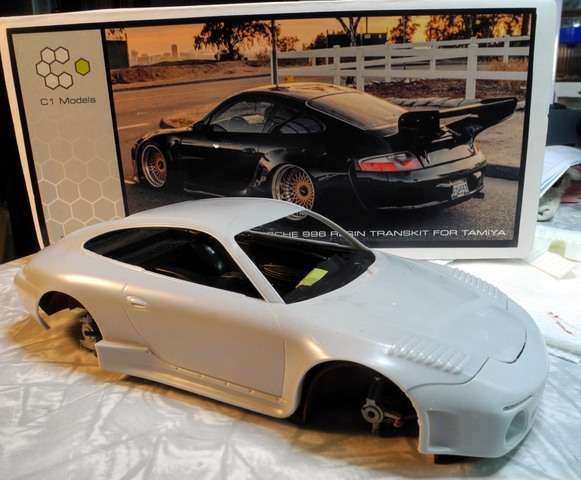 Heres a better look at the body mocked up with the chassis (mostly completed) and the interior (temporarily assembled for fitting). There are wide-body rear fenders to be installed still and the nose piece is only white glued on and lacks the splitter piece along its bottom. 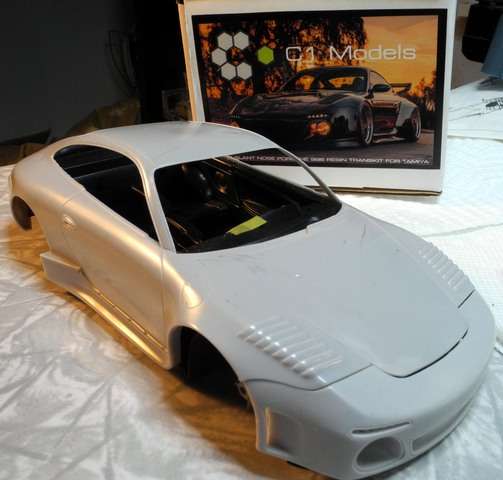 There are some fitting problems as it is, the nose of the chassis needs to come up as much as an eighth inch, and the whole chassis needs to slide backward about an eighth as well. There is room for moving the chassis back, but the front might be a problem, I am going to see if I can relieve the shock towers and get it to sit up in there better. 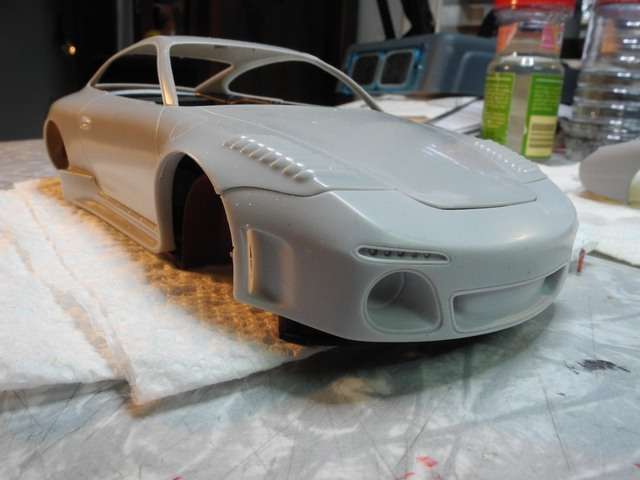 Mostly completed chassis, needs exhaust system and some covers front and rear.  Might do a bit more detailing on the engine bottom too.  The quality of this resin transkit is fantastic. Thin, styrene like casting, minimal cleanup (but you can see it does need a little bit), well fitting components, well worth the pretty high price of admission. I will have to reserve judgement on actual fit until I resolve the chassis to body problem, but other than that the body kit parts seem to fit very well after a couple of test sessions. Thanks for looking and if you feel like commenting, please do! jb |
|
|
|
Post by patw on Jun 16, 2020 5:55:20 GMT -5
Again jb I'm looking forward to seeing this finished.
|
|
|
|
Post by mack2856 on Jun 16, 2020 21:37:38 GMT -5
As a Porsche freak, ( there's a 996 in my garage) I look forward to the rest of this build.
|
|
|
|
Post by jbwelda on Jun 16, 2020 21:44:27 GMT -5
Mack, you have one of these in your garage? Wow! Feel free to post any reference photos you have or can take right here. I am open for ideas at this point! I would especially like to see the interior if you get a chance!
jb
|
|
|
|
Post by mack2856 on Jun 19, 2020 18:24:45 GMT -5
|
|
|
|
Post by jbwelda on Jun 23, 2020 15:22:15 GMT -5
thanks, that does help, especially the interior.
jb
|
|
|
|
Post by jbwelda on Jun 26, 2020 17:43:06 GMT -5
Well it has taken three tries but with some filing here and some holding there I have managed to fit the nose on so it looks pretty good. Panel lines are tight but consistent. It wasnt that far off actually, but i always find it a problem to get everything lined up right on these body kit things. Even as I have taken to holding everything tight but temporary with canopy glue, I always miss something, seems like. Only thing here are some minor seam fills where the nose meets the wheel wells and a couple of very minor points of contact. 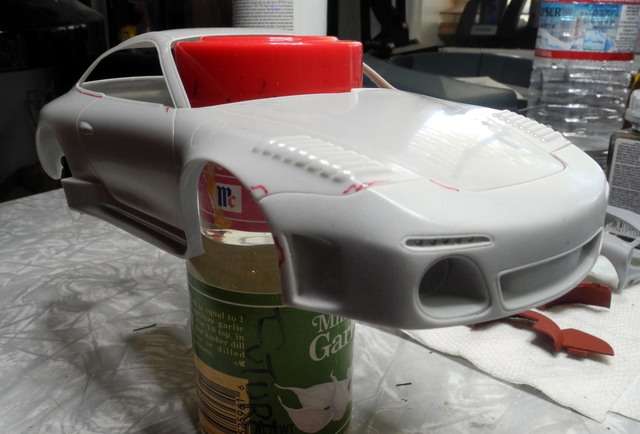 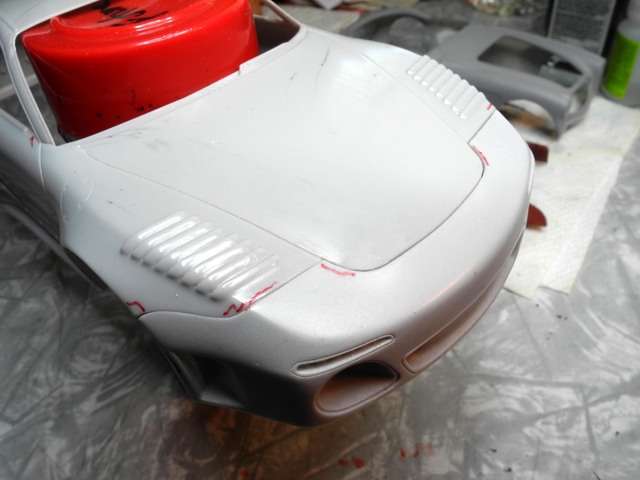 So next is to finish prepping the body (its still got a half dozen more parts including rear wide body kit and wing) and get it into paint. Painting is going to be more than the normal pain because of the need to get into the corners of all the parts while maintaining the shade of color. And of course I think i am going to go the pearl route on this, so that will make it even more challenging. I may change my mind on that...stuff like this looks good in solids too, I think. Thanks again for looking and all comments encouraged! jb |
|
|
|
Post by jbwelda on Aug 26, 2020 0:00:33 GMT -5
Moving along on this one as well, finished the interior, out of box except the use of embossing powder for carpet. That effect turned out less than great in some areas of this interior, kinda clumpy. I think the problem is I am using Future as the bonding agent and I think I should go back to diluted Elmers glue. That was tough to get spread consistently so that's why I switched to Future, but for some reason a thin coat is not working consistently leading me to have to do patchups, which cause it to clump up. But for this one, it is what it is, and won't be all that apparent inside the cabin. I did add some carbon fiber the seat backs, and side and dash panels just because it seemed like a good idea. Scale Motorsports carbon fiber decals, worked well with MicroSol and a hair drier and a little patience. Next I am on to smoothing and painting the body and fitting the wheels and tires.  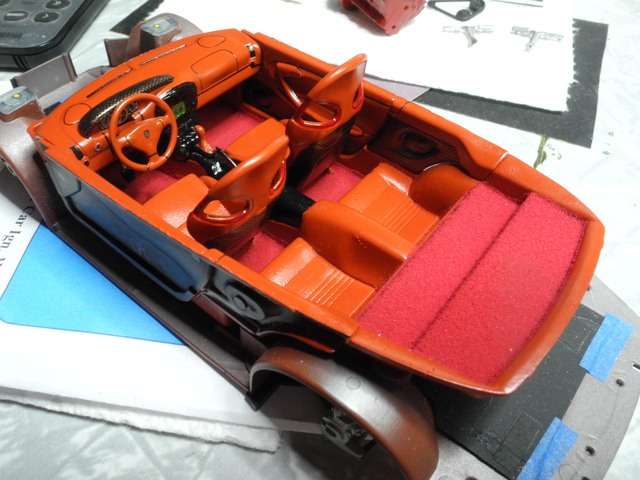 Thanks for looking and all comments appreciated! jb |
|
|
|
Post by Jerry55 on Aug 30, 2020 7:24:15 GMT -5
 Beautiful detail... Very impressive... Beautiful detail... Very impressive... |
|
|
|
Post by mack2856 on Aug 30, 2020 9:03:47 GMT -5
Great colours for the intieror, it just pops.
|
|
|
|
Post by jbwelda on Oct 4, 2020 21:39:27 GMT -5
I turned my attention to the body, smoothed up the seams and some other cleanup, then shot some paint. Tamiya TS-59, Pearl Light Red. What a kool kolor! Easy to apply too. Followed up by a couple coats of TS-13 clear, then I noticed a couple of dust particles so I stopped. Have been lazy about getting back to it, but will polish out the top surfaces and then recoat with clear if necessary. It really is a nice color that my photos don't really capture properly and should look even better smooth and polished. A neat feature about this so nice casting is that the louvers on the rear deck and especially the front fenders cast their own shadows and make them look like you can see through them. Doesn't really come out in the photos but its pretty apparent in real life. Color looks a little dark in this pic compared to day light:  This is probably a little closer to reality and you can see the body kit in full effect. I first sprayed the body and the rear fenders separately, then put the fenders on the body and reshot them that way to blend the color. Really didn't turn out to be a problem, this paint is pretty forgiving for color matching it seems.  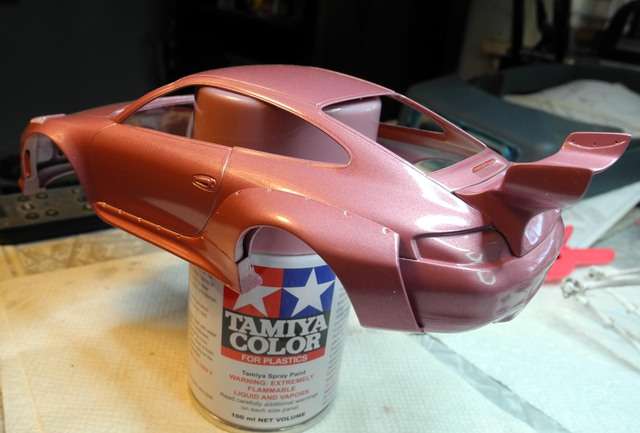 So I need to polish out the body and follow up with any problems that reveals, then ink in the panel lines and around the window openings and do a few more details and then on to final assembly. Oh yeah, here are the wheels and tires I am using. But I may end up not using them, the rear offset at least might be a problem. One thing I do not like about these wheels and really, the tires, is that they seem directional, but they do not give you mirror image tread on them. So one side the tread points one way and the other, the other. I have a feeling its not like that in real life. 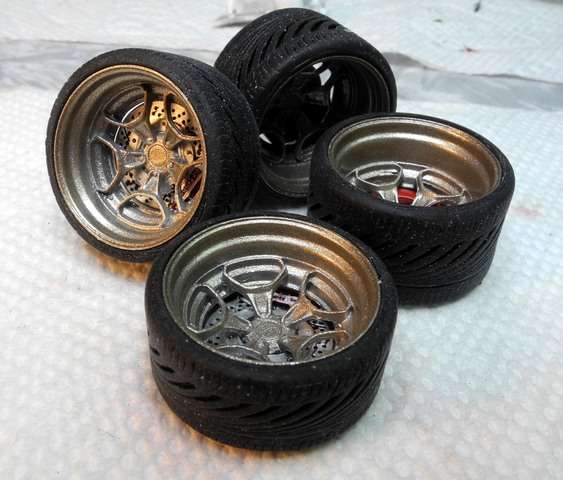 Anyway, onward... jb |
|
|
|
Post by jbwelda on Oct 26, 2020 22:15:18 GMT -5
Got all the glass in the body, and the headlamps and tailights. Did a test fitting against the body again and it appeared the windscreen was sticking down just a little bit, I feared it would cause a problem and sure enuff its not letting the interior come up enough on one side or the other (it teeter totters on the central point sticking up under there.) Plus while the stance looked OK (failed to take any pics), the front end could come down just a bit. So at the risk of great tragedy because the body/chassis fit is very very slim in tolerances, I took the chassis out of the body and attempted to address the issues. Also once I got the chassis up in there, some of the embossing powder I used for carpeting snowed down onto the windows and since the interior is sealed all around, it was kinda tuff to blow in there and clear it up! So, it totally had to come apart again anyhow. So the first thing was to get out the Dremel and grind down the offending point under the windscreen, actually part of the windscreen. Then I decided to grind away some of the windscreen bottom. This is all assembled and glued down but only with canopy glue for the glass. So you can imagine the fun this is, its what I love about model building, that last minute modification. And there were more coming. So I grind away the bottom of the windscreen with minimum damage, and turn my attention to the dashboard side of the equation, planing down the forward edge to give the glass a bit more clearance. Looks like it will work anyhow...the next time I stick the chassis up in the body, I want to be the last time I do so. Next up is the front ride height. I have no intention of actually making the suspension line up with the wheel center, I want to put the wheel up in the wheel well as much as possible. And what is stopping that is about 1/16" of plastic, the top of the wheel well. With that gone, the tire will sit up in there better, lowering the front end. Did I mention this is going to sit impossibly low. Like the real crazy ones. I like low if I don't have to drive anywhere. 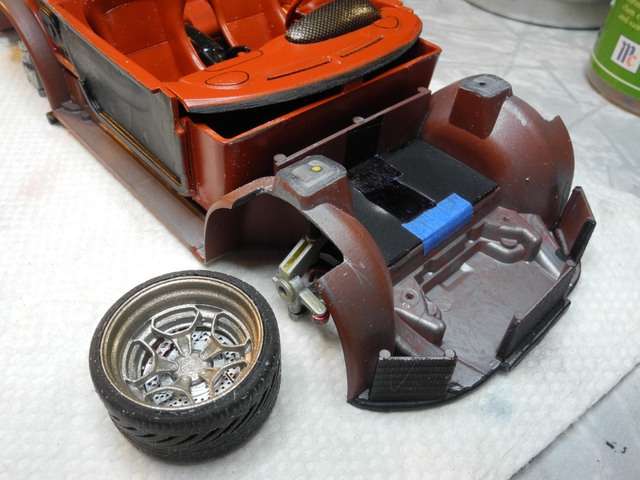 Here you can see the cut out on top of the wheel well. You can also see where I chamfered down the edge of the dashboard. Pretty drastic stuff for mostly assembled model! Ah but the dremelling away on the installed inner edge of the windscreen in the finished body, now that's fun. Here is the body with taillamps installed, headlamps installed and detailed but still lacking the outer clear covers, and some other details sorted. These photos captured the color pretty well, better than the previous ones I posted.  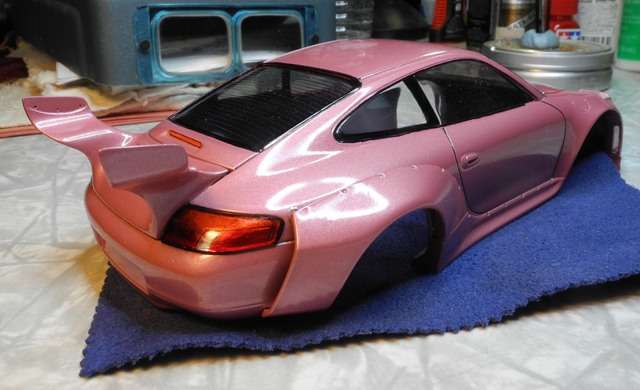 While I was getting drastic, the only damage I did was knock the rear view interior mirror off. So I put that back on and am going to wait till tomorrow to mate the chassis up to the body again, like I said, hopefully for the final time. Then its wheels and tires, finish the wing, headlamp outer pieces, windshield wipers and exhaust tips! Thanks for looking and of course all comments encouraged. jb |
|
|
|
Post by jbwelda on Nov 3, 2020 21:13:07 GMT -5
Finished this up in the past couple of days, will post some more pics in the Finished section but here are a couple just to wrap it up:  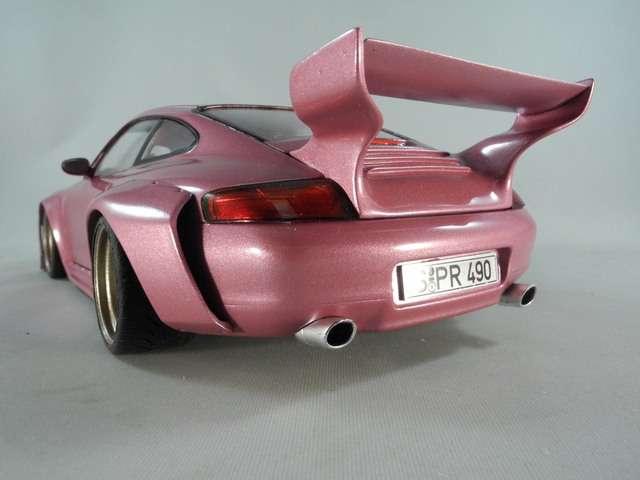 Link to Completed Section post Link to Completed Section postMany thanks again for watching and commenting! jb |
|