|
|
Post by jbwelda on Aug 5, 2019 19:26:05 GMT -5
I have had this subversive Trabant 601 Universal that Revell Germany has put out in at least a couple of forms. This is such a totally KOOL kit, its really a joy to behold. Lots of little parts, and possibly unlike the prototype, everything fits perfectly the first time with a minimum of flash or other mold problems. There is a really nice little engine for the engine compartment, with detail like we only wish US manufacturers would supply. And the interior is very nicely appointed with multiple rear area covers (one for the spare tire and another to cover the rear area from above), detailed dashboard, very nice engraving of upholstery patterns and floor mats. Same with all the mechanicals from the engine compartment back to the rear suspension area, all very nicely detailed. The body itself has opening hood and rear hatch (I think you choose to position it open or closed, it might not actually hinge) and really beautiful trim pieces. Its just that the subject matter doesn't appeal to everybody, or possibly anybody, on this side of the world. The Trabant seems to be the brunt of a lot of trash talk, and probably for very good reasons. Yet it has that proto-gasser look to it, sort of English Ford, sort of Austin Mini, with an awkward looking rear treatment that might help with the weight distribution. And probably very light weight, helped along in that direction by the inevitable swiss-cheesing of all the body and underside panels...a naturally acid-dipped car. Short of that untapped potential though, the Trabant does not have a very good reputation in the reliability arena to make up for its lack of looks, hence many would never look twice at this kit. But I thought it might look good as some kind of surf wagon sort of thing with some extra motivation, in this case a Mazda turbo rotary, I think its called a 13B, if I could figure out how to put it under the hood without disturbing too much doing so. I did some surgery and "adapted" (via razor saw) the front wheel drive differential to the rotary I got from some fly by night resin dude on ebay, and have fit it down into the engine compartment, but have been avoiding doing the actual fitting of stuff for the turbo and intercooler and stuff...so I found a pic of a nice weber carb setup: 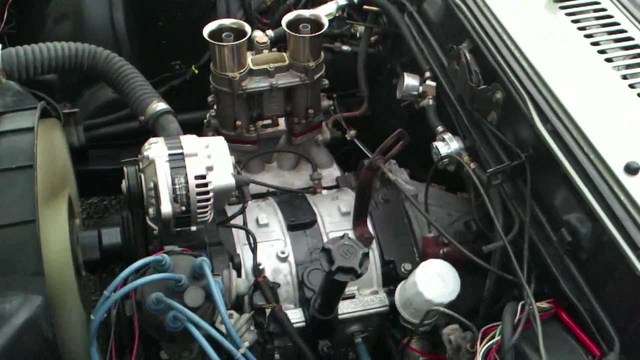 that would simplify a lot of things and still look pretty exotic/awesome. So I have some thinking to do on that...meanwhile I have built the interior and done a lot of body prepping (undercoating color actually) to match the interior panels. Lets go to photos: here are engine parts...will start looking more interesting as I detail paint and start assembly: 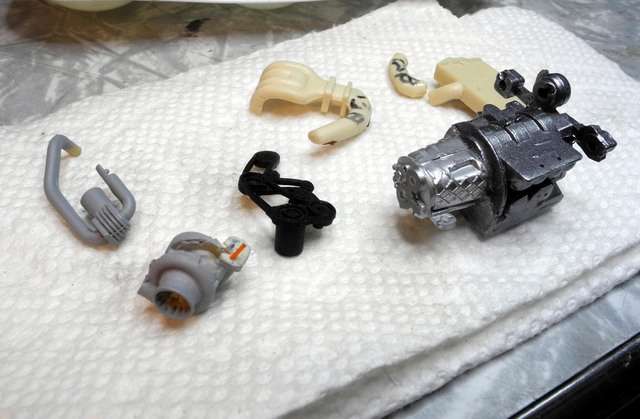 Here are some mocked up photos of what I am going for. I got the wheels and tires out of one of my recent Asian builds, they are kind of miniature Centerlines, and need to be knocked back a little in bling, but the tires look nice under there, quite a bit larger than what came with the kit. And you can see I have already painted the top insert, the rest of the body well might end up lime green, a color I have been digging lately. 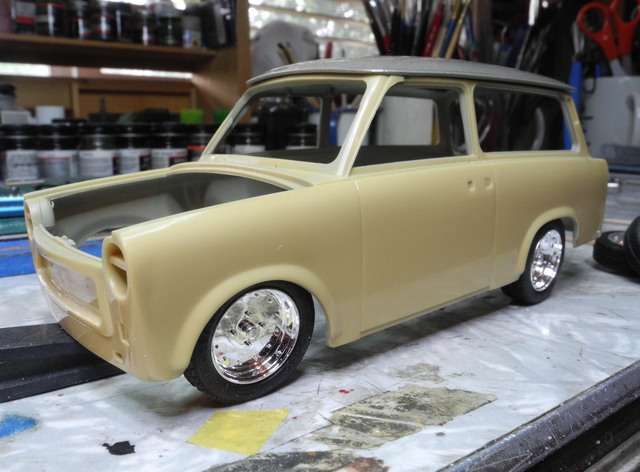 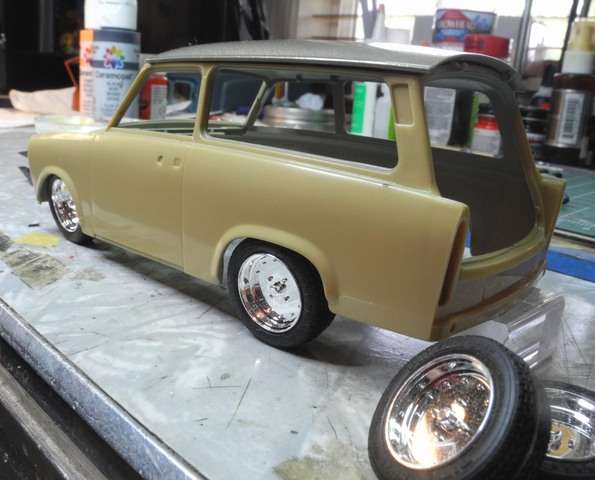  here are some shots of the interior...the dash mounts on the body and not on the interior bucket itself. 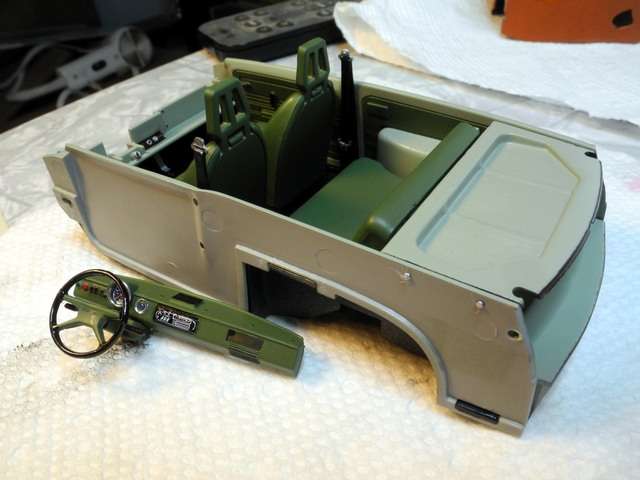 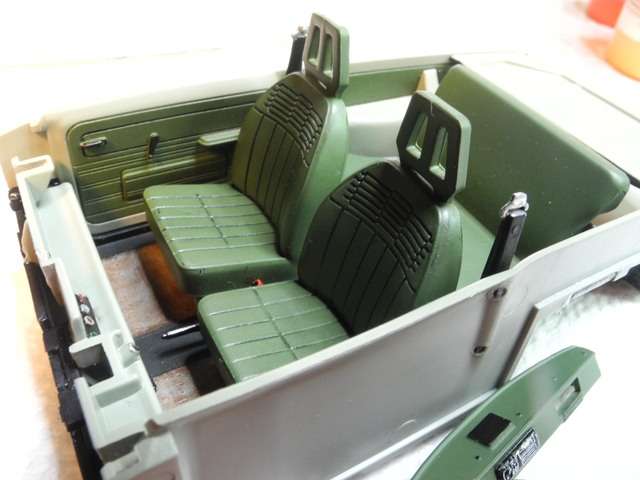 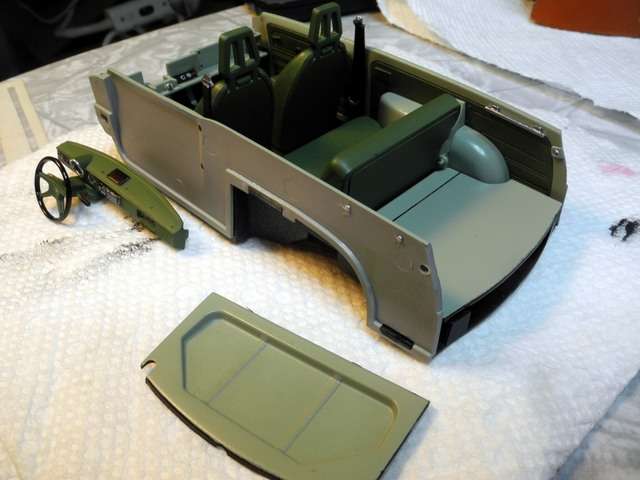 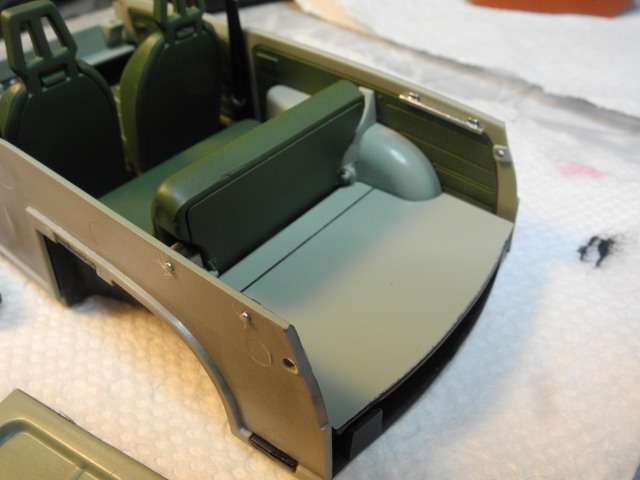 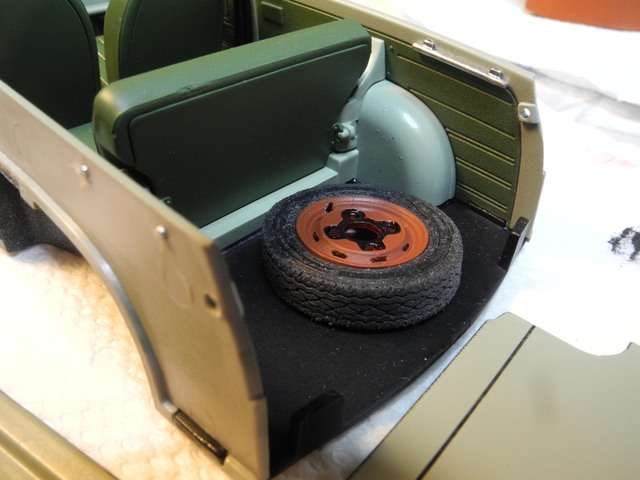 But wait, there's more! I might have mentioned a go kart team with trailer...sort of like this one: 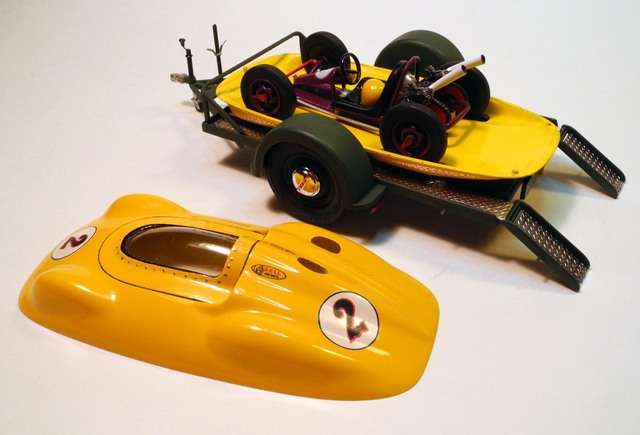 Maybe I wanna see the wheat fields, over Kiev and down to the sea. The Clash: The Call Up/The Cool Out The thread title should require no explanation other than to say, man, I had a dreadful flight. jb |
|
|
|
Post by jbwelda on Aug 5, 2019 19:42:44 GMT -5
So this, my friends, is what that newish pink Tamiya primer looks like, just in case you wondered. Pretty pink. And I think the inside of the go kart shell is going to stay pink. You can see the magnets I placed to help keep the shell together...I am interested to see how that works. (edit: just noticed I still had blue-tac covering the magnets to prevent paint build up, so you cannot really see them in the photos) 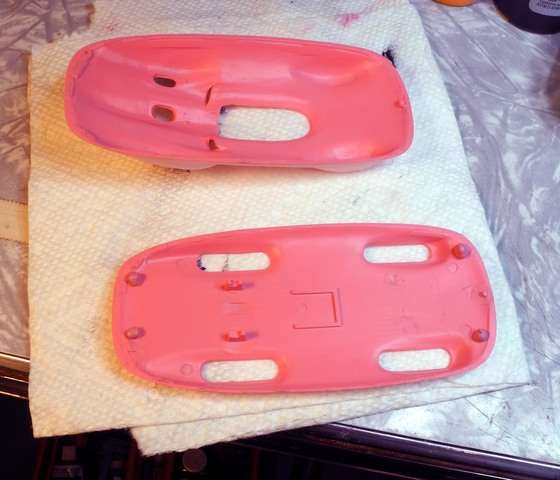 Here are they shells put together, the ghosting of pink through the almost translucent plastic looks kind of neat. 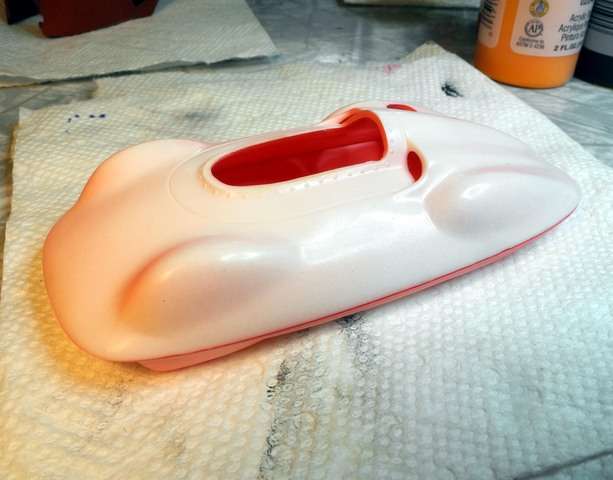 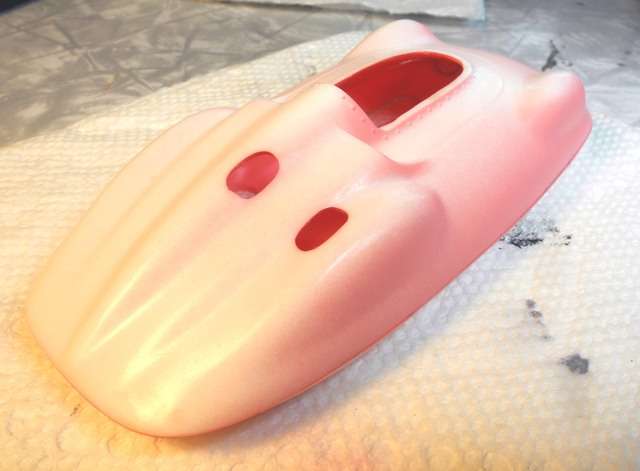 Of course I am going to use the recent reissue of the AMT go kart inside the shell, but am going to have to dip into the vintage for the streamliner stuff...this shell I picked up quite a while ago along with nice windscreen. Will build another trailer like the one in the prior post, basically it is the Revell Kurtis Midget trailer from that magnificent (as well) kit that no one really seemed to talk about. Thanks for looking and all questions or comments appreciated! jb |
|
|
|
Post by jbwelda on Aug 18, 2019 18:11:05 GMT -5
Not to put the kart in front of the horse or anything, but I have been getting distracted thinking about the go kart and trailer this Trabant is going to be pulling. I have lots of the Revell Midgets and that trailer is nice, but really kind of small for this Bonne-style shell. So I saw a trailer for a boat on the bay the other day, and ended up getting it, thinking it would probably work out with just a floorboard added. But that turned out to not be such a good idea, given the V shape of the bottom struts of the trailer, for a boat of course, but still I figured I would see what I could do with it nonetheless. Unfortunately I didn't take any "before" photos, but suffice to say, I chopped off the really ungainly looking front A frame part, along with the forward hull V, and replaced that with some plastic rectangular stuff. Actually, that's backwards, I fitted and glued in the piece before removing the front A frame part. Then I did the same routine with the rear, reducing the length by about a scale 5" or so. That helped some, keeping in mind what a little car is going to be towing this rig, but it still looked kind of ridiculously big compared to the Trabant. So I decided to narrow the whole thing about 5". That really started to help, and the kart shell still has plenty of room side to side, but the fenders are still too wide, so I might cut them off, narrow them, and then reattach them. Like I said, I neglected to take any "before" photos, but here is one with the trailer as it is now, with the A section set to the front of it, and the rear piece I amputated sitting to the rear of it. The pieces are more or less lined up flush on the left or right side of the trailer, so you can see how much I narrowed it. 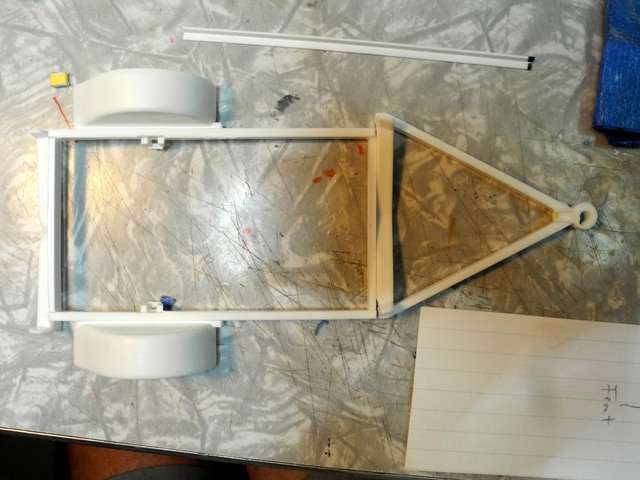 Here is a shot of the basic trailer as it is now, am still going to have to narrow and shorten the A section and might make a more realistic hitch for the front, or at least more in scale. The trailer is resting down on the tires so it is sitting low, its much higher if I mount them where they are supposed to go, but for this subject I think I will end up with them up in there making the trailer sit low like this. 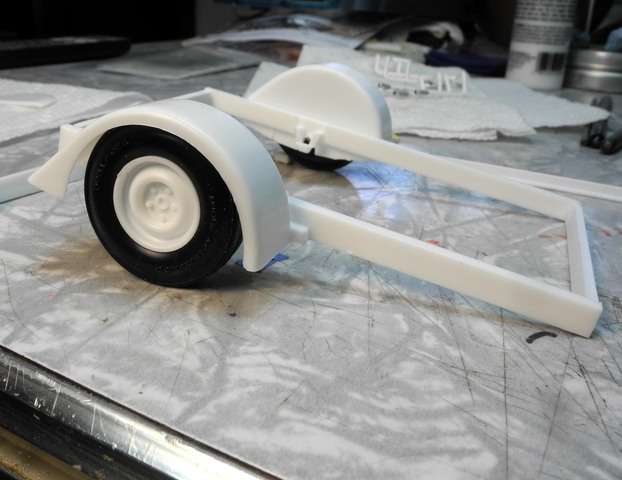 A photo of the trailer with a floorboard template more or less in place. 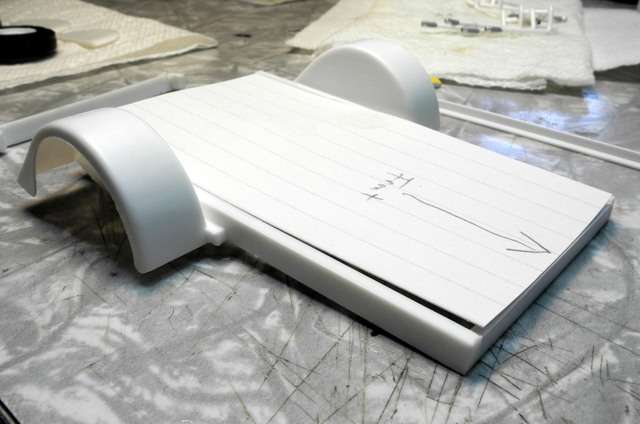 A look at the kart itself, the shell is painted Tamiya Metallic Sand, same as the roof of the tow car. Kart itself is going to be Tamiya Lime Green, as is the trailer and the main part of the tow car. Should make an interesting color combination. 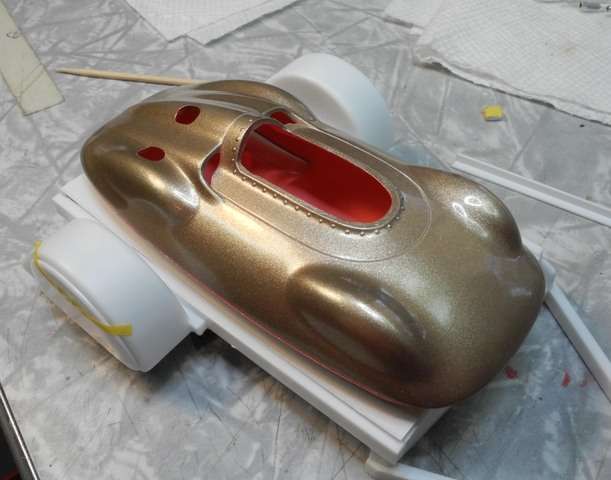 And maybe these fender skirts after I narrow the fenders? 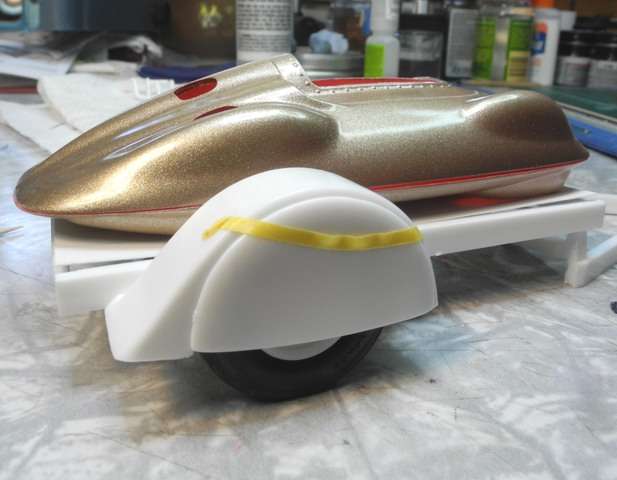 Comments encouraged! jb |
|
|
|
Post by jbwelda on Sept 7, 2019 17:06:03 GMT -5
Evidently not much interest in post-cold war detritus, but nonetheless, I persist. Not going to be your average Trabant though, needless to say. 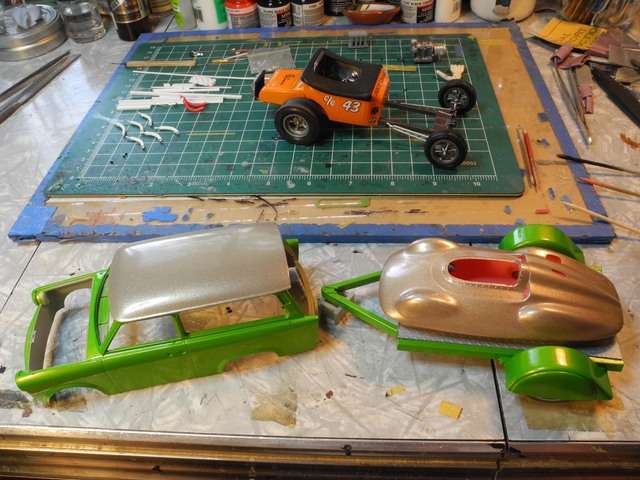 Might notice some kustom work on the body: frenched headlamps being the most obvious. 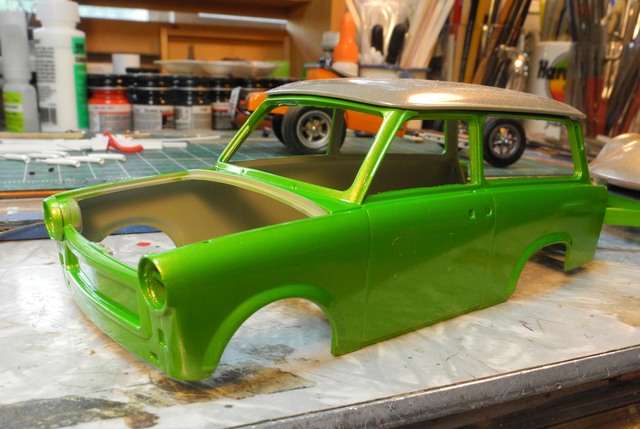 And then there is the go kart shell upon the trailer. Love that pink coming through. Possible thoughts at this point: add disk brake to scratchbuilt rear axle, possibly convert dual two stroke engines to one engine from the AMT parts pack motorcycles. Might be too much trouble though. Am planning on replacing some stuff with polished aluminum tubing, like brake actuator rod, and tie rod up front, detailing whatever engine is chosen somewhat...keeping in mind it will be hidden inside the shell much of the time. 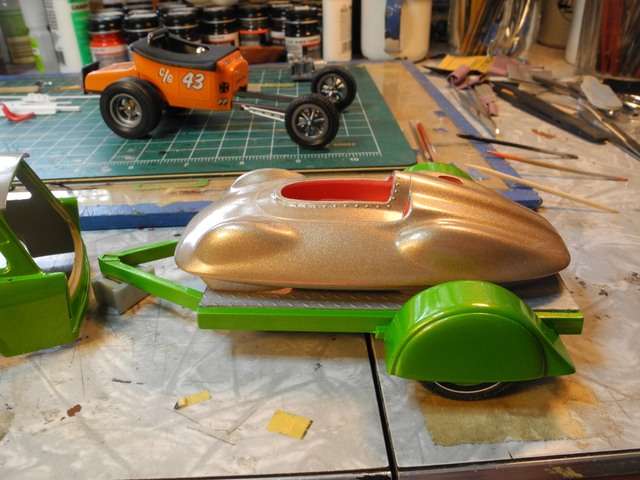 Comments appreciated, even if the party hardliners might be upset! jb |
|
|
|
Post by patw on Sept 21, 2019 16:31:52 GMT -5
Superb Trabby,on my favourite Centreline rims, Trailer and Go Cart! Lookin' really good! I saw a Trabby on the coast in Bournemouth last year, low on air ride with big wides in a custom car club show on the street (closed off)!
|
|
|
|
Post by jbwelda on Sept 21, 2019 21:58:12 GMT -5
Thanks Pat, I kinda figured you might like this one, we got similar tastes in weird cars. Had no idea there were people in the real world customizing Trabbys, but I am glad to hear it has occurred to someone! Bet it didn't have a rotary in it though, but air bag suspension, that's good enuff!
jb
|
|
|
|
Post by jbwelda on Oct 5, 2019 23:11:33 GMT -5
The major project for me on this one was to adapt a Mazda rotary engine, and that has proven to be a stumbling block. But I have it halfway figured out now, the other half being the exhaust system which I think there is plenty of room for behind the engine. I think many would look into this engine compartment and not see anything all that different from whatever came in the kit. Well, maybe not the Weber carb. Once I get the engine compartment sorted out its going to be about time for final assembly...including those fender top strips, which will be fun. 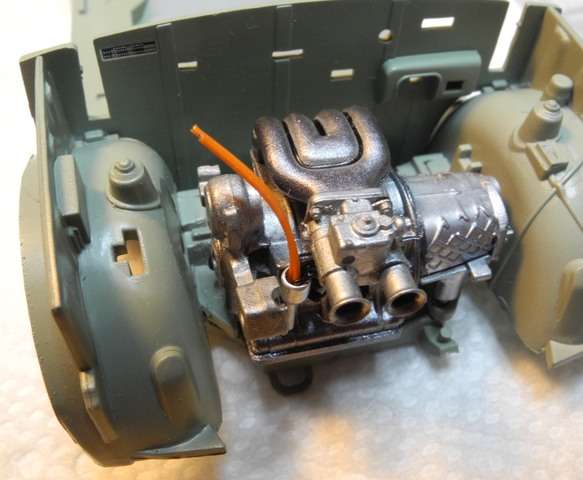 I did wire the ignition 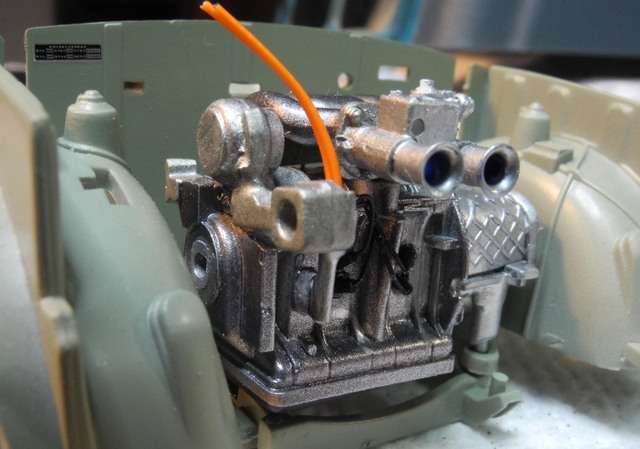 It still has the fan assembly and engine front end, oil filter and some other details to add. jb |
|
|
|
Post by Faust on Oct 9, 2019 20:27:02 GMT -5
That's nuts. Ridiculous. Totally unlikely.
And.
TOTALLY AWESOME!
You just took a great kit of one of the worst cars ever, and made it a great kit of an awesome car! Such a cool idea, and it's lookin' great! I'm very inspired!
|
|
|
|
Post by jbwelda on Oct 22, 2019 0:05:37 GMT -5
Engine compartment is filling up... 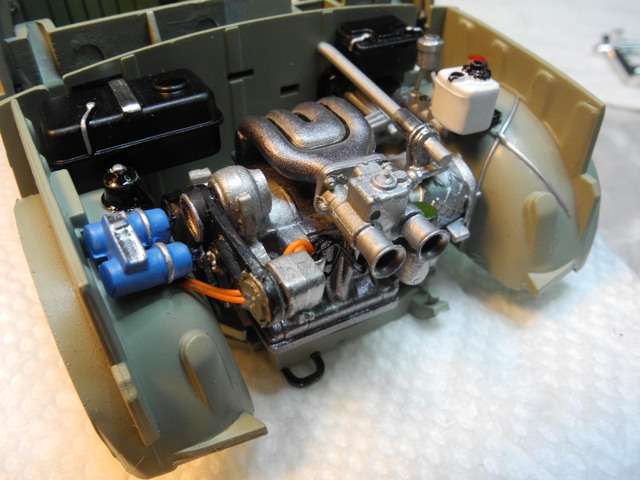 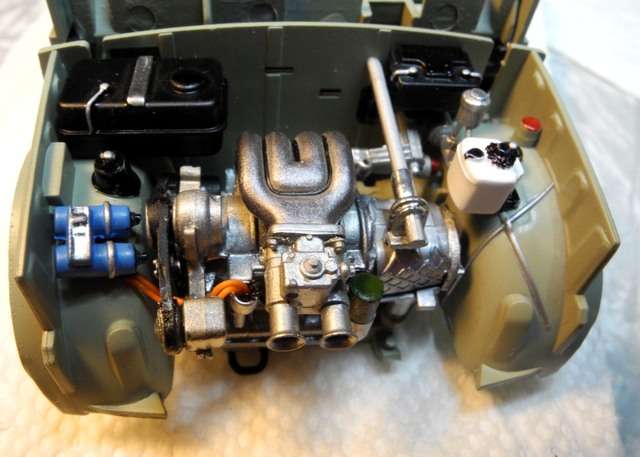 And the kart, as Hank Snow would say, is moving on... 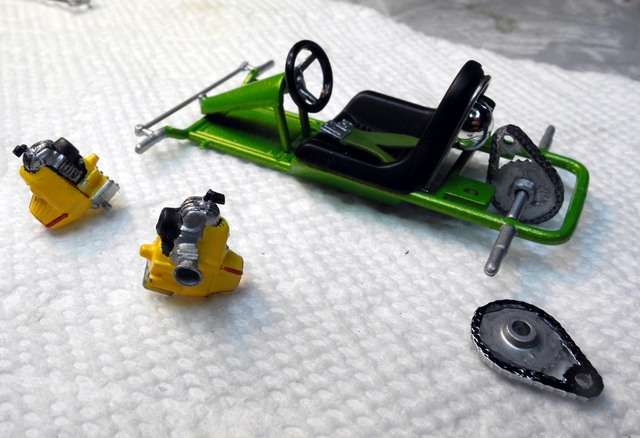 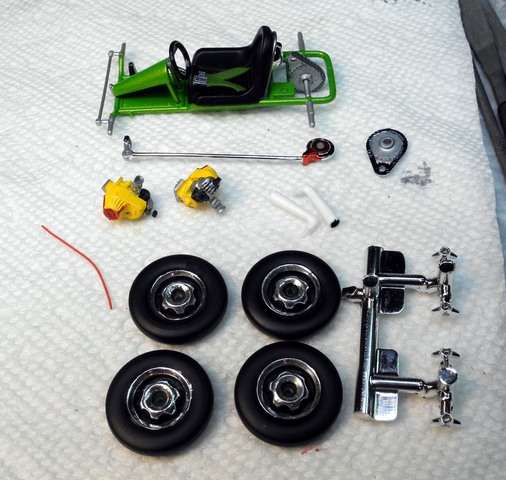 So now its time for you and me, come on out, we'll march to the sea. jb |
|
flatout
Some Glue required
 
Posts: 128
|
Post by flatout on Oct 23, 2019 18:11:19 GMT -5
Hey JB...very cool little hot rod. Love that you used a rotary, would make for a very quick little wagon. Looking forward to seeing this one when finished.
|
|
|
|
Post by jbwelda on Nov 3, 2019 0:11:23 GMT -5
Time for an update, contemplating some body issues on the vehicle itself, but meantime finishing up the kart and trailer. Used the LSR wheels and tires along with the vintage Bonneville style body shell, and did some minor detailing on the engine like adding some velocity stacks to the carbs (and they pretty well line up with the intake scoops above the seat). If you have built this version before, you know you have to cant each of the exhaust pipes to fit out the shell, which leaves them looking kinda off-kilter, so that's why they look like that with the shell off. The color choices might be questionable, but the pink really does give a soothing tone to the gold (Tamiya Metallic Sand, I think). Heres the pieces, before internal decaling: 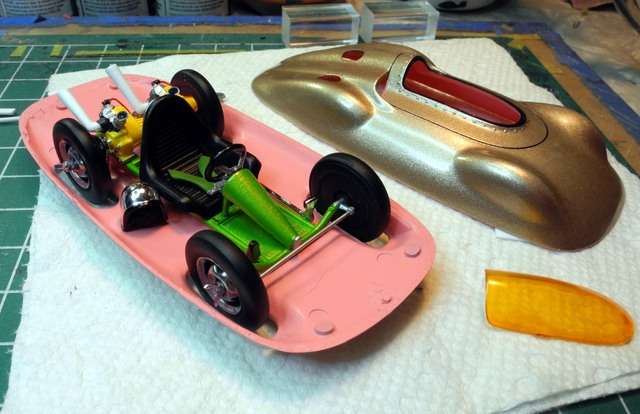 I only had one pilot canopy and it had glue marks on the side that I could not remove so I shot some Tamiya clear orange on it and will put a couple decals to distract from that fact. Closer shot of the kart: 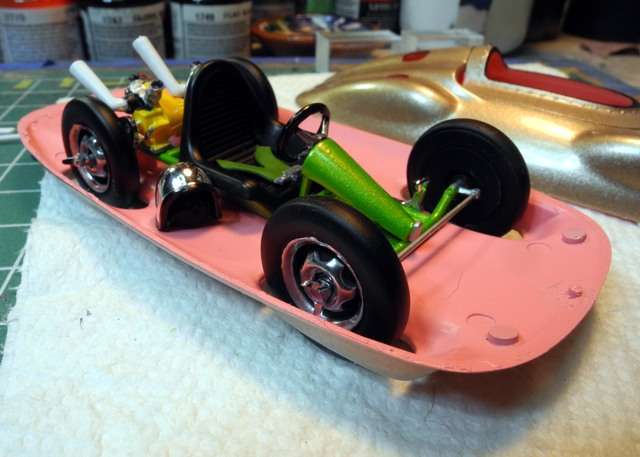 After some decaling: 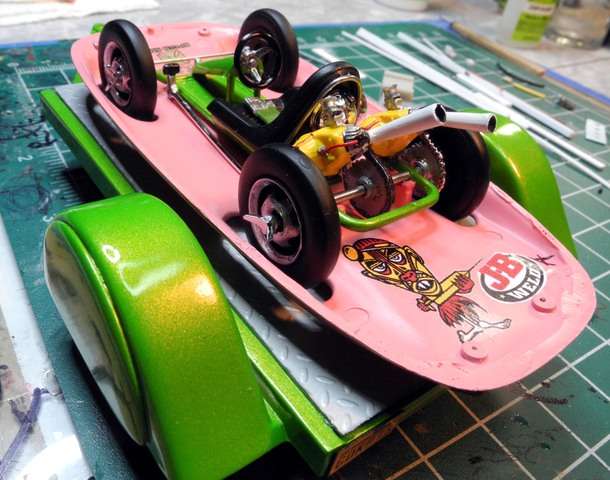 Here is the top of the shell with some decals in place, I just glued the canopy to the body and its setting up: 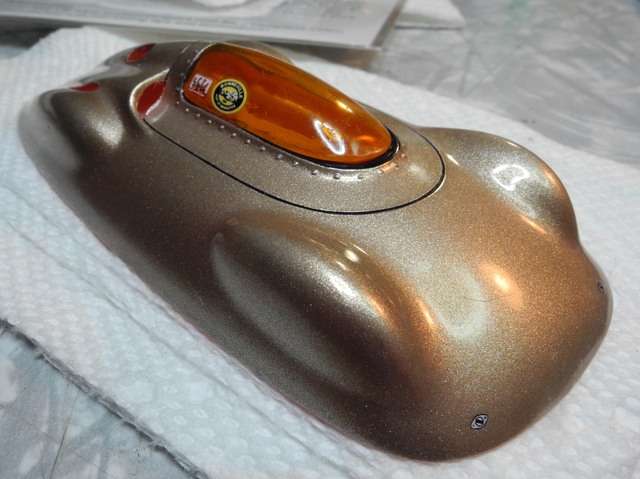 Here is the completed deal sitting on the trailer. Still have to add some taillights to the trailer and I should make some kind of tie-downs, but I will see how detail oriented I feel later. 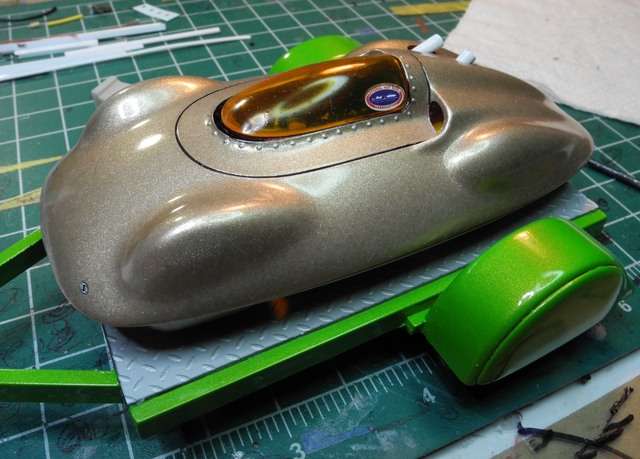 The body shell is held together by magnets on the bottom half with corresponding tips of straight pins on the upper half. Doesn't really hold the thing together but it does help hold the body together and with the halves pretty evenly seated all around.  Alright thanks for looking, I promise to get back on the main attraction soon, these little side distractions are so fun though! jb |
|
flatout
Some Glue required
 
Posts: 128
|
Post by flatout on Nov 3, 2019 13:09:36 GMT -5
Lookin good JB...the lime and pink give it an Art Deco feel, goes well with the Tiki Art. Looking forward to seeing more of the Wagon.
|
|
|
|
Post by jbwelda on Nov 30, 2019 23:17:08 GMT -5
Been away from it for a bit, but I got some more done beforehand...its getting ready for some final assembly soon! Recall that the lid to the passenger compartment is gold (Tamiya Metallic Sand actually) so I was messing around with the hood to somehow match or contrast or whatever I could come up with. Luckily I had a spare kit so I used the hood from it to make up a carbon fibre hood...like who seriously would make carbon fibre parts for a bleedin' Trabant? So it looks kind of cheap because, well, its probably just a vinyl transfer anyhow. But its got fasteners in the corners and it looks kinda neat. 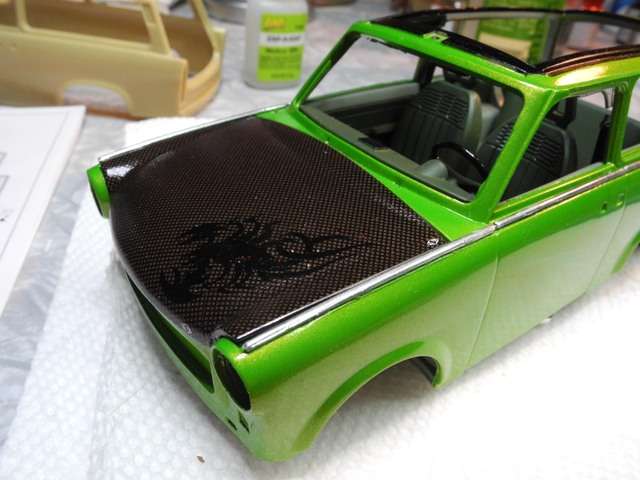 Or...I took the hood I shot green initially, and I kind of mist painted from one direction with the Metallic Sand, and then shot clear over that. Makes it look gold from one direction (from the rear) or more the candy lime green of the body from the other direction. I wish I could do this to the top to be honest...but for now this is another option: 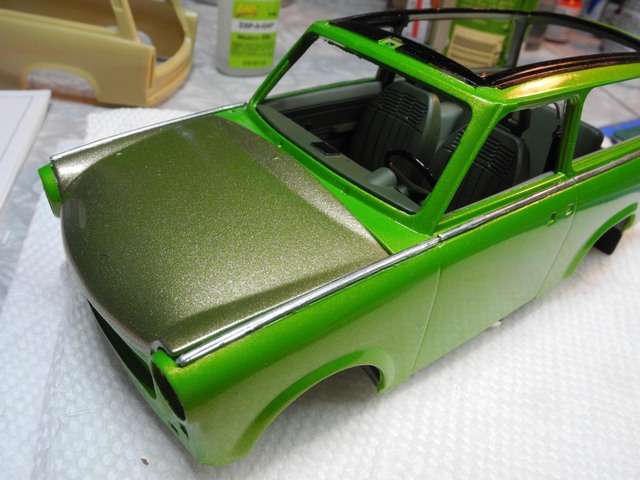 here I was test fitting the completed chassis up under the mule body from my second kit: 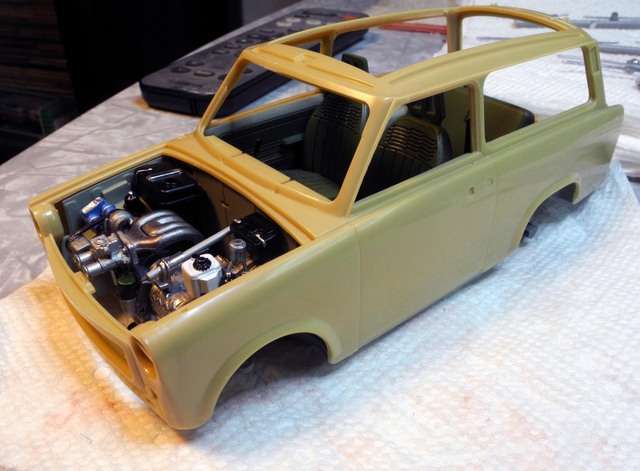 Then here it is up in the real body: 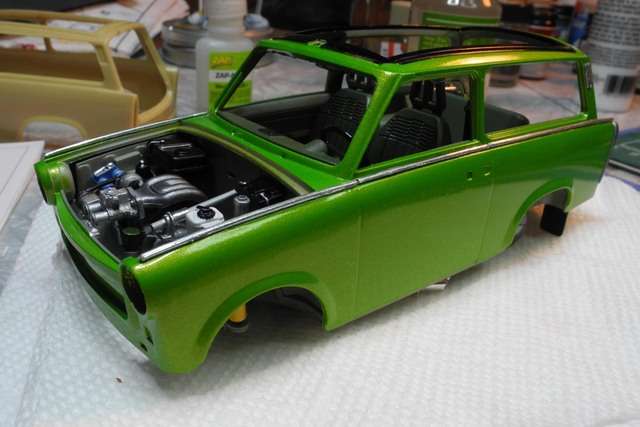 Close up of the rotary install, looking pretty good to me: 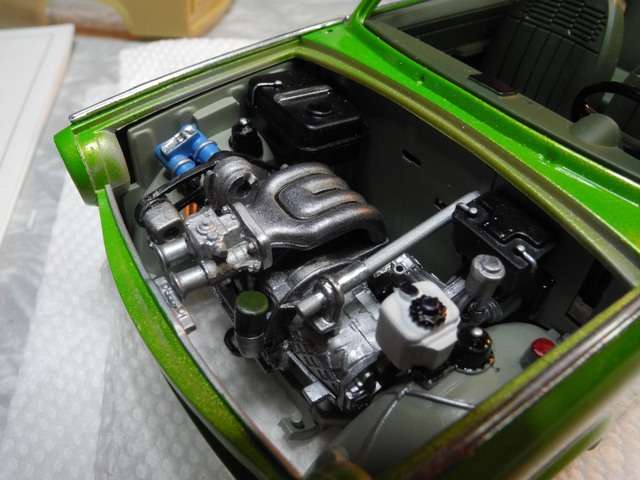 A bit of tint on the rear window: 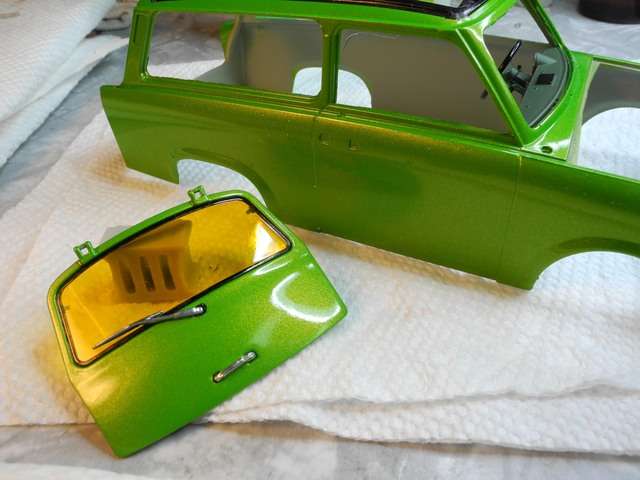 Alright folks, thanks for looking and comments always welcome, this one isn't everyone kettle of fish for sure! jb |
|
|
|
Post by jbwelda on Dec 1, 2019 23:52:25 GMT -5
Another update...this is a kit that really makes you look good. It really does. For example, I did no test fitting whatsoever, and unbelievably the glass fits like a glove, all the way around. 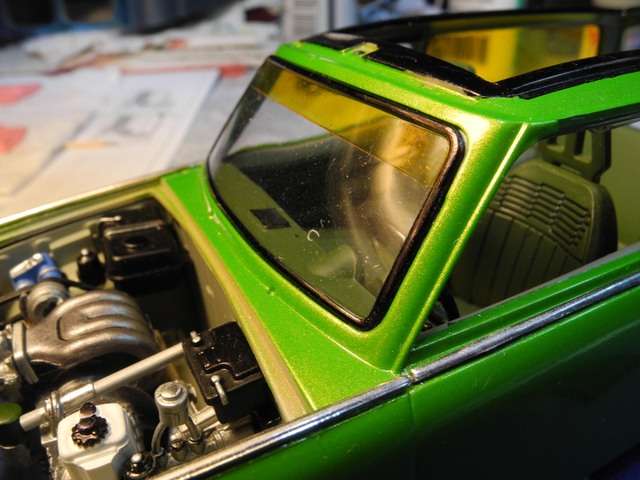 It was totally tempting fate that none of the pieces would fit their holes, in this case my faith was justified! 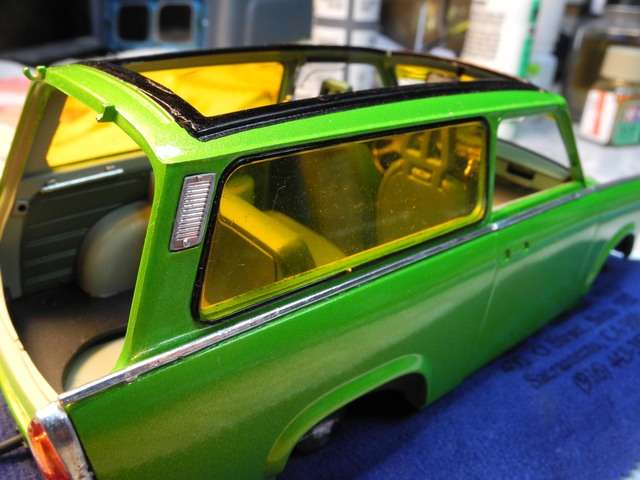 Here is another example: the dashboard mounts to the body and then the interior is supposed to slip up alongside it when the chassis is offered up to the body. That almost never works. Almost never. Again, no test fitting, just slipped the body with dashboard over the chassis/interior parts, and this is what you get. Perfect. 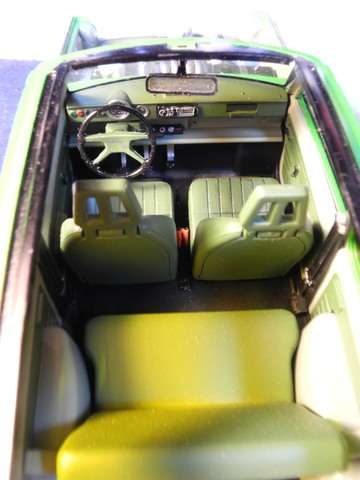 You have to know, if this were an AMT kit, or even a normal (USA) Revell kit, this would never be happening and instead you would be grinding away with a Dremel to get the interior up into the body enough to not have a gap between the body and chassis. But here, I swear, you are looking at very first attempt at fitting the two together. Just makes the builder look like a wizard, I swear. Tail lights and rear end minus bumper and of course rear cover: 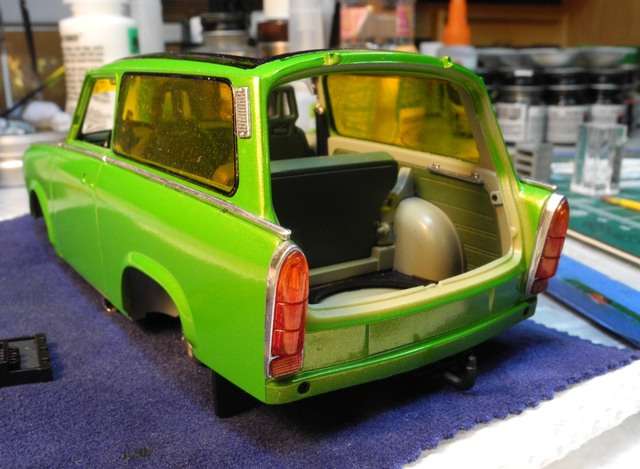 Carbon fiber hood with top posed in place, it softens it up a little. might have to c/f the roof before I am done. 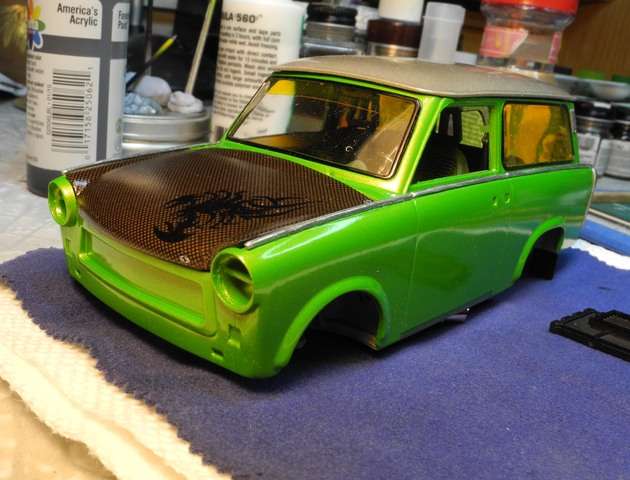 A look at how it will sit with wheels and tires: 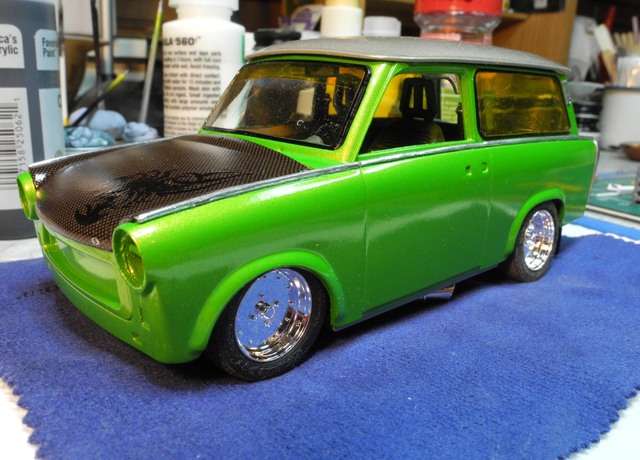 You can just see the exhaust pipe up under there. Still have to make some straps and clamps underneath. 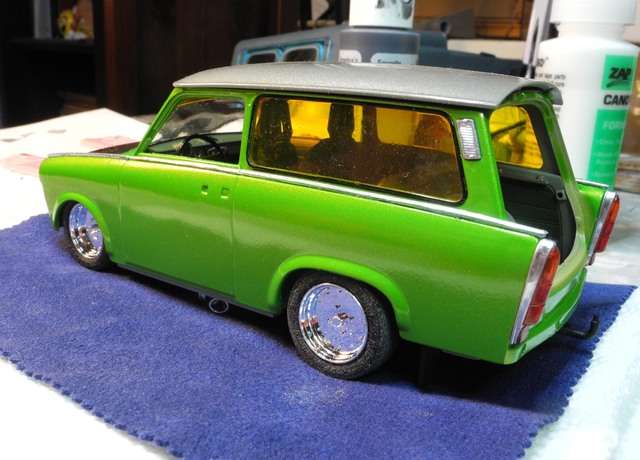 I think the wheels are SSR Mk1, seen second row, second from right, in this photo. Don't know if I will give them the dull look or keep them bright like they are. 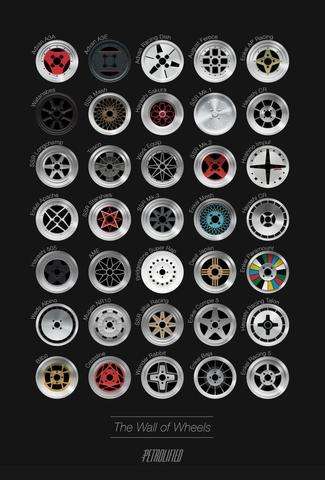 Thanks again for looking and all comments appreciated! jb |
|
|
|
Post by jbwelda on Dec 14, 2019 20:38:17 GMT -5
I was all ready to call this one done, but last night I went to sleep with the idea that the rear end of the car was sticking too far up in the air, so resolved (in my sleep) that I would see what I could do about that at this late stage of the game. I fiddled around and got it down another 1/8" or so which should look much better. But for now, and ahead of adding corrected photos to my gallery, here is a look at the completed pair with the car at its initial altitude in the back. Should be able to take new pics by Sunday or Monday and will add them to my gallery at that point, and post another warning here. 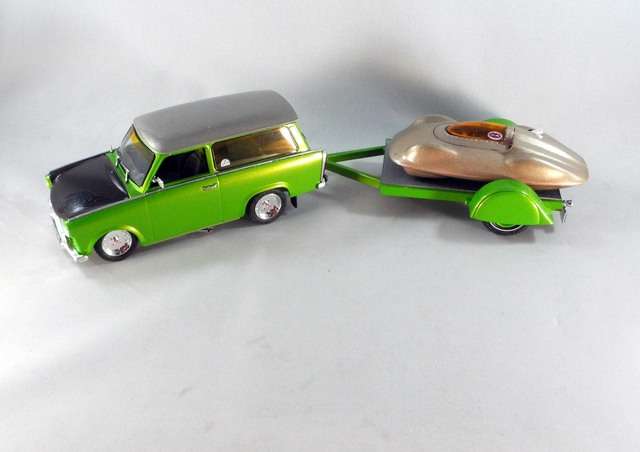 I think despite the questionable color choices, it came out looking pretty good. And the rotary engine looks real nice under the hood. 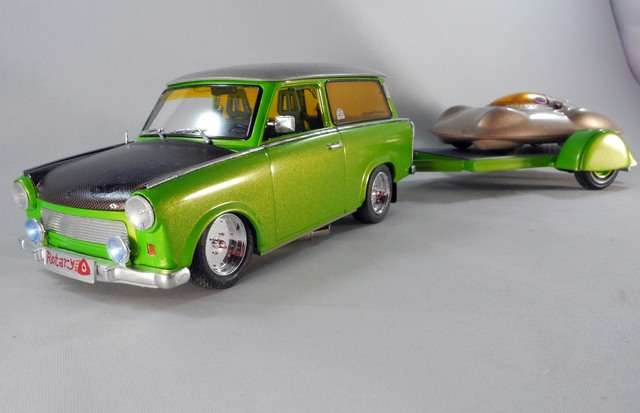 Thanks again to everyone who has looked and commented! jb |
|




 It's an interweb thing.....