|
|
Post by Bernard Kron on Jun 3, 2016 23:50:12 GMT -5
Over on Vintage Drag Models there's a strictly box-stock challenge going on. The only exceptions are paint, decals and wheels and tires ('cause the wheels tires in a lot of kits syphon...). They've even banned detailing!
Strictly OOB per the challenge, this is my entry, the MPC Blue Max Mustang funny car. It will be 100% out of the box except for paint and decals (and I'll probably wire the ignition 'cause I just can't stop myself...).

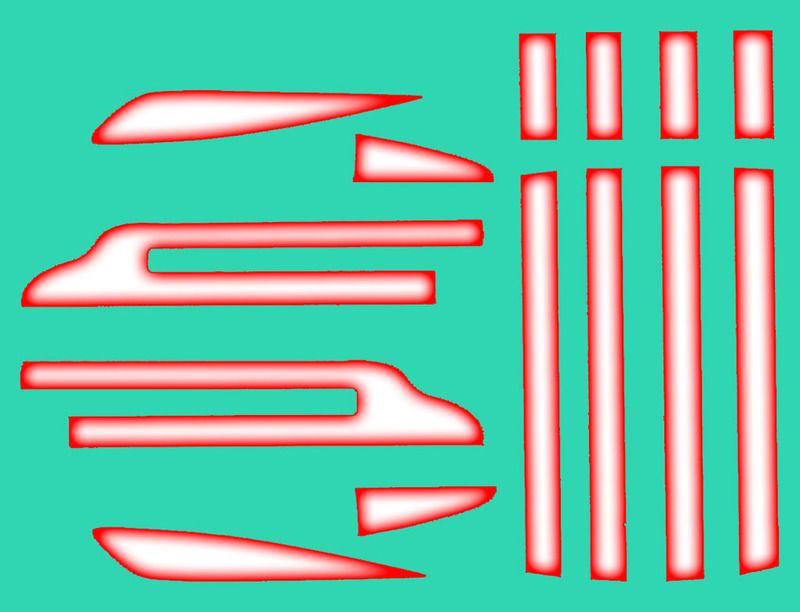
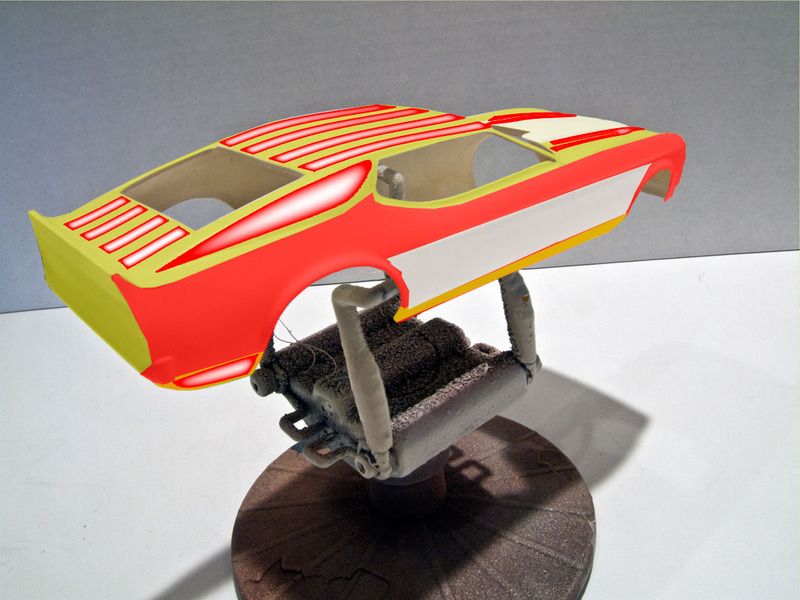
As you all know decals are my thing and this one will be no exception. I scanned the kit decals to use them as a basis for my design. I don't know the name of the car yet but it'll go on the white panel on the side of the car. Trade decals will go either behind the front wheel or on the rocker panel under the door. Paint colors will be Wimbledon White (a cream off-white solid) on the side panels and the hood scoop, and candy red upper doors and fenders with a gold top, hood and rear panel. I'll be making my own fogged panel decals as per the mockup below. The white areas in the panels will actually be clear and show up as gold with candy red fogging. The car name will be in red.
I opened up the filled rear window area and the side areas and rear window will be transparent red acrylic.
I'll strip most of the chrome parts and go for a more utilitarian looking chassis and motor. The interior will be finished in bare aluminum and the body underside in Wimbledon White.
Thanx for lookin',
B.
Here are preliminary decal mockups and art.
 |
|
|
|
Post by Bernard Kron on Jun 6, 2016 16:26:27 GMT -5
Here’s a quick update. I’m about half way through the painting and masking process. While there’s been some pre-planning on this project, modeling for me is pretty much an interactive, improvisational thing so final decal design will be determined by how the colors come out and the overall look of the car. Below is a composite photo showing the steps so far. After cutting out the rear window and doing any body prep and cleanup I shot the car in Duplicolor White Primer and two coats of Duplicolor Wimbledon White (A). Next step was to mask off the hood area and side panels that would remain Wimbledon White in the final paint scheme (B). This was followed by shooting the entire body in Testors #1846 Pure Gold One-Step lacquer. It got two coats. Once the paint had dried hard it was time to begin masking off the areas that would remain gold. Picture (C) shows the first bit of masking tape applied. There was a whole lot more to go! Finally all the gold areas were masked off, consisting of the greenhouse, hood, lower body valence, grill area and lower half of the rear end below the air flap (D & E). Even the inside is completely masked since it’s finished in Wimbledon White and will show when the body is raised to display the chassis(F). Next up is to shoot another coat of Pure Gold in order to seal off the masking edges and prevent bleed through. It will also touch up any nicks or chips that resulted during the masking process. After that will come a coat of Duplicolor Metalcast transparent red to create a Candy Red effect. It will cover the upper body sides. Once the Moment Of Truth comes and I remover the masking tape layers, the result will be a tri-tone paint scheme of candy red, gold and cream white. After the decals are designed, printed and applied the whole shebang will be sealed under 3 coasts of Duplicolor Clear and rubbed out. While the paint cures I’ll work on the motor and chassis. I have most of the parts painted so hopefully that part will be pretty straightforward. Thanx for lookin’, B. 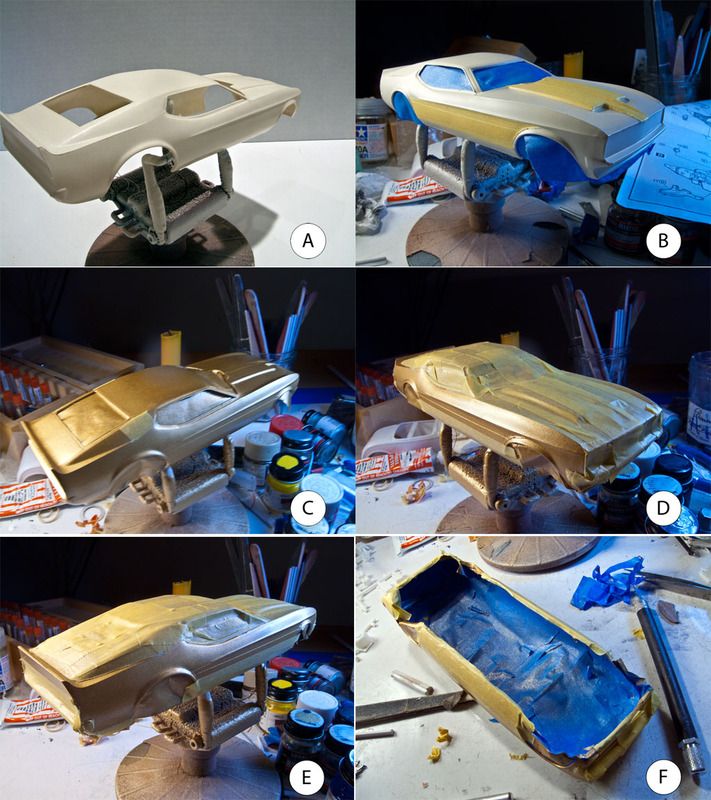 |
|
|
|
Post by Bernard Kron on Jun 7, 2016 16:42:03 GMT -5
Hot sunny weather isn’t something we take for granted here in the Pacific Northwest where it rains 8 months out of the year,. It’s perfect rattle can weather so I’m painting while I can. Got the candy red (Duplicolor Metalcast transparent Red) down and the masking tape removed. The color combo is what I had in mind and the cleanup shouldn’t be too bad. Now on to the graphics design! Thanx for lookin’, B. 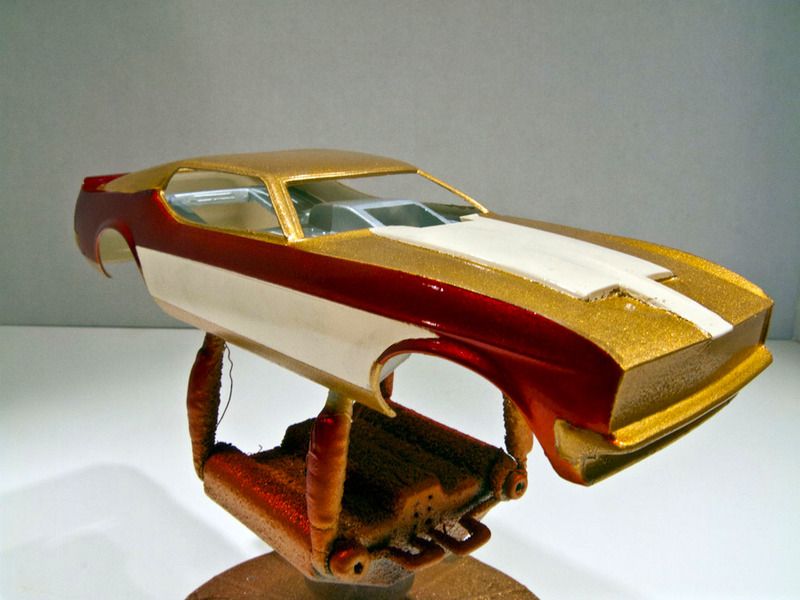 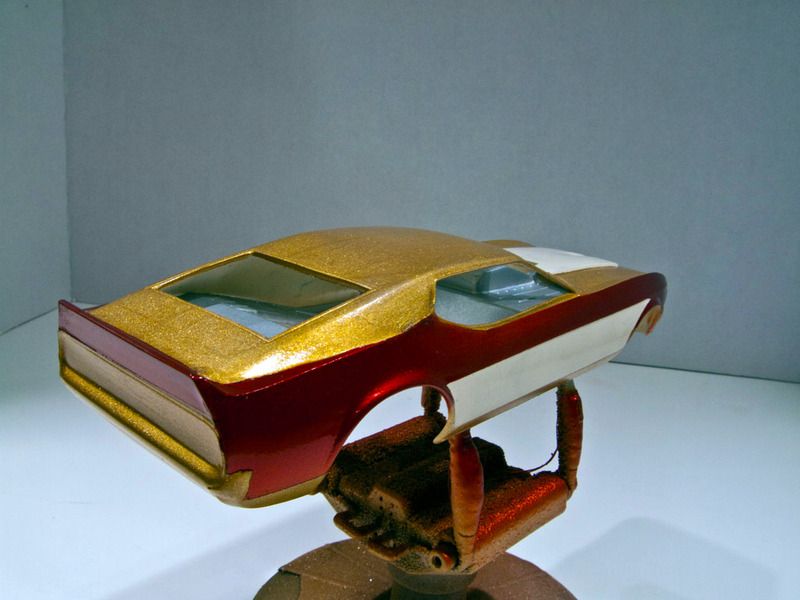 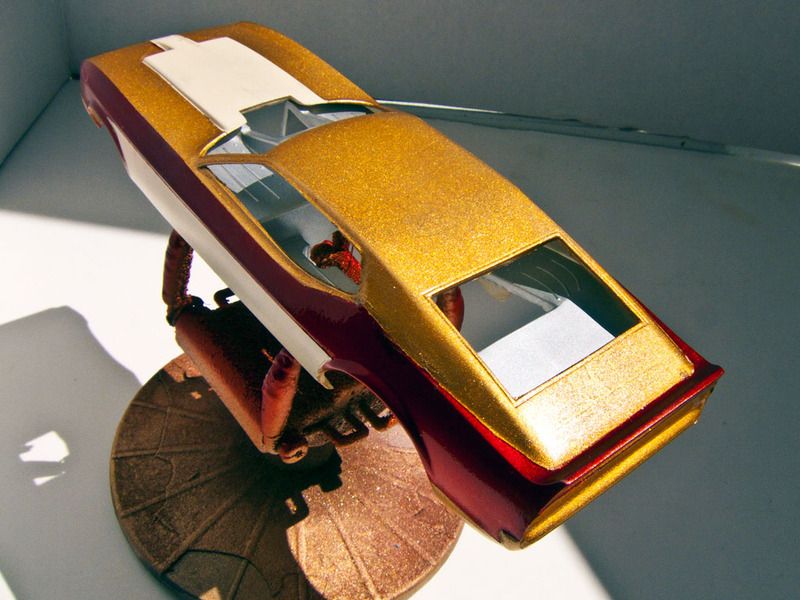 |
|
|
|
Post by Bernard Kron on Jun 9, 2016 18:46:23 GMT -5
I completed the artwork and got a lot of the decals applied. Now to build out the chassis and motor… Here is final the art work I created for this project. The scallops are based on the kit decals but were modified to fit the paint scheme I put together. The front and rear panels are modified versions of the kit decals. I added the Boss 429 to the rear panel area. I also made Boss 429 logos to go on the hood scoop. 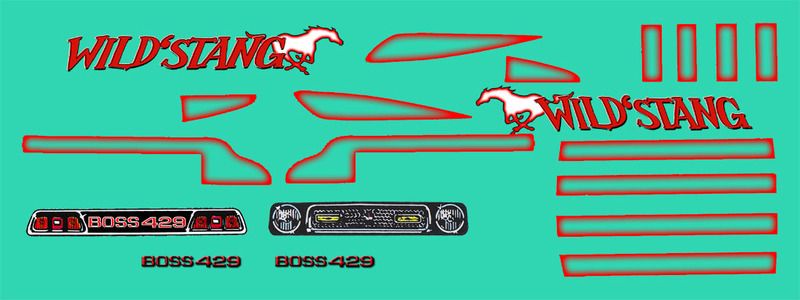 Here are the decals applied to the paint work. Once the final decals, including trade decals, are applied the whole shebang will get clear coated and polished. 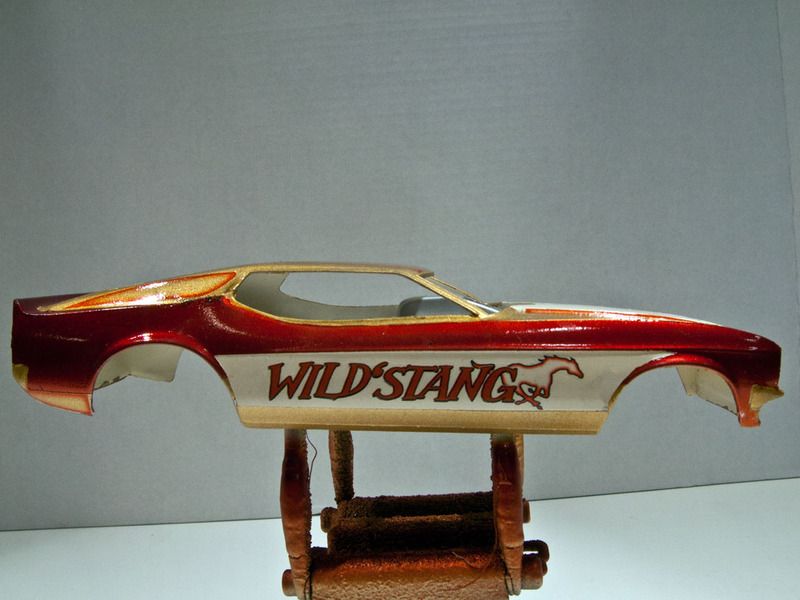 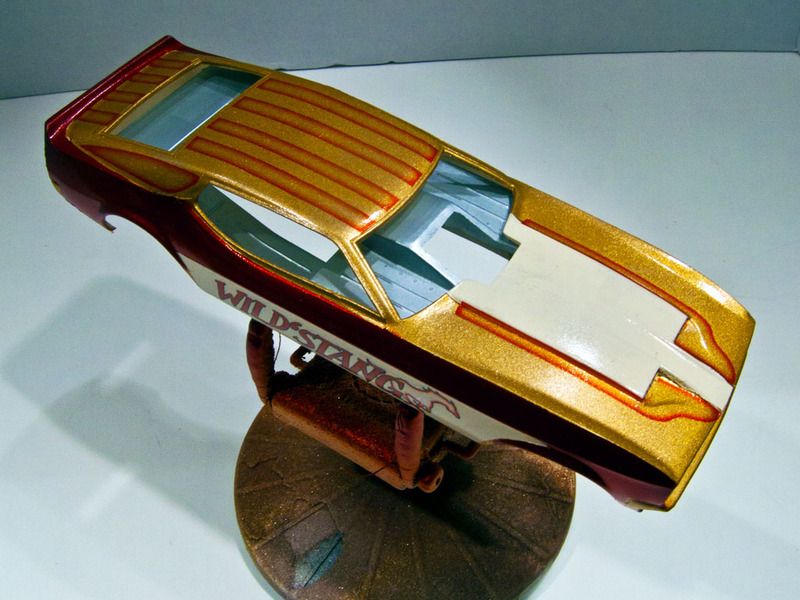 Unfortunately I ran out of decal paper before I could apply the grill and rear taillight area panels and Boss 429 logos so the last 2 pictures are Photoshopped mockups of what thatll look like, the other 2 shots are real. 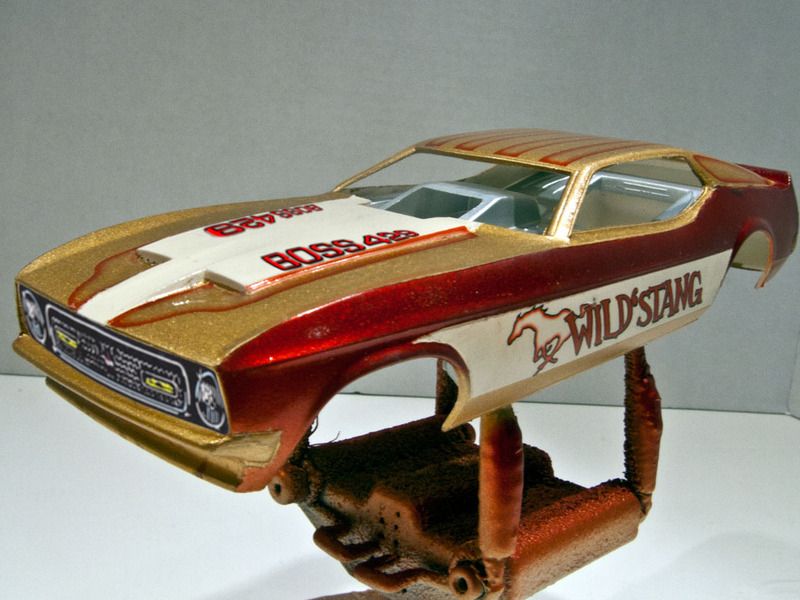 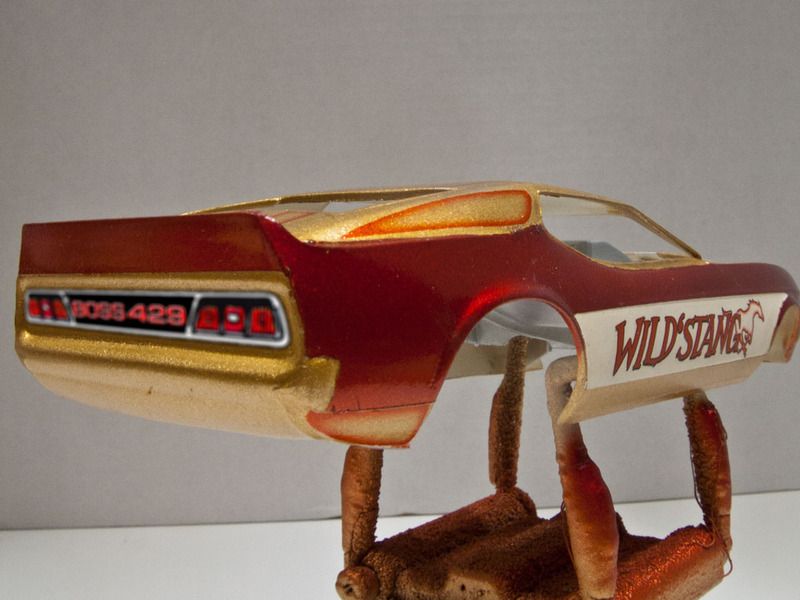 Thanx for lookin’, B. |
|
|
|
Post by harron68 on Jun 10, 2016 11:43:49 GMT -5
I live in the area where Fred Cady was the "decal guy" so I appreciate anyone with the skills to design and print 'em with a computer!
You are so right in rain in the Great NW. One of my online clubs, Skid's Place, has a number of builders (some have had flooding)from the Washington/Oregon region. Thanx for a very creative job with paint and decals.
|
|
|
|
Post by Bernard Kron on Jun 14, 2016 22:42:09 GMT -5
Thanx! First off, I need some advice, or at least confirmation that I’m right in my assumptions. While the clear coats cure (see below) I can’t handle the body so I mocked up the interior panels to the chassis as best I could. From what I can tell the motor fits behind the front wheel well panels of the interior tin work. The motor also needs to be set back enough so the oil pan clears a cross member behind the fuel tank area. Given these facts it appears that I will need to trim the drive shaft somewhat to get proper placement. I get the impression that many of the parts in these MPC flopper kits are meant to serve for several fairly different cars so this doesn’t surprise me. But I’m a real rookie when it comes to these kits. So I need some advice from some of you more experienced builders. Am I right in my conclusion? (Please refer to the circled areas in the picture below.) 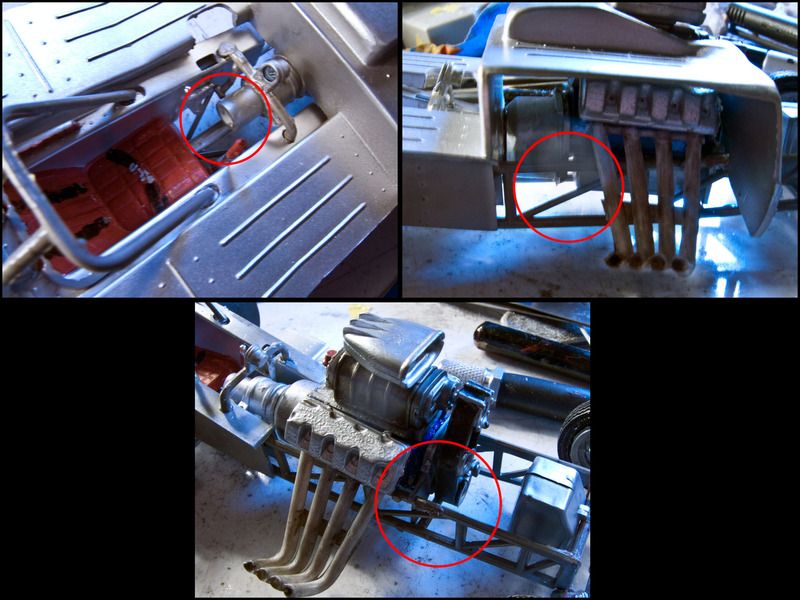 Since my last update, I got the remaining decals printed out and applied and got three coats of Duplicolor Clear laid down over them. The trade decals are mainly from Slixx Nostalgia Drag decal sheets while the grill and tail light area decals are made from scans I took of the kit sheets, adding the “Boss 429” to the back. I scanned and made my own decals as insurance in case I messed them up. The Boss 429 decals on the hood were homemade – they’re slightly smaller than the mockup I showed the other day. The clear needs to cure for a few days and then I’ll rub it out. Those extra layers really add depth to the paint and I’m fairly pleased with the results so far. The fogged panels, in particular, really pop now. 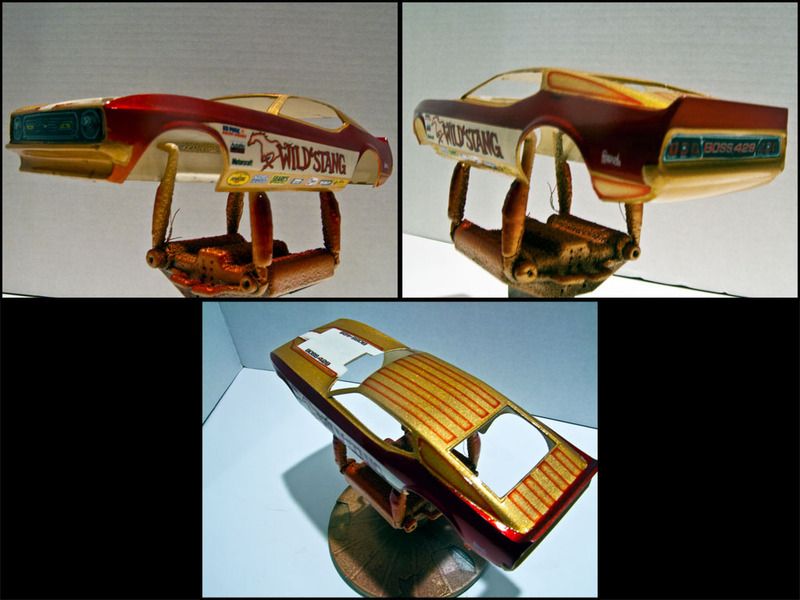 The chassis is assembled, finished in Krylon Grey enamel with details in various shades of Testors Metalizer for a utilitarian look. That same no-nonsense theme is carried over to the motor and wheels. The rear wheels are finished in Testors Jet Exhaust enamel for a pseudo-Dow 7 finish. The front wheels are finished in Testors Metalizer Magnesium. The engine block is Testors Ford Engine Blue with various shades of Metalizers on the engine parts. The valve covers are actually from the kit, Boss 429 parts designed to kit the standard MPC Hemi heads. The kit also comes with some Chevy Big Block style heads and valve covers to create a mock-BBC look. 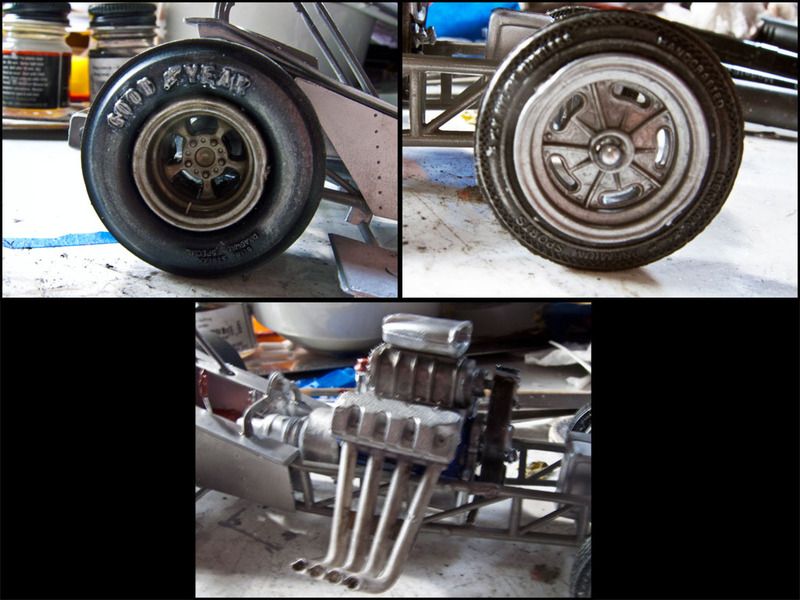 Thanx for lookin’, and for any advice on the motor placement issue. B. |
|
|
|
Post by TooOld on Jun 16, 2016 7:21:26 GMT -5
That's really sharp looking Bernard ! That body style really lends itself to fancy paint and graphics better than the earlier Mustangs .
I like the idea idea of OOB with just paint and decals added .
I've recently started using CorelDraw (I've used Inkscape for years) and am looking forward to doing some more and better graphics for my own decals !
|
|
|
|
Post by Bernard Kron on Jun 16, 2016 15:05:12 GMT -5
Thanks Bob. I use Photoshop myself, but sometimes wish I used a vector graphics program, to avoid pixel-related resolution problems. Spending time with one of these programs is on my to-do list, but I have so many years experience with P-shop that I'm wondering if it would be worth it at this stage.
|
|
|
|
Post by Mr.409 on Jun 21, 2016 8:33:28 GMT -5
Looking great! I've never built any of these kits, but this build shows how much potential they have. Nice job with those decals. I tried to make my own too a couple of years ago, but drawing them on computer turned out to be way too tricky... Your decals look very good though and they make a nice difference to the other Mustang Funny Cars out there.
Interesting to see how it looks when it's all done.
|
|