Post by Bernard Kron on Dec 4, 2015 23:05:07 GMT -5
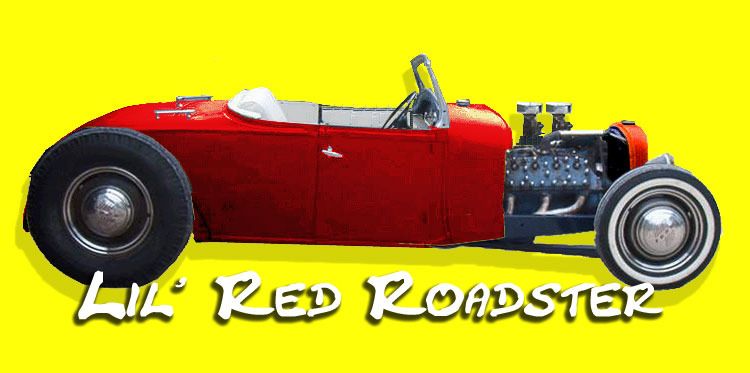
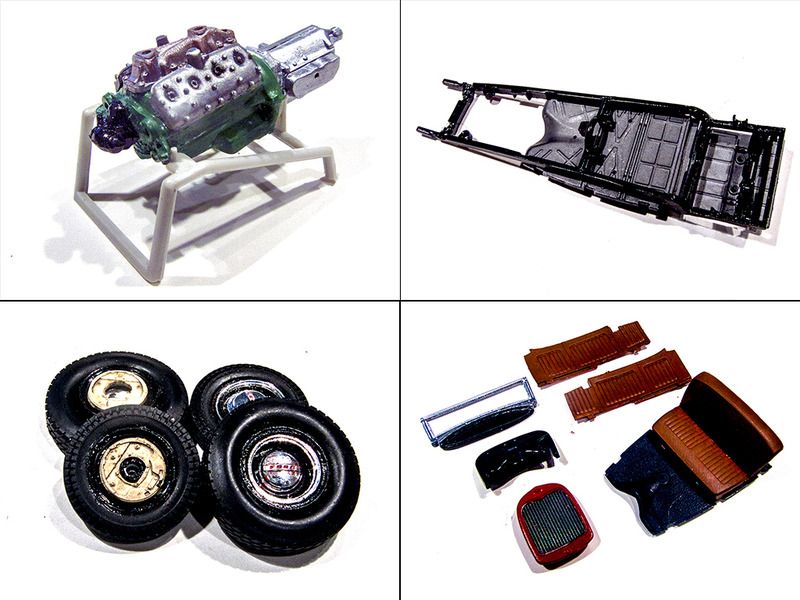
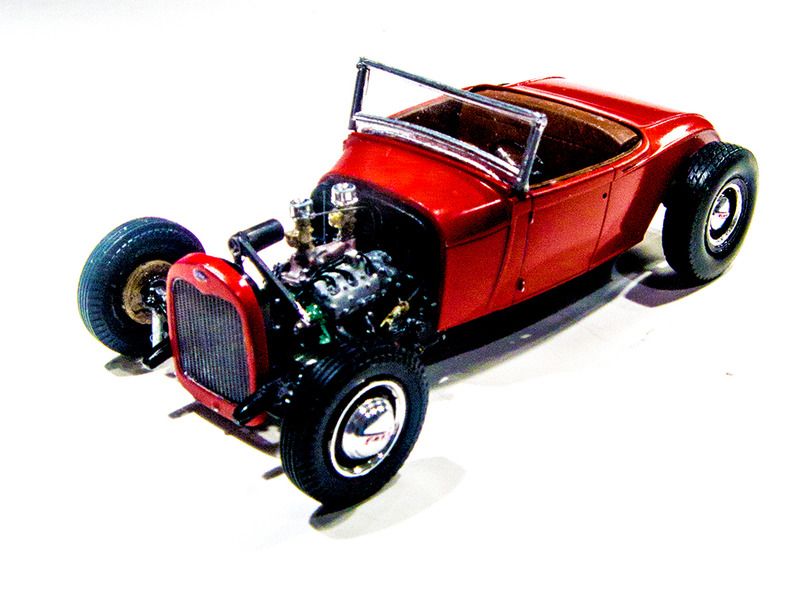
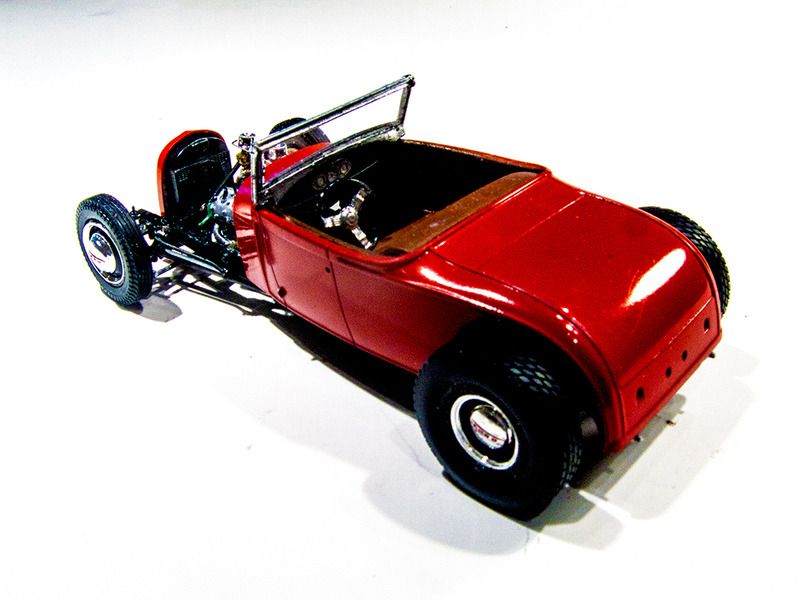
Several years ago, when I was just getting back into modeling, I mocked up a channeled ’29 Ford Roadster hot rod in Photoshop. I used an image of a black highboy I found on the web and cut, paste and colorized until I got the image I liked. The picture has stuck with me despite the fact I never got around to building it.
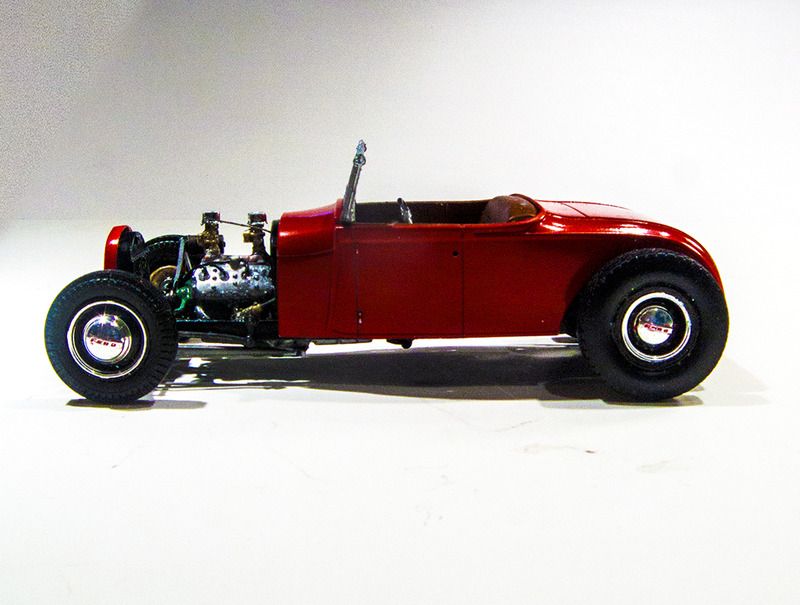
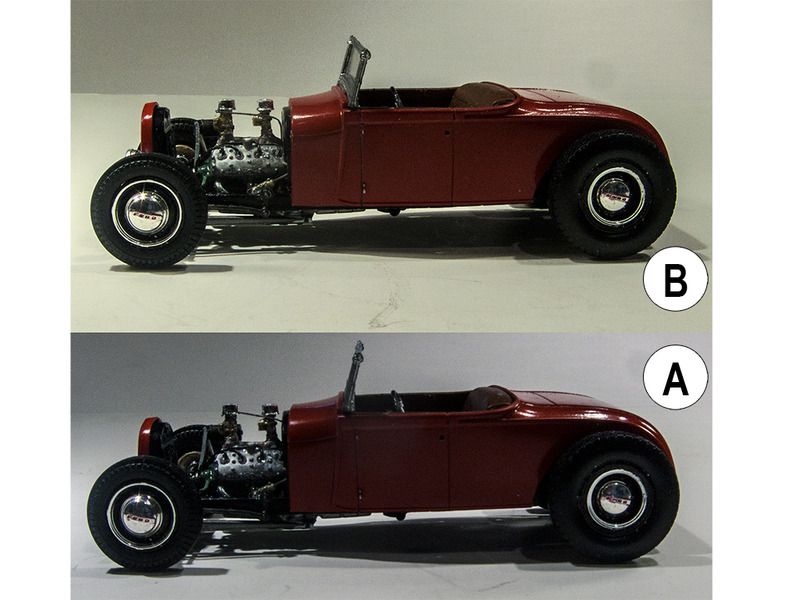
With the release of the Revell ’29 Ford Roadster with its channeled option the need to build something like the “’Lil Red Roadster” hit me once again, especially since Revell’s channeled version had quite a few things about it that I thought needed changing, especially the enormous ground clearance. So, with the greatest apologies to Tim Boyd, whose image I have stolen, here’s a before and after Photoshop mockup showing a very crude lowering job. All I did was “cut out” the wheels and ground line from the rest of the car’s image and then lowered everything around the wheels – it’s the same thing I did to make the original ‘Lil Red Roadster.
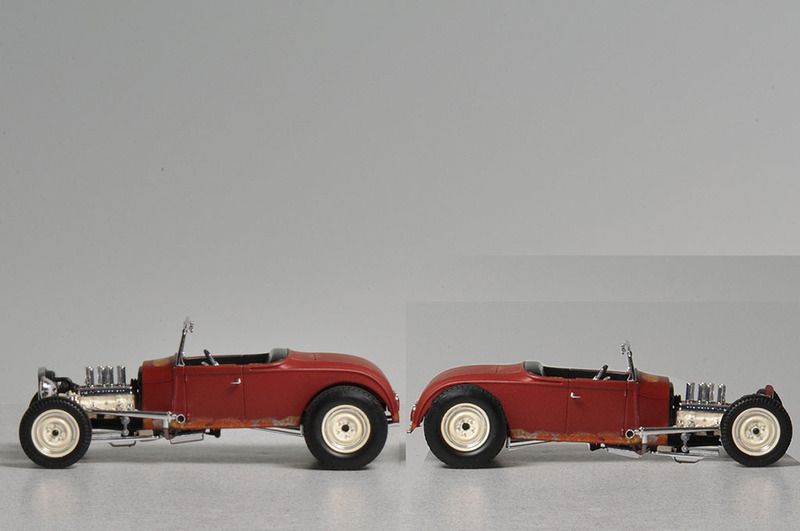
As you can see there’s a bit more rake than the LRR but otherwise the lowering isn’t too far off. For reference I noted the fact that the top of the rear tire now sits just at the upper body molding.
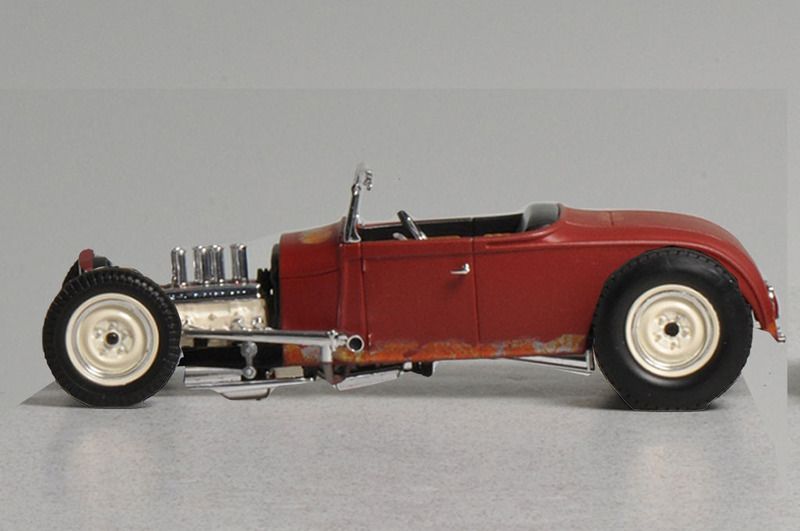
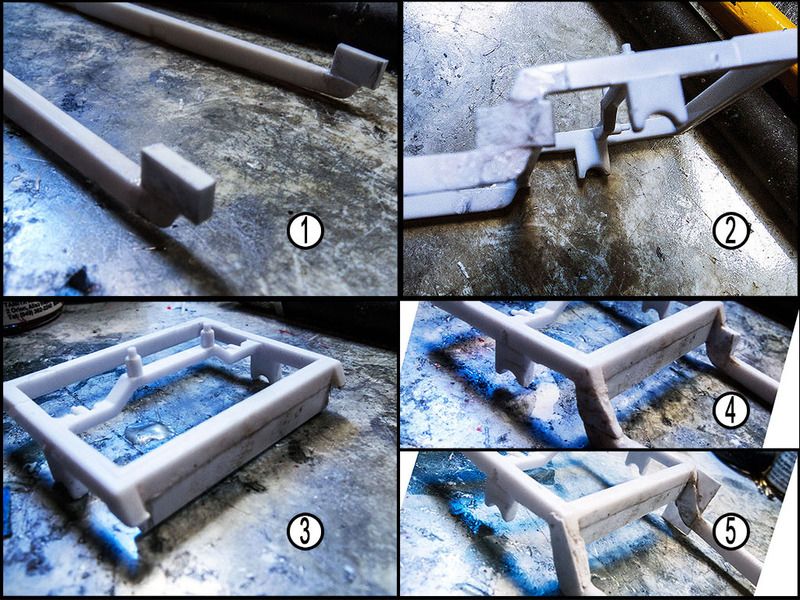
So I then measured the distance between the original position of the rear tire and the raised position. This would be the amount I would need to increase the Z at the rear of the Revell kit frame. It worked out to about .152 inches. Allowing for the kerf on my Zona zaw of about .003 inches I could use some .156 x .080 inch styrene strip and insert additional height to the factory Z (fig. 1 and 2). Then, to reinforce the new joint I inserted some of the same material across the frame to increase the glue area (fig. 3). After the usual sanding and shaping (fig. 4) I added some .010 inch strip on either side of the joint to finish it out and add a little more reinforcement (fig. 5).
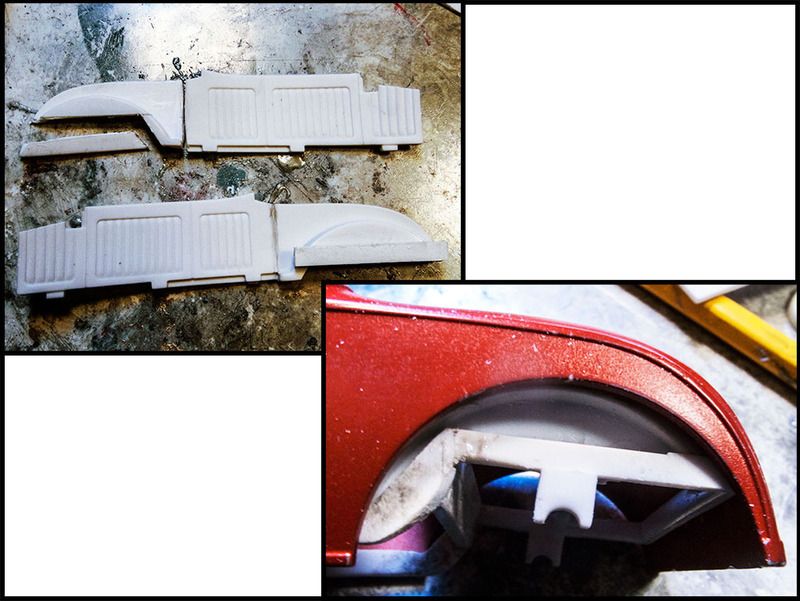
It’s now standard operating procedure to cut the wheel well panels from the interior sides if you contemplate any sort of modification to the Revell ‘29 kit. So I did that before removing additional material from the wheel well panels to accommodate the raised Z on the frame.
To lower the front end I reversed the front cross member and cut 3 leaves from the front spring. I decided that I wanted a more traditional rear suspension to go with the general retro-funk of the LRR so I installed a rear crossmember and spring from a Revellogram ’37 Ford Panel Truck which has been mercilessly raided over the years for its parts. The rear axle will be removed and I’ll be using the kit axle instead.
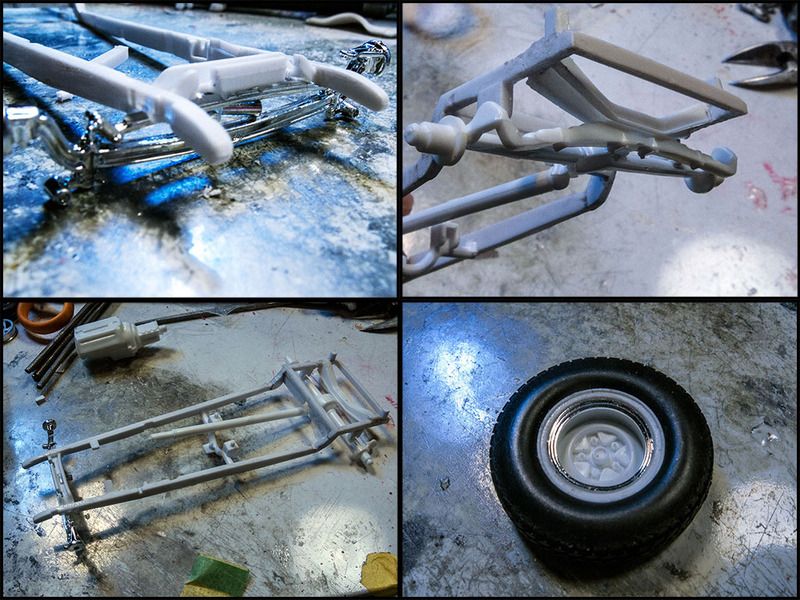
That’s it so far. I still haven’t gotten it up on its wheels so I don’t know how low I’ve gotten it, or whether the stance bears any resemblance to either mockups. One ,thing is clear already and that is that I must use the tires that came with the kit. They are perfect for this type of build. For the rear wheels I probably will switch out to some deep dish reversed steelies as shown in the picture above. Those are 9” 60’s stock car wheels from Plastic Performance Parts.
I still haven’t decided whether to stick with the flathead in the original ‘Lil Red Roadster image or to use the kit nailhead. I’m leaning towards the flattie, but then I have to decide to keep it fairly crude as in the LRR mockup, or maybe make it a bit more nicely turned out with finned heads, etc. Once I get it up on its wheels I have no doubt that the ‘Lil Red Roadster will let me know what’s right.
Thanks for lookin’,
B.

With the release of the Revell ’29 Ford Roadster with its channeled option the need to build something like the “’Lil Red Roadster” hit me once again, especially since Revell’s channeled version had quite a few things about it that I thought needed changing, especially the enormous ground clearance. So, with the greatest apologies to Tim Boyd, whose image I have stolen, here’s a before and after Photoshop mockup showing a very crude lowering job. All I did was “cut out” the wheels and ground line from the rest of the car’s image and then lowered everything around the wheels – it’s the same thing I did to make the original ‘Lil Red Roadster.

As you can see there’s a bit more rake than the LRR but otherwise the lowering isn’t too far off. For reference I noted the fact that the top of the rear tire now sits just at the upper body molding.

So I then measured the distance between the original position of the rear tire and the raised position. This would be the amount I would need to increase the Z at the rear of the Revell kit frame. It worked out to about .152 inches. Allowing for the kerf on my Zona zaw of about .003 inches I could use some .156 x .080 inch styrene strip and insert additional height to the factory Z (fig. 1 and 2). Then, to reinforce the new joint I inserted some of the same material across the frame to increase the glue area (fig. 3). After the usual sanding and shaping (fig. 4) I added some .010 inch strip on either side of the joint to finish it out and add a little more reinforcement (fig. 5).

It’s now standard operating procedure to cut the wheel well panels from the interior sides if you contemplate any sort of modification to the Revell ‘29 kit. So I did that before removing additional material from the wheel well panels to accommodate the raised Z on the frame.

To lower the front end I reversed the front cross member and cut 3 leaves from the front spring. I decided that I wanted a more traditional rear suspension to go with the general retro-funk of the LRR so I installed a rear crossmember and spring from a Revellogram ’37 Ford Panel Truck which has been mercilessly raided over the years for its parts. The rear axle will be removed and I’ll be using the kit axle instead.

That’s it so far. I still haven’t gotten it up on its wheels so I don’t know how low I’ve gotten it, or whether the stance bears any resemblance to either mockups. One ,thing is clear already and that is that I must use the tires that came with the kit. They are perfect for this type of build. For the rear wheels I probably will switch out to some deep dish reversed steelies as shown in the picture above. Those are 9” 60’s stock car wheels from Plastic Performance Parts.
I still haven’t decided whether to stick with the flathead in the original ‘Lil Red Roadster image or to use the kit nailhead. I’m leaning towards the flattie, but then I have to decide to keep it fairly crude as in the LRR mockup, or maybe make it a bit more nicely turned out with finned heads, etc. Once I get it up on its wheels I have no doubt that the ‘Lil Red Roadster will let me know what’s right.
Thanks for lookin’,
B.


 It's an interweb thing.....