|
|
Post by Bernard Kron on Mar 22, 2015 0:27:40 GMT -5
|
|
|
|
Post by falconwagon on Mar 22, 2015 6:56:38 GMT -5
Well I like that ,if you don't get done send it to me.
|
|
|
|
Post by falconwagon on Mar 22, 2015 7:04:03 GMT -5
Well I like that ,if you don't get done send it to me. some movation  |
|
|
|
Post by boxcar on Mar 22, 2015 7:36:37 GMT -5
Got a great start. Can hardly wait to see it finished.
|
|
|
|
Post by junkyardjeff on Mar 24, 2015 21:45:19 GMT -5
I am thinking about building another 49 but need to finish a 50 convertible I want to make a 49 just like a 49 my dad had years ago but need to find a source for pea green spray paint.
|
|
|
|
Post by sharp on Mar 25, 2015 19:52:50 GMT -5
That is gonna look cool! can't wait to see more!
|
|
|
|
Post by Bernard Kron on Mar 26, 2015 13:23:27 GMT -5
Thanks everyone! Progress is being made. I thought I’d take the time to show some of the details as I go along. Here’s how I slammed it. The photos show the offset spindles at the front. In addition I shaved the front crossmember to raise the lower A-arm bracket for adequate ground clearance. Not shown, but I also cut the posts on the kit’s A-arm bracket which stand in for the coil springs, effectively “cutting the coils”. At the rear I used simple lowering blocks, trimmed the rear spring shackles, C’d the frame rails and relieved the undercarriage to provide clearance for the differential. Since my last post I removed about .04 inches from the lowering blocks, raising the rear about 1 scale inch. Also, the chassis tends to slip up into the trunk area at the rear so I glued in a locating block to firmly locate it in the proper position. 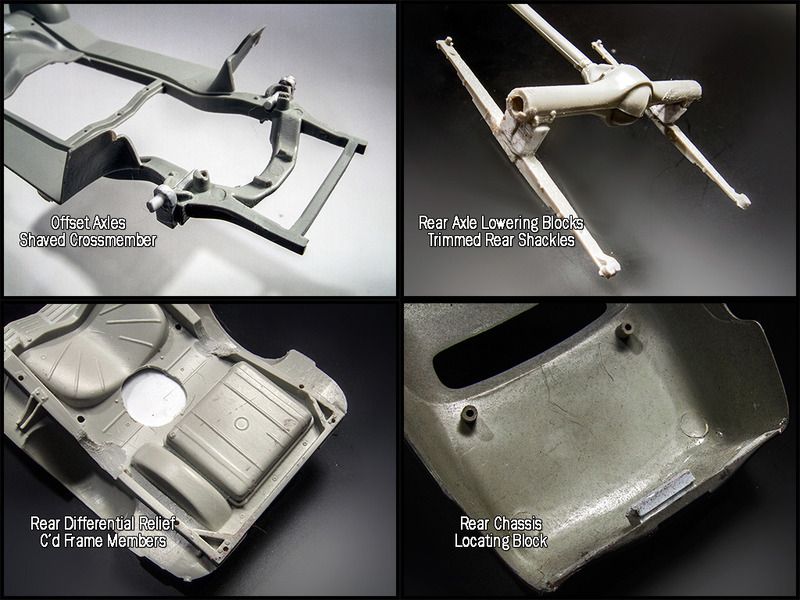 I’ve begun some basic customizing bodywork. I smoothed and filled any seems, frenched the headlights and have begun final finishing work. The windshield visor needs more cleanup work and the edge trim, brackets and center ribs will be foiled. I also selected a set of ’53 Caddy bullet Sombreros from the Revell ’48 Ford Custom. Next up are the motor and interior. Thanx for lookin’, B. 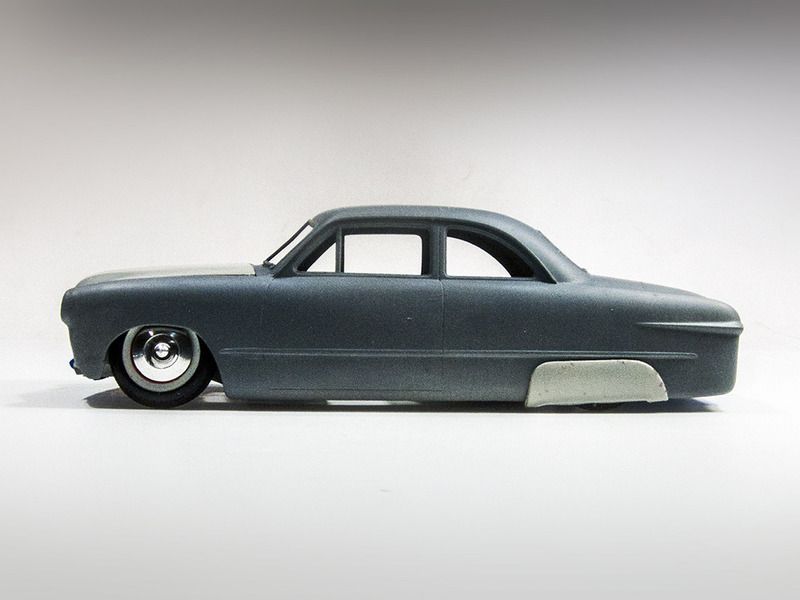 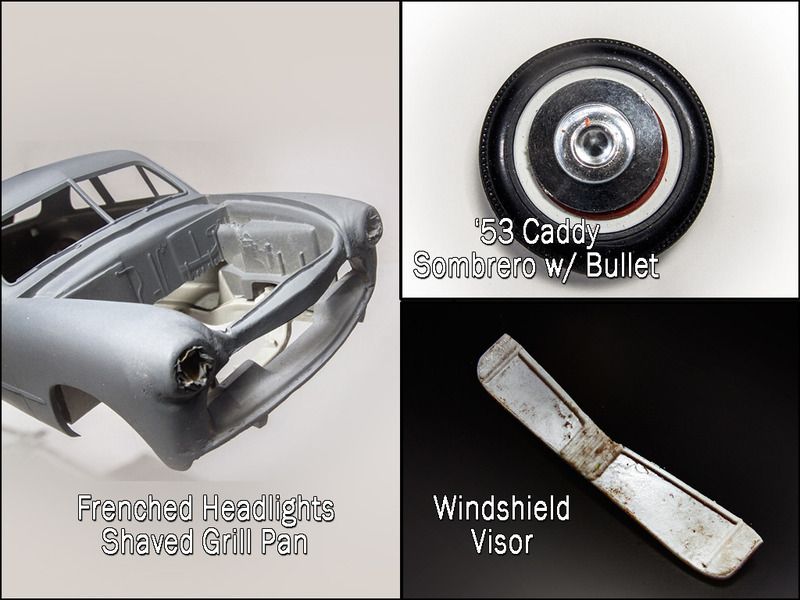 |
|
|
|
Post by Bernard Kron on Apr 20, 2015 6:54:48 GMT -5
This is turning into a somewhat “experimental” project even though the basic build is pretty straightforward with a minimum of bodywork and paint issues. I guess the simplicity of the whole thing has tempted me into trying out a few ideas I had on the back burner. On the simple and basic side of things the chassis is painted out and ready for the suspension and exhaust systems. The undercarriage and floorpan are painted in Testors Metalizer Gunmetal with black frame rails and suspension. The engine has been built and detailed. Nothing special to report here, just the kit Cadillac motor with tri-power and a scratch built coil. 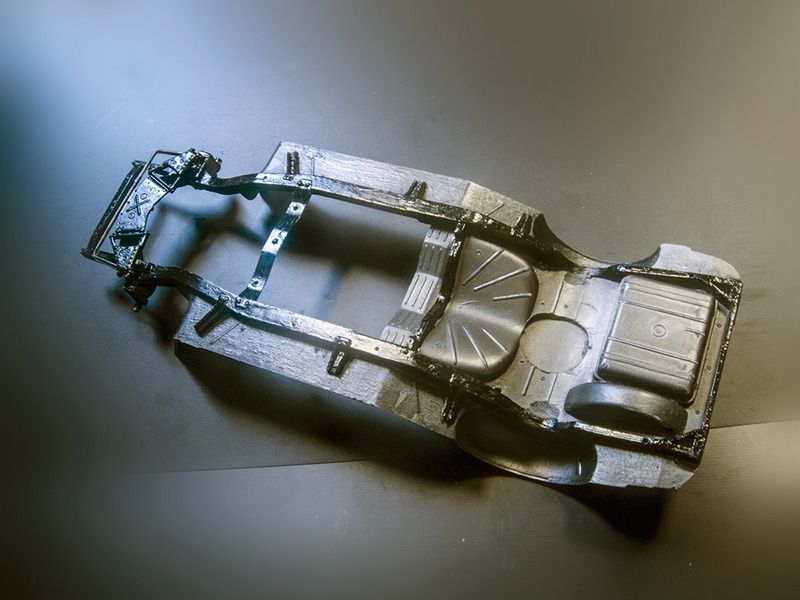 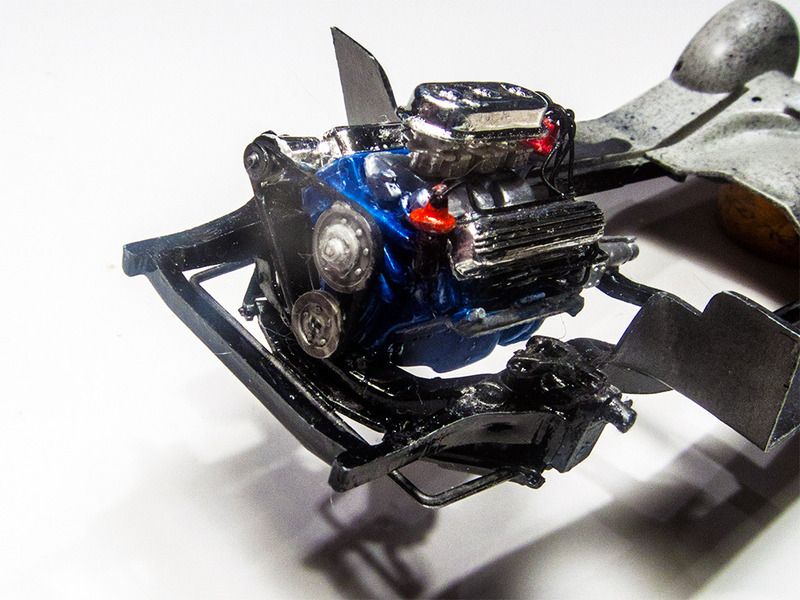 One thing I was concerned about was mounting the Modelhaus customized ’51 Ford grill. During the mockup phase I used a water-soluble temporary adhesive to glue it directly to the bodywork. I had shaved the grill pan to get a nice snug fit but I was concerned about gluing the grill to the paintwork when it came to final assembly. The paint will be matte gray primer and any glue residue would permanently mark the paint. So I came up with a pair of mounting tabs that positively locate the grill shell. I’m hoping I can mount the grill with only glue applied to the tabs and still get a an accurate alignment. 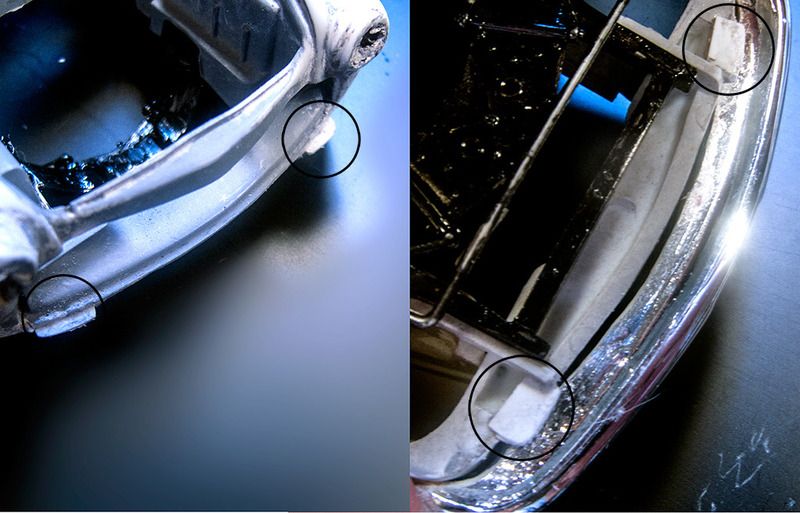 I took another swing at the visor. I epoxied a piece of flower wire to the underside. This is a flexible wire used in flower displays that provides rigidity but is easily formed, which allowed me to shape the visor into a curve to match the roof contour. Since the picture below was taken I has a swing at foiling it but the BMF I had was starting to crinkle on me and I didn’t like the result. So I’ve stripped it and will take another crack at it using a fresh sheet. 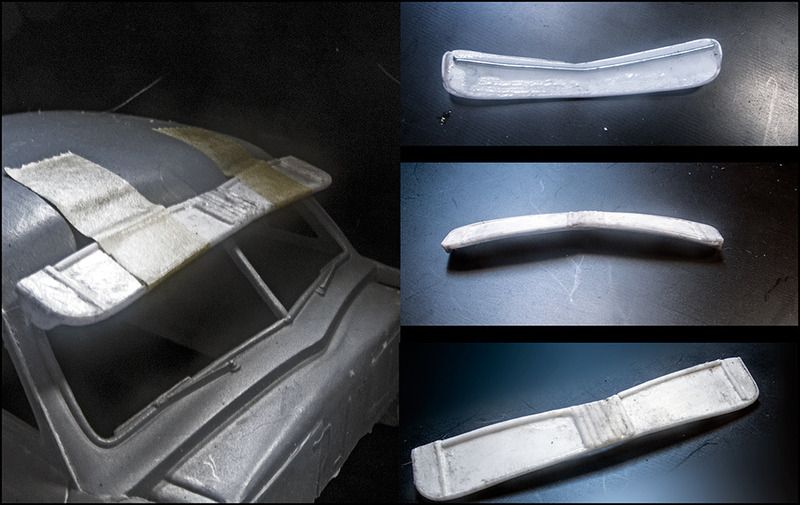 Perhaps the most “experimental” thing about this build is turning out to be the interior. I had originally intended to buy some Scale Motorpsorts upholstery decals. Then I began thinking about it and realized I could make my own and gain more control over the scale and pattern of it. I use Photoshop a lot and it has a feature where you can fill an area with a repeating pattern (called, oddly enough, Pattern Overlay…). There are literally thousands of patterns available as freeware on the internet so I downloaded a set of animal furs and skins, everything from bears and mouse fur to tigers, snakes and lizards. I thought a nice garish leopard skin pattern would go nicely on my primered, slammed, skirted and visored Shoebox. The first step was to create a basic pattern and scale it to the size of the interior. Then I cut patterns for the areas I would “upholster” and scanned them into my computer as transparent Photoshop layers which I gave white outlines. These I laid over my pattern. The result was a graphic that I would print over white decal paper.  Then I cut and shaped some styrene strips to form bolsters for the seats. Here is a photo of the basic yellow interior with the leopard skin decals applied before I glued the black styrene strip bolster shapes into place. One thing that shows all too clearly is the harsh, hard look of the glossy decal stock. 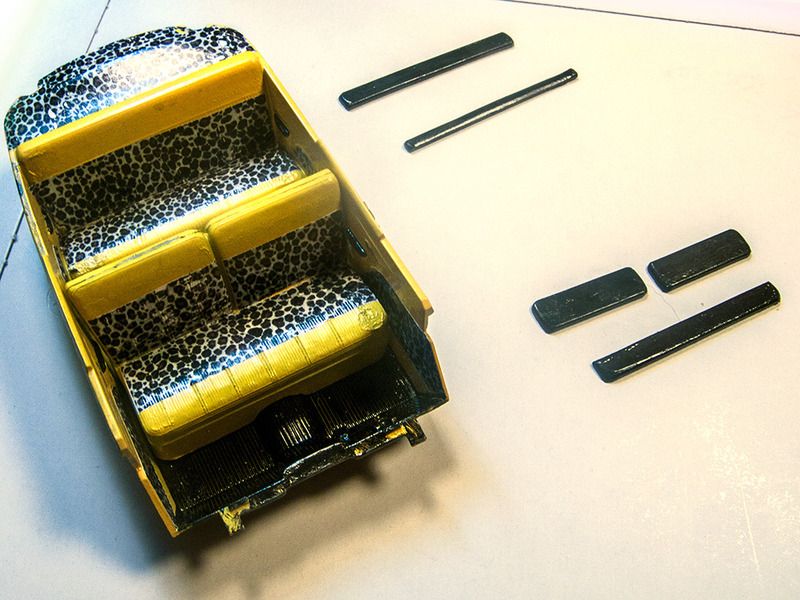 And finally the completed interior. Besides the strong black accents of the bolsters, a coating of Testors Dullcote really tied together the surfaces and made the whole thing look far more natural. Not shown here was a test install in the light grey primered body. The yellow and black against the primer looks pretty sharp. I’m excited to see what the final effect, with chrome trim and glass, will be. 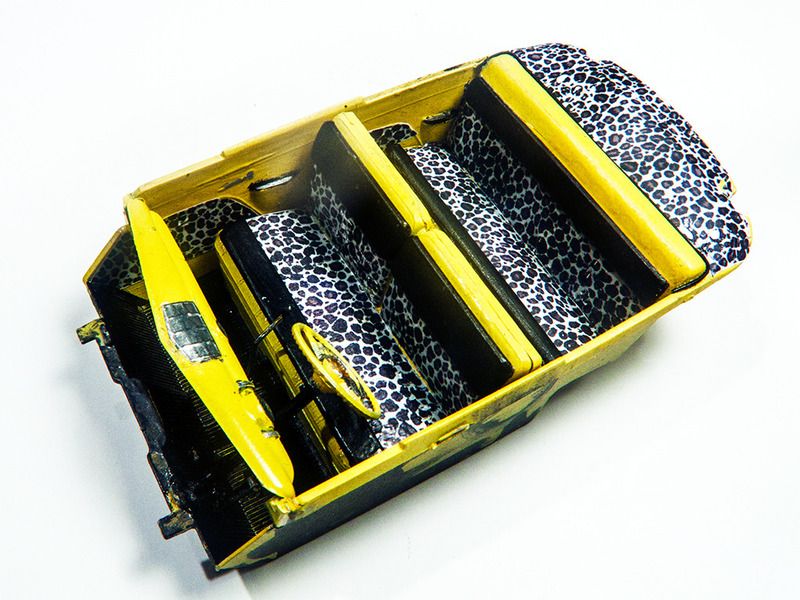 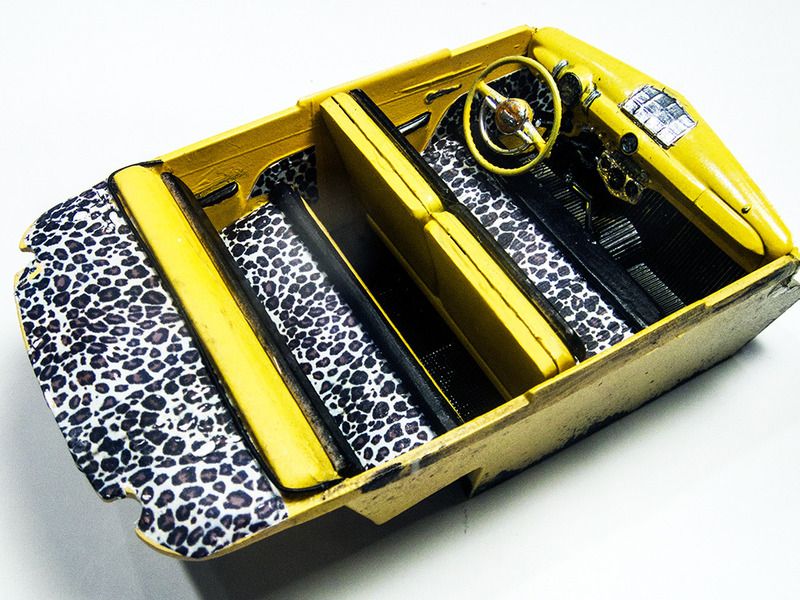 So that’s it so far. Next up is completing the chassis and then the BMF. At which poin I can get to the relatively simple task of final assembly. It’ll be a relief to get past all these subassemblies and see this funky Shoebox up on its wheels and down in the weeds where it belongs! Thanx for lookin’, B. |
|
|
|
Post by IceMan Collections on Apr 20, 2015 8:23:02 GMT -5
This is looking great. Thanks for explaining your lowering process. It seems easier once you see a step by step. I hope the skirts are not clued on yet. It's slightly uneven. That interior is great. Did you just measure the shape of the seats and then draw the white lines over the pattern?
Keep it coming. It looks awesome!
|
|
|
|
Post by harron68 on Apr 20, 2015 10:25:25 GMT -5
Your models are ALWAYS great tutorials and bits of history combined! Thanx for another great one. The grille tabs are an excellent solution and the lowering fotos are helpful to  -ride builders. I've built only two '49 Fords and have a couple of '50 ragtops I hoped to combine into a dual cowl phaeton and a "shorty," but lost the building bug. I hope your model works out, but when things seem to turn bad, they can still be modified to something to be proud of, just not what was planned. Best o' luck, big thanks for your postings! |
|
|
|
Post by Bernard Kron on Apr 20, 2015 12:02:47 GMT -5
... I hope the skirts are not clued on yet. It's slightly uneven. ... Did you just measure the shape of the seats and then draw the white lines over the pattern?... Thanks guys! No, the skirts were just mocked up in position and slid down while I was shooting pics, LOL. For the leopard skin inserts I determined the areas I wanted to cover, in this case the stock curved panels molded into the kit interior's side panels and then traced the shapes onto bits of paper which I cut out. I darkened them with a Magic Marker so they would show up clearly, then scanned them with my cheapo Canon combination printer/copier/scanner. In Photoshop I generated a white outline of the shape which I used the decal master. For the areas between the bolsters on the seat backs, I measured the rectangular areas I would need and drew them in Photoshop. Here's the scan I did for the side panels. I just flipped the shape for the other side: 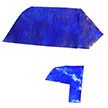 |
|
|
|
Post by rbartrop on Apr 21, 2015 14:53:17 GMT -5
Now that's a technique I'll be adding to my list of things so swipe.
|
|
|
|
Post by Bernard Kron on May 2, 2015 21:03:32 GMT -5
I wasn't sure how the interior would go over but most responses have been positive. A friend of mine says it screams "Peg Bundy"! I think I'm on the home stretch, after some more fabrication and a long period of foiling, including the visor. I made some exhaust tips by flattening and filing some aluminum tubing. The chassis and motor are completed, the grill and skirts are glued into place and I began work on the hood. Shouldn't be too long now... Thanx for lookin', B. 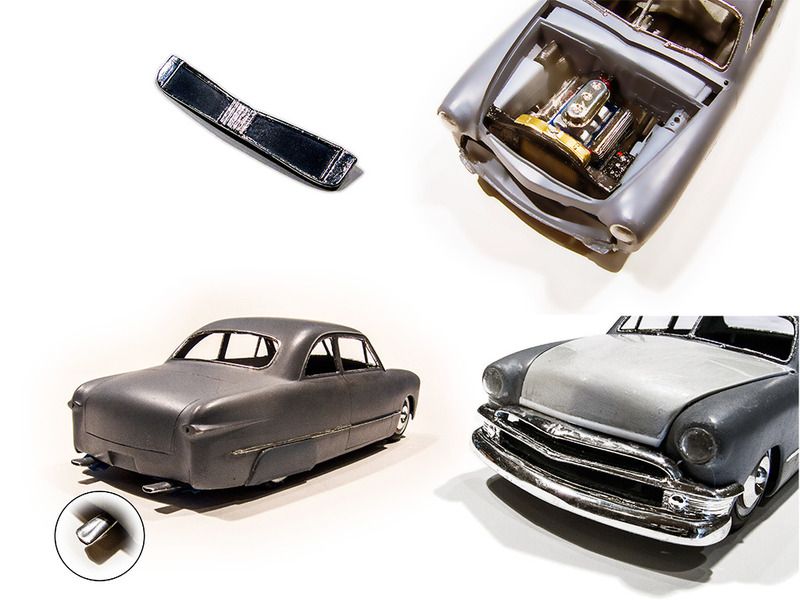 |
|
|
|
Post by boxcar on May 3, 2015 9:03:03 GMT -5
So far, good.
|
|
|
|
Post by Bernard Kron on May 5, 2015 20:24:45 GMT -5
Thanx! I'm solidly in the throes of final assembly, now, so here are some final detail pics as I start to button things up. The hood took quite a bit of fettling with the curvature of the grill requiring some detail sanding of the underside of the molding at the front of the hood. The custom bumper setup from the AMT kit is now installed. It should look pretty good once the license plate is installed and the exhaust tip positioned. And an overhead shot showing the leopard skin package tray peaking through the rear window. I hope to have this done by the weekend. Thanx for lookin', B. 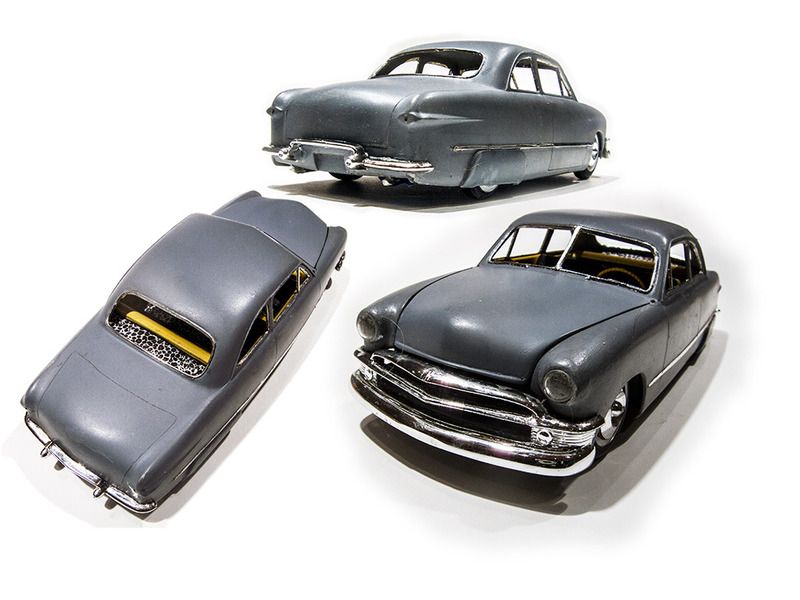 |
|


 -ride builders. I've built only two '49 Fords and have a couple of '50 ragtops I hoped to combine into a dual cowl phaeton and a "shorty," but lost the building bug. I hope your model works out, but when things seem to turn bad, they can still be modified to something to be proud of, just not what was planned. Best o' luck, big thanks for your postings!


 It's an interweb thing.....