Post by Bernard Kron on Feb 26, 2015 1:01:12 GMT -5
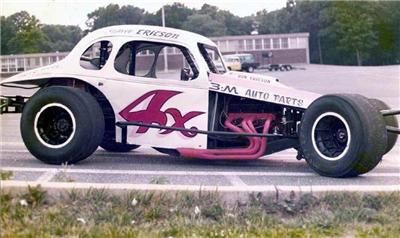
I recently joined a specialist forum whose focus is primarily in the area of circle track racing of one form or another, especially dirt track racing. Dirt track racing is not something I know a lot about, but having watched on television and seen some very impressive short track cars of various sorts both in 1:1 and in scale I thought I would try my hand at it. The members of the forum I joined, Scale Racing Lobby, are mostly based in the southeast with some members in the northeast so the style of racing they know about is primarily from those areas. They have been very welcoming and have been able to point me to lots of sources for history and information on these highly regional types of racing series.
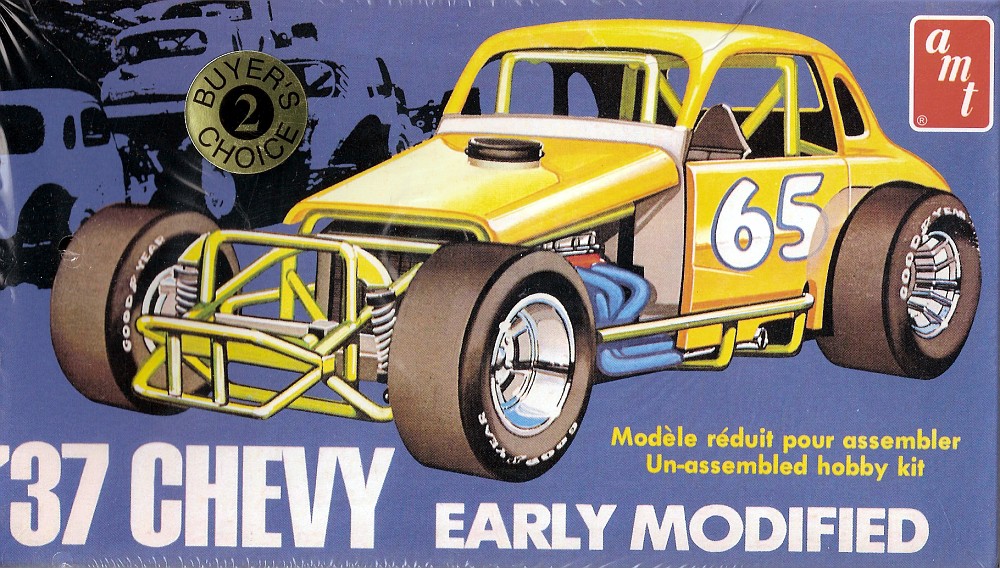
For my first project in this genre I thought it would be best to limit myself to a fairly standard kit and build it largely out-of-the-box. While attending the recent NNL West show I picked up an AMT '37 Chevy Modified kit:
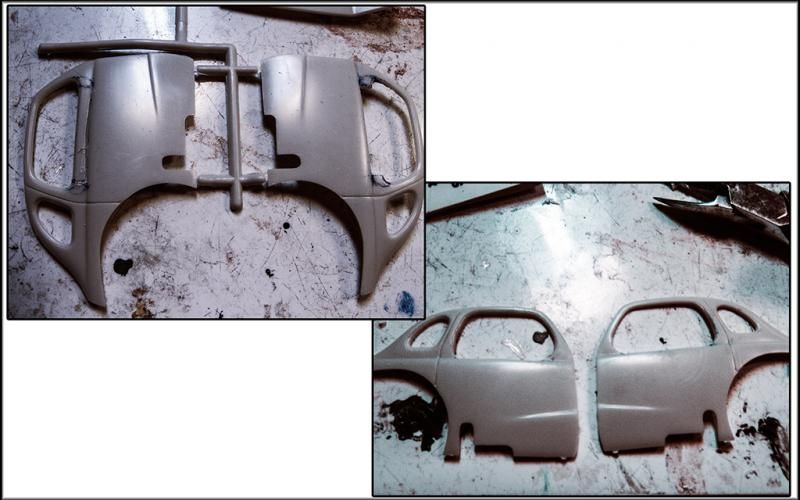
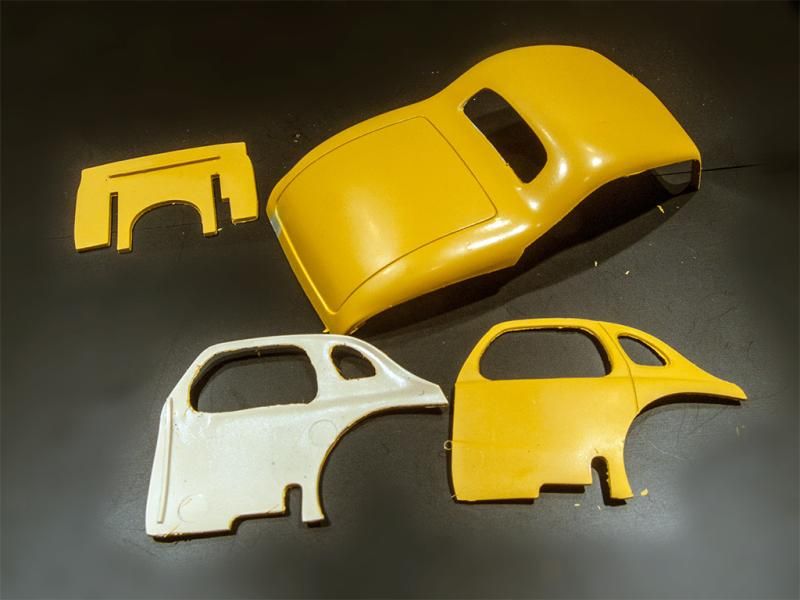
I'm sticking closely to the sequence of build in the instructions as I figure they'll help me avoid any construction issues. So far this seems like a good plan. Stealing an idea from one of the forum member's models, I radiused the opened-up door windows without removing material from the door by the A pillars. The instruction suggest removing the door window panel entirely as an option but I thought this would weaken the body structure too much. This method looks much tidier. My approach was to determine where the stock corner radiuses begin along the bottom edge and use those points for the ends of my horizontal cut. I first cut vertically at those points with my trusty photo-etch saw, then scored my way through the reveal edge. After removing that piece, having marked out what I thought would be an attractive looking radius, I used a round sanding stick to shape the new corners. Here's some pics:
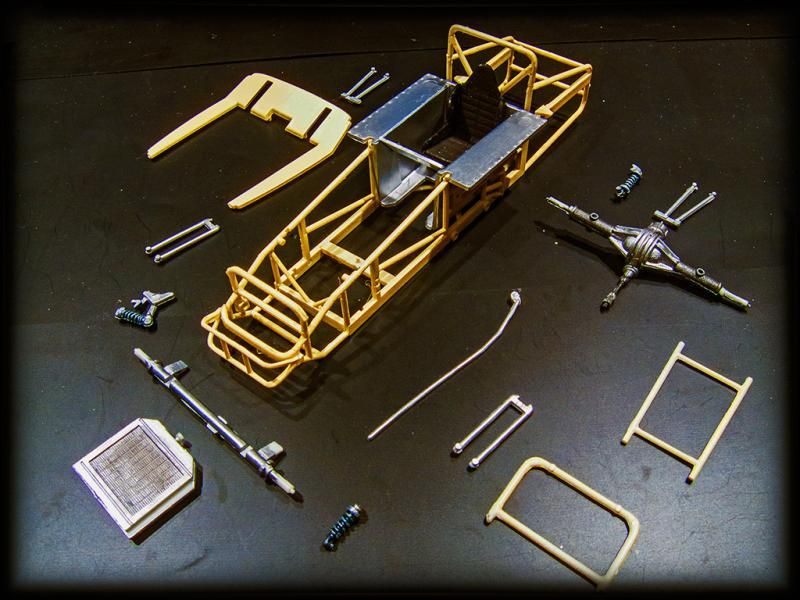
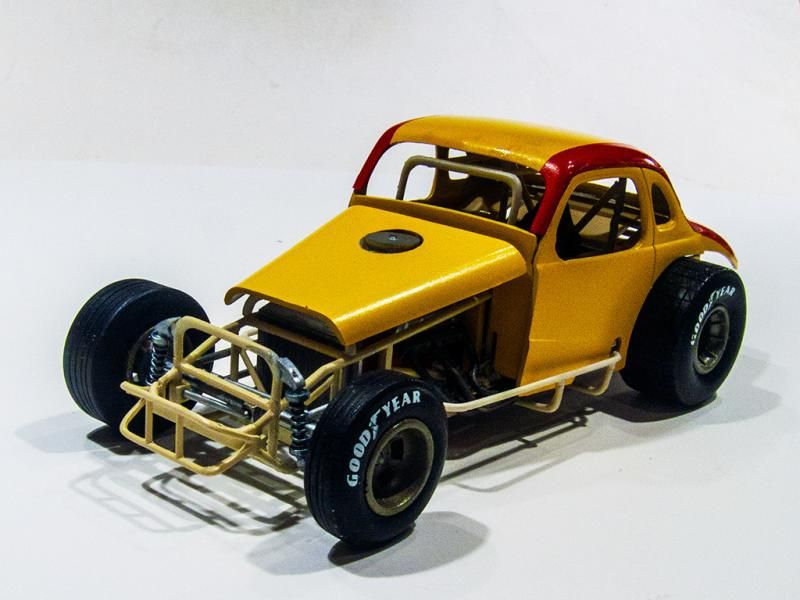
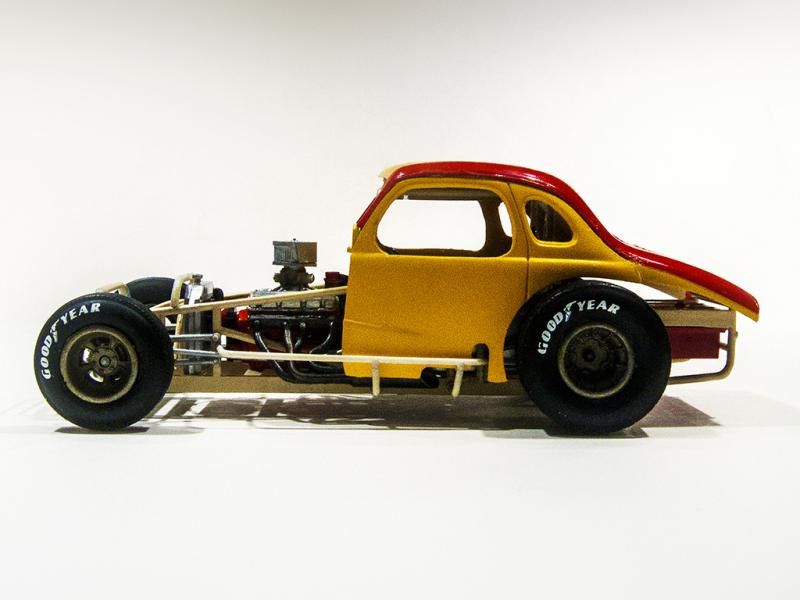
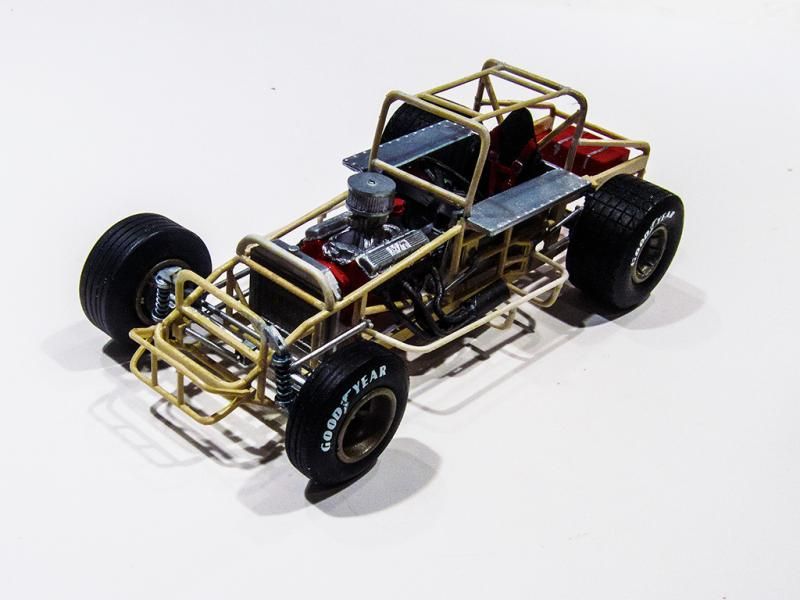
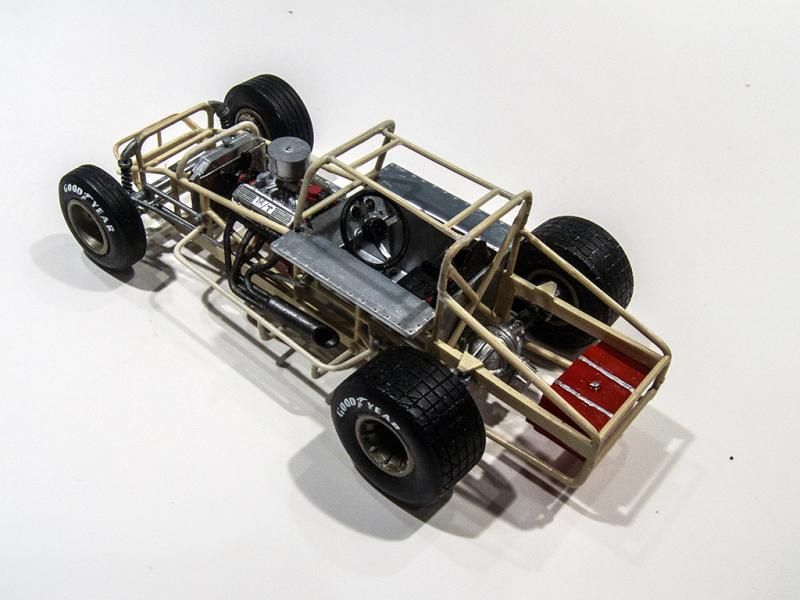
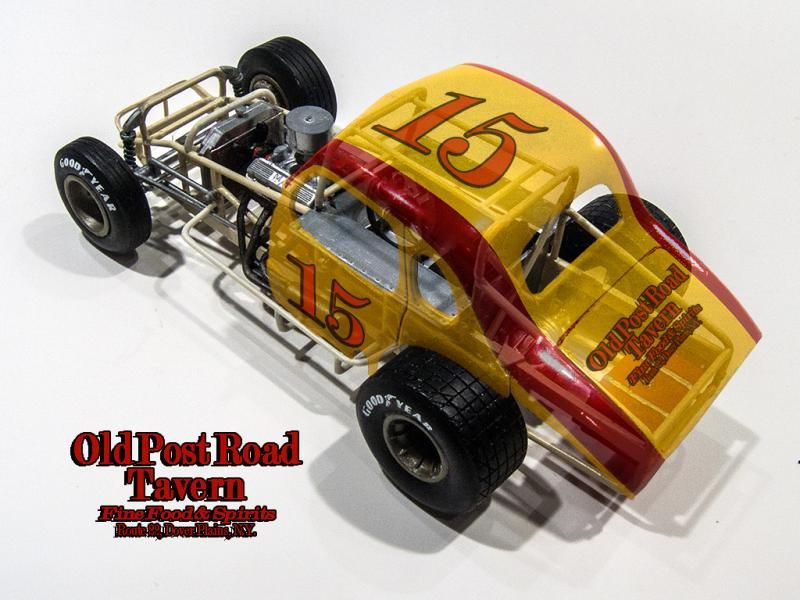
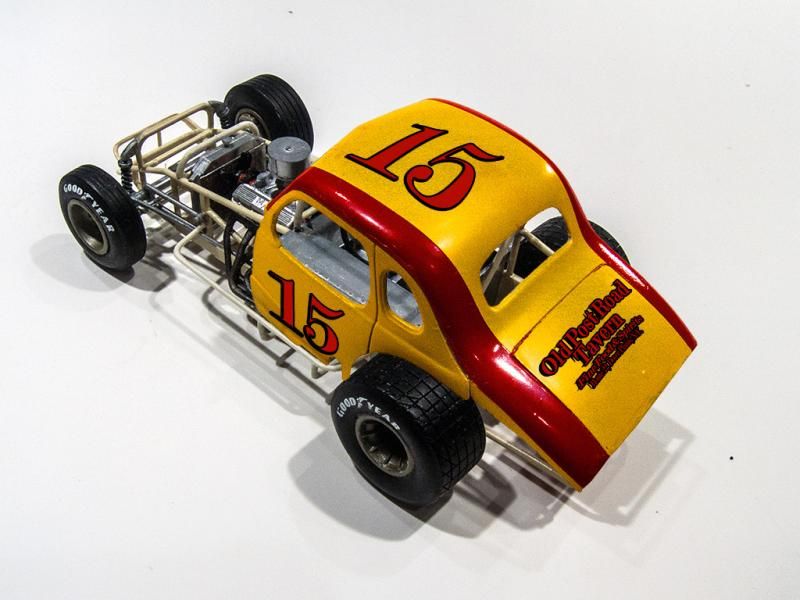
The last few days have mainly been about painting and detailing. I'm trying to give it a utilitarian look which is the vibe I'm getting from the pictures of the original cars that the kit seeks to model. The chassis and all the interior surfaces except for the chassis tin work are painted Duplicolor Cream, a kind of medium light beige color. The cockpit tin is finished n Testors Metalizer Aluminum Plate. The basic body color is Duplicolor Chrome Yellow. I'm thinking I'll add some red trim paint along the edges of the roof and rear deck and red numbers and lettering to match which I'll do with home made decals. The motor is standard Chevy Engine Orange.
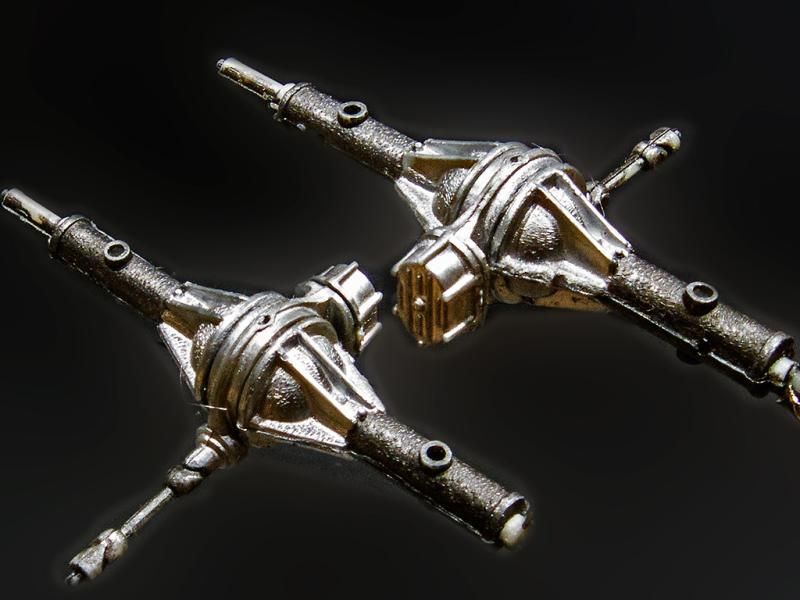
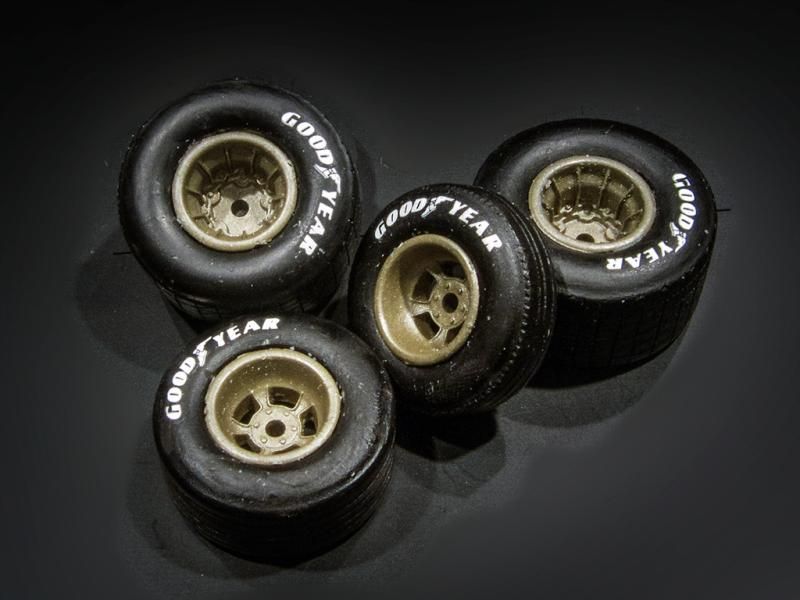
All the chrome bits have been stripped and refinished in various shades of Testors Metalizer. The exception is the wheels. I'm using the kit wheels but they have been refinished in Testors Acryl Jet Exhaust, which is a pretty close match to the Dow 7 anti-corrosive finish used on Halibrand mags. The tires are from Big Donkey with a small "pony tire" for the inside front and a staggered oversize outside front. I've included a picture of the rear quick change because I thought it was an especially nice piece in the kit and it responded to paint detailing rather well.
Thanx for lookin',
B.
For my first project in this genre I thought it would be best to limit myself to a fairly standard kit and build it largely out-of-the-box. While attending the recent NNL West show I picked up an AMT '37 Chevy Modified kit:

I'm sticking closely to the sequence of build in the instructions as I figure they'll help me avoid any construction issues. So far this seems like a good plan. Stealing an idea from one of the forum member's models, I radiused the opened-up door windows without removing material from the door by the A pillars. The instruction suggest removing the door window panel entirely as an option but I thought this would weaken the body structure too much. This method looks much tidier. My approach was to determine where the stock corner radiuses begin along the bottom edge and use those points for the ends of my horizontal cut. I first cut vertically at those points with my trusty photo-etch saw, then scored my way through the reveal edge. After removing that piece, having marked out what I thought would be an attractive looking radius, I used a round sanding stick to shape the new corners. Here's some pics:

The last few days have mainly been about painting and detailing. I'm trying to give it a utilitarian look which is the vibe I'm getting from the pictures of the original cars that the kit seeks to model. The chassis and all the interior surfaces except for the chassis tin work are painted Duplicolor Cream, a kind of medium light beige color. The cockpit tin is finished n Testors Metalizer Aluminum Plate. The basic body color is Duplicolor Chrome Yellow. I'm thinking I'll add some red trim paint along the edges of the roof and rear deck and red numbers and lettering to match which I'll do with home made decals. The motor is standard Chevy Engine Orange.
All the chrome bits have been stripped and refinished in various shades of Testors Metalizer. The exception is the wheels. I'm using the kit wheels but they have been refinished in Testors Acryl Jet Exhaust, which is a pretty close match to the Dow 7 anti-corrosive finish used on Halibrand mags. The tires are from Big Donkey with a small "pony tire" for the inside front and a staggered oversize outside front. I've included a picture of the rear quick change because I thought it was an especially nice piece in the kit and it responded to paint detailing rather well.
Thanx for lookin',
B.







 It's an interweb thing.....