|
|
Post by lo51merc on Aug 31, 2009 15:32:31 GMT -5
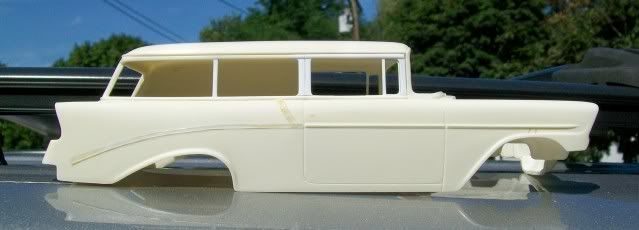
I've had the Revell Nomad kit collecting dust for a long time. A few weeks ago I ordered the resin Sedan Delivery from Modelhaus. The SD is basically a Handyman with no side windows behind the doors. The Handyman in the picture was mine until about 23 years ago. So......my project will be to convert the SD to a Handyman wagon. I think the biggest challenge will be to recreate the stock side trim. I don't know when I'll get started on it, maybe this year I hope. I won't be able to run the same tires I had, but I can get similar mags. Mine were ET II's, (I still have them!) but Americans will look the same. I'll be keeping the colors as close as I can to the 1:1. Gary  |
|
|
|
Post by kirbside on Aug 31, 2009 16:00:56 GMT -5
Looks like your off to a good start. I have always liked these wagons.
|
|
|
|
Post by virgmeister on Sept 1, 2009 8:38:23 GMT -5
I will be looking out for this build. I like the blue.
Virgil
|
|
|
|
Post by lo51merc on Sept 7, 2009 8:39:34 GMT -5
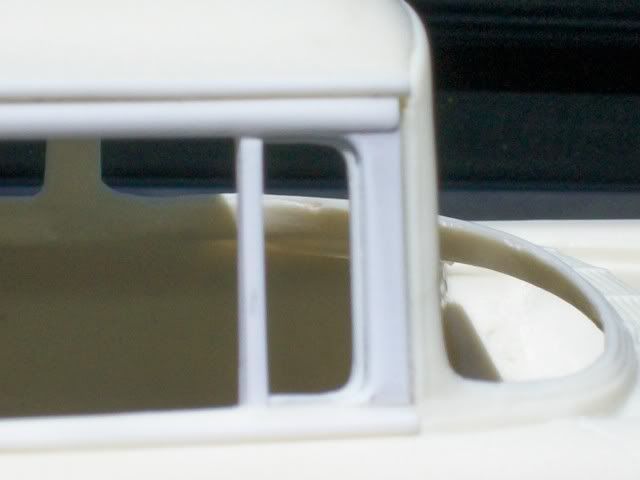
My progress so far has all been on the passenger side. Starting from the front, I softened the exaggerated crease at the top of the fender and also corrected the area below and forward of the side fender trim. I stole the side trim from my 1972 edition of the Revell 56 Chevy. I stripped the chrome for gluing purposes, and I'll be foiling the trim after painting anyway. I had to modify the small piece of trim to fit. The major area of work was in the windows. The cowl is about 3/32" too far back so I had to shorten the door window to compensate for it. The door window has been totally replaced from the beltline up to the drip molding with sheet styrene. The side window vertical moldings have also been replaced along with the beltline molding which I made from a piece of .035 styrene rod that I scraped down to about .017 thick. I'll sand the molding down to flatten it like the prototype. I still have to make the small trim piece on the front fender that seperates the two-tone paint jobs. Gary    |
|
|
|
Post by moparmarc68 on Sept 7, 2009 9:38:07 GMT -5
You are off to a great start. What are you using to cut the resin?
|
|
|
|
Post by olderguy on Sept 17, 2009 9:27:24 GMT -5
Guy your wrk. looks great!!! Would you be interested in making a piece of frt. fender trim for a DM diecast that I'm doing my thing to. Seems my skills aren't as good as I thought they were, could be the arther in my stubby fingers. After 40 yrs. as a millwright my hands don't wrk. as good as they used to. Sooo sad... for me. Please email or pm me, I'm willing to pay a reasonabale amount for your time and skill.
|
|
|
|
Post by lo51merc on Jan 28, 2010 14:15:43 GMT -5
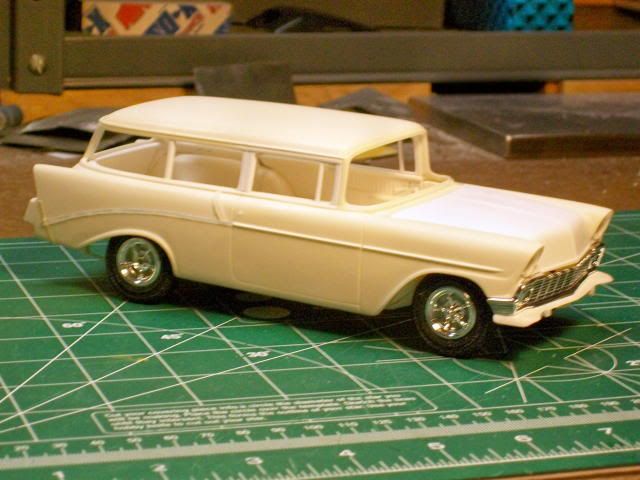
To finally get back to this and answer moparmarc68's question, I've used a Dremel, files, and sandpaper to work on the resin. And, olderguy, my skills aren't good enough to tackle anything like you had asked about. Sorry to you both for the delay in answering your questions. I pulled this back out the other day and restarted work on it. The body itself was pretty much finished last fall and the interior rework was started. I finished modifying the rear interior side panels and assembled the front and rear suspensions. I think there are some inaccuracies in the Revell 56 Nomad body because I couldn't get the rear wheel to fit in the wheel well like my 1:1 Handyman. The front is stock and the rear is jacked up a scale six inches to approximate the correct stance. I had read on some forums about the "snow plow" front bumper so I knew I'd have to fix that. My solution was to use the front bumper from the old Revell 56 Chevy 2 dr sedan (60's issue) kit. I modified the stock Nomad front pan to get the bumper closer to the grille. Gary  |
|
|
|
Post by RodBurNeR on Jan 29, 2010 2:28:47 GMT -5
looks cool, keep it coming!
|
|