|
|
Post by TooOld on Jan 23, 2022 16:48:16 GMT -5
Started this one last week and it's something new for me because believe it or not I've never built a Japanese kit before , I have a few but I just always build American makes instead . I've always thought the MGB-GT was a great little sports car (except for the Lucas electrical stuff) so I had to build this one ! The C1 Trans Kit comes with everything needed to convert the interior plus clear sheet for the glass . I'm using the '74 Aoshima kit which is identical to the more expensive '68 MGB kit but has the added urethane bumpers and the steel Rallye Wheels (I've been corrected and told they are called Rostyle Wheels). 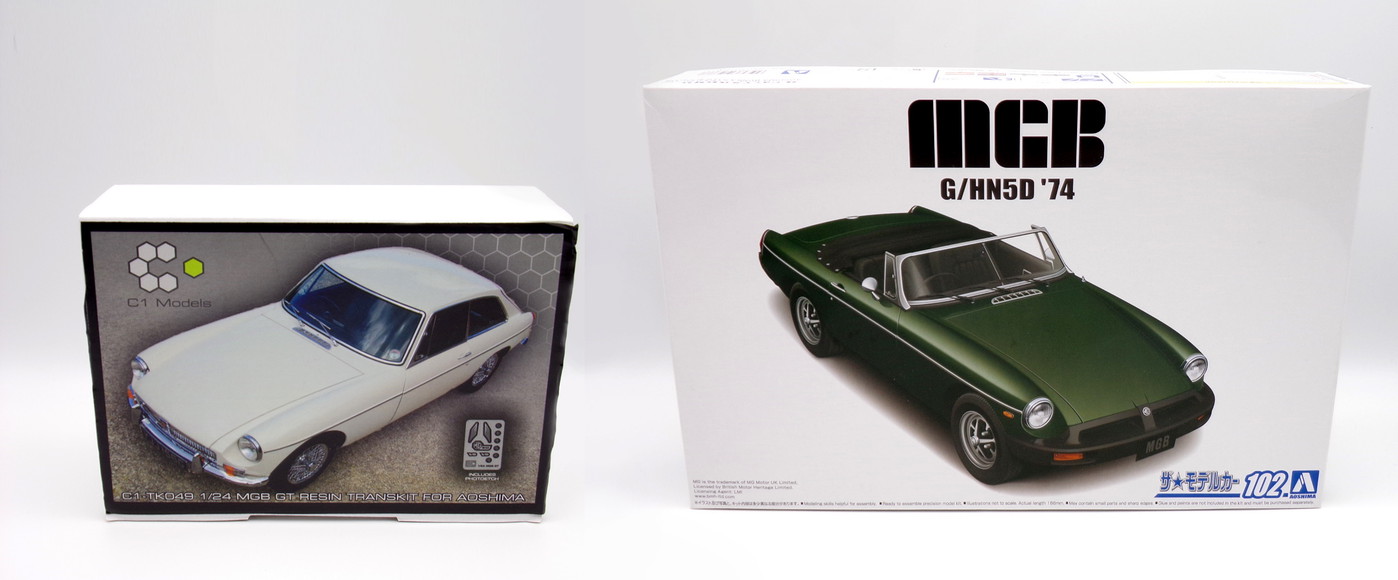 The C1 body is beautifully cast and should require very little except prepping for paint . 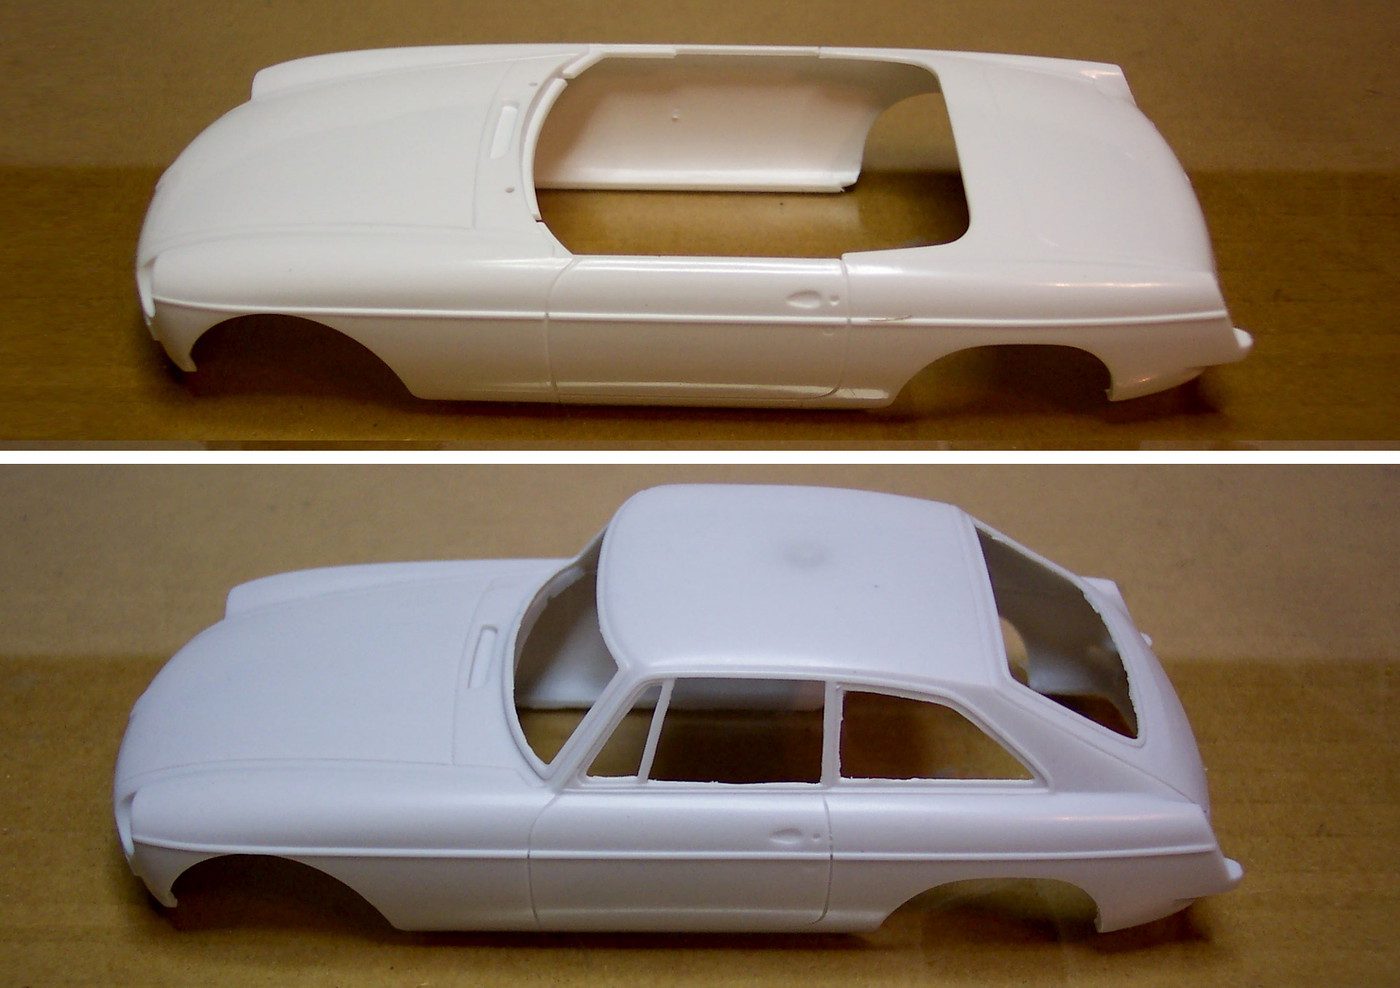 Inside the body C1 has molded in recesses to make installing the glass much easier . 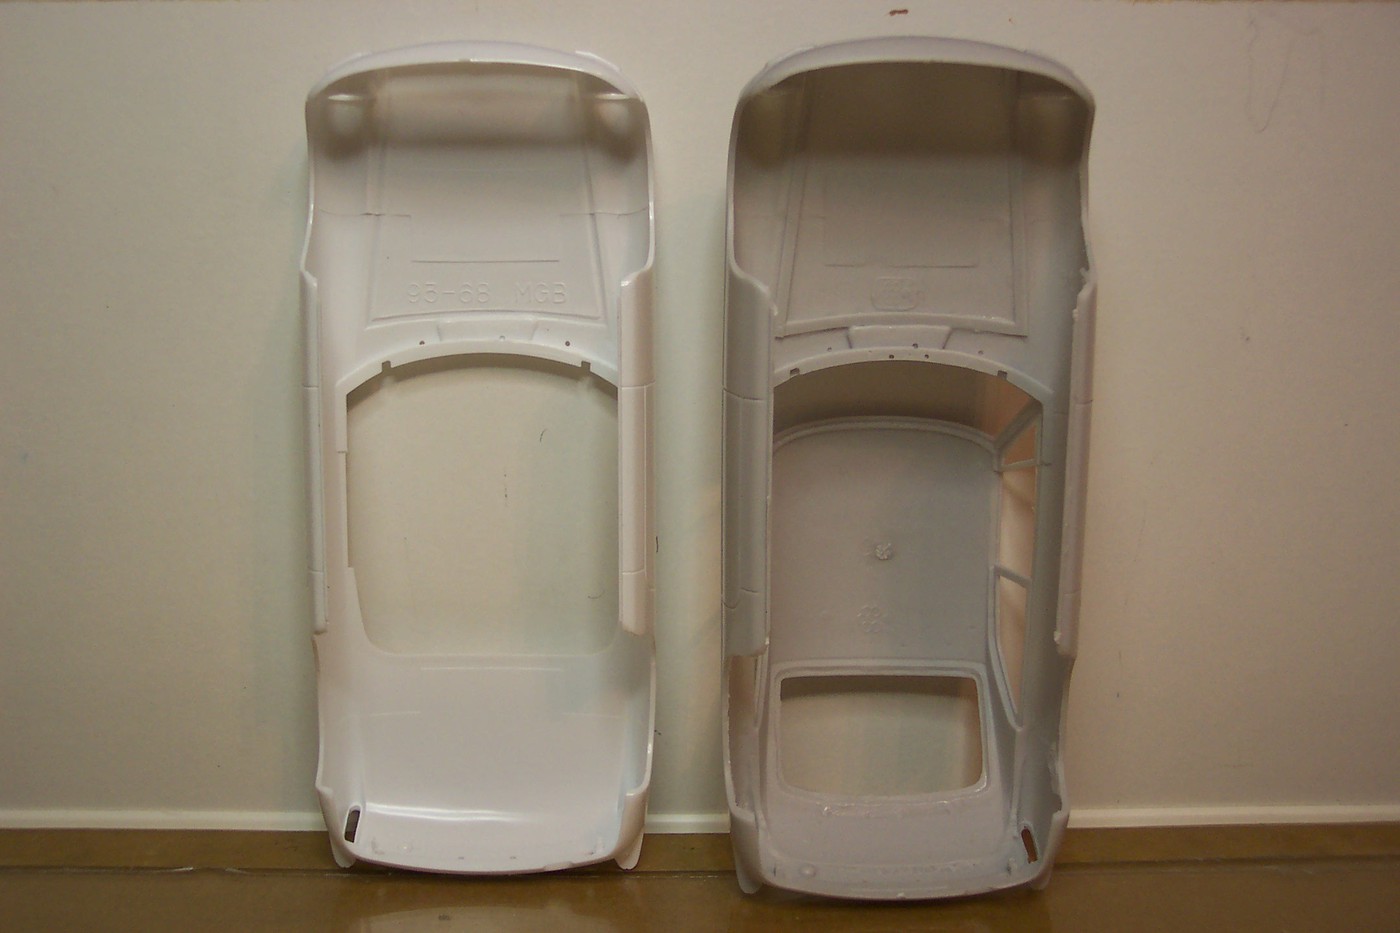 I used some Detail Tack to assemble the suspension and taped the roadster interior together so I could test fit the body . 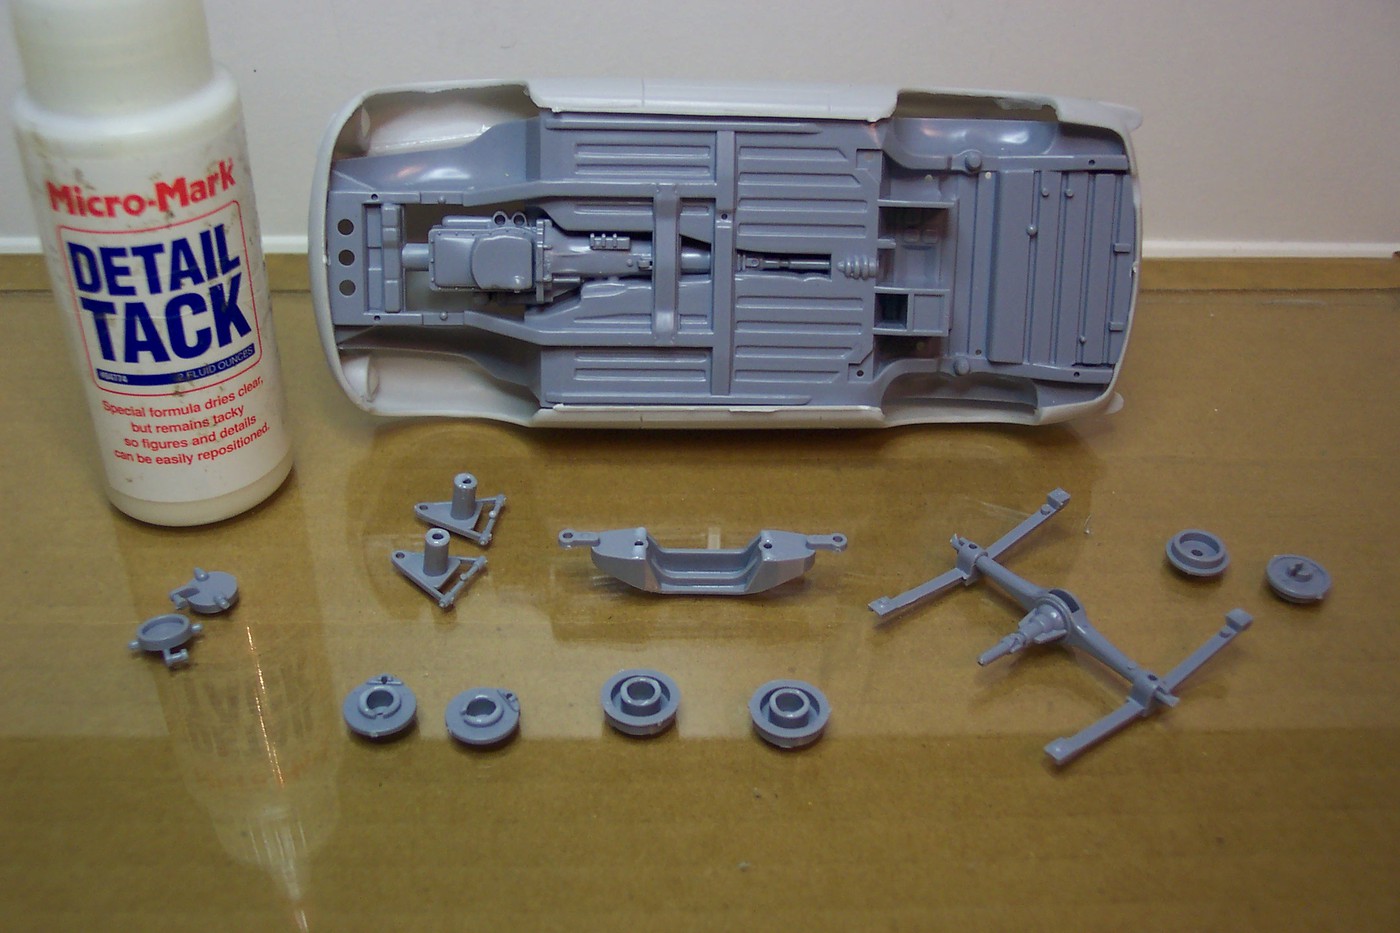 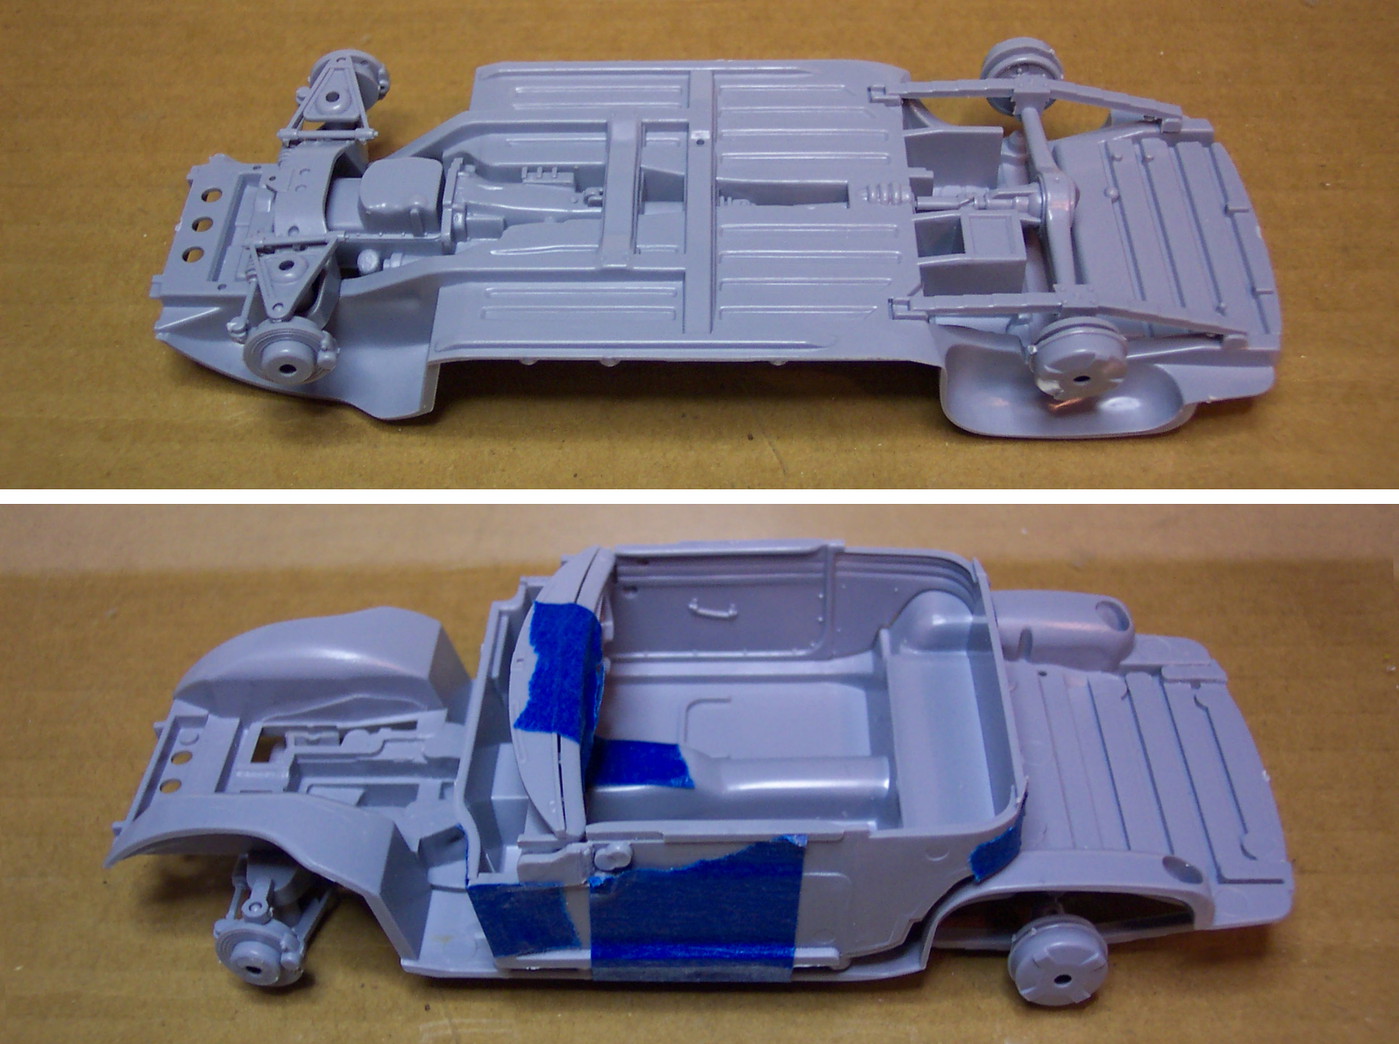 It all fits very nicely into the resin body . 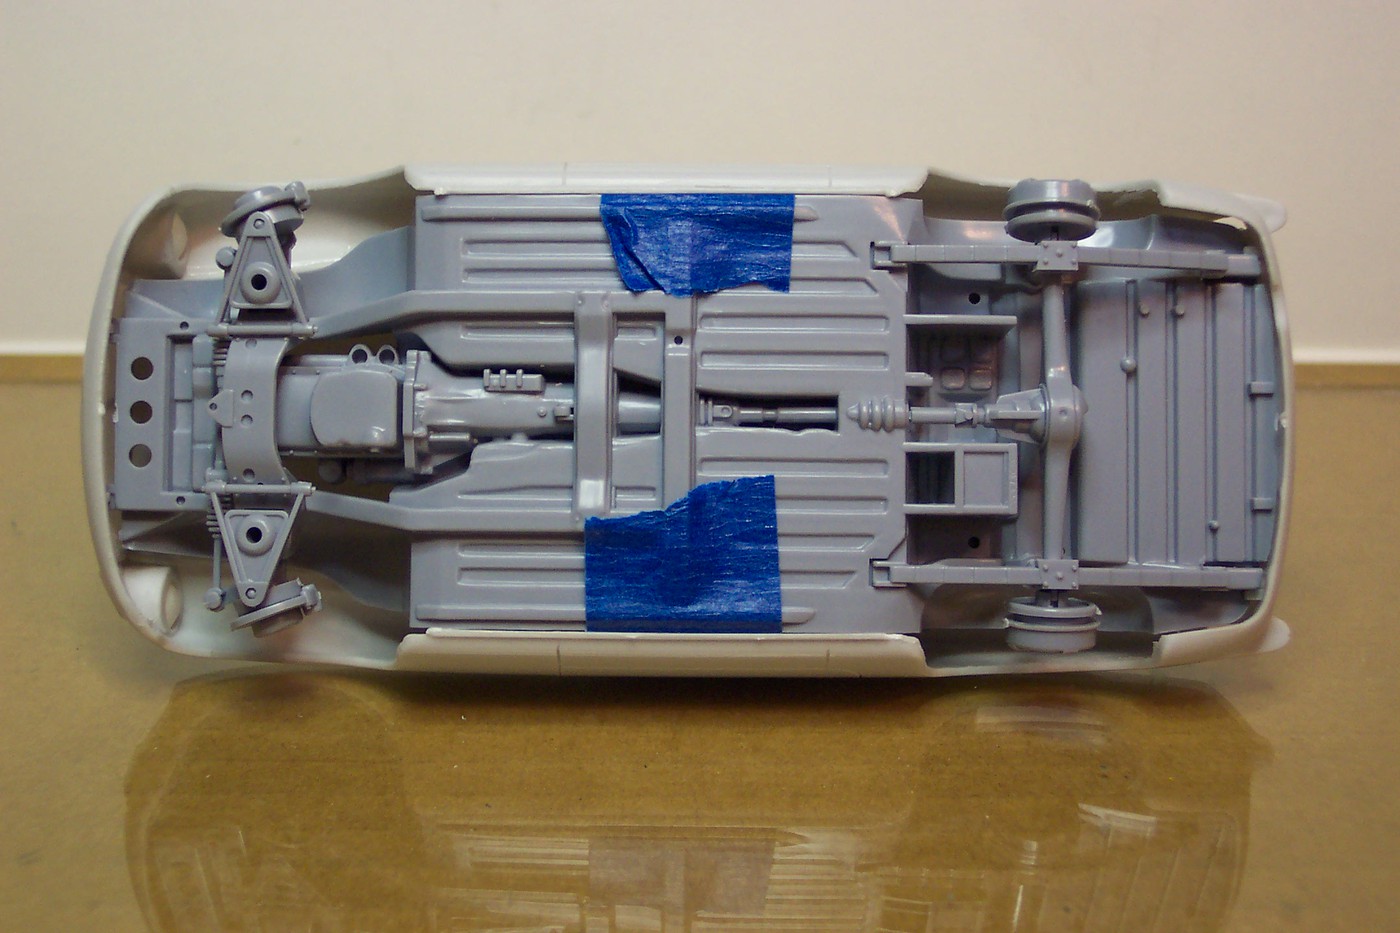 It's hard to get a good pic but the dash and interior also fit just like they do in the Aoshima body , very nice . 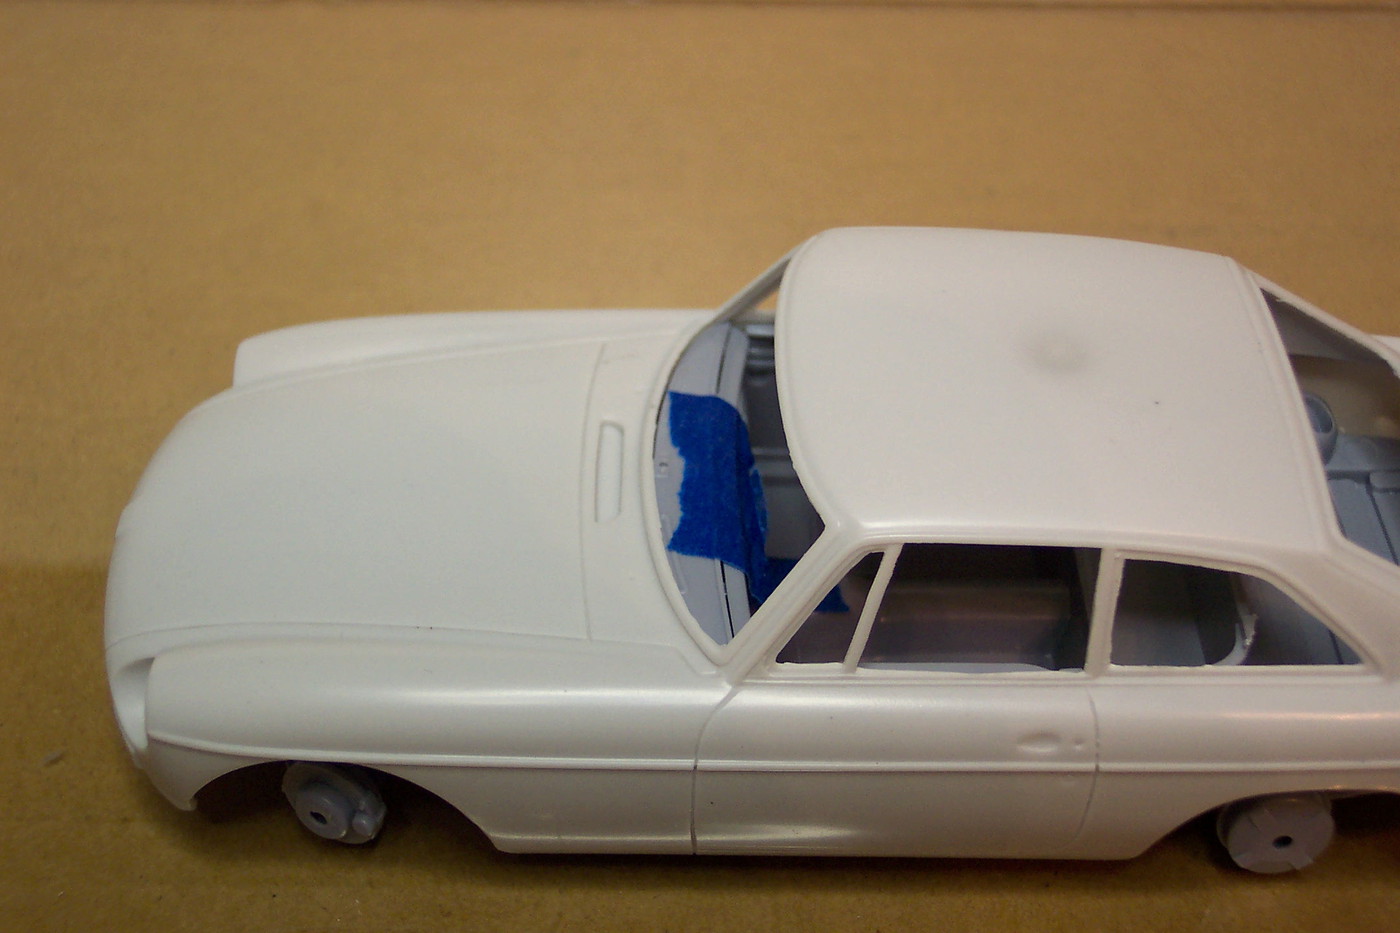 Up on all four to check the ride height . I also bought the Minilites from C1 but I think I prefer the look of the Rallye Wheels . 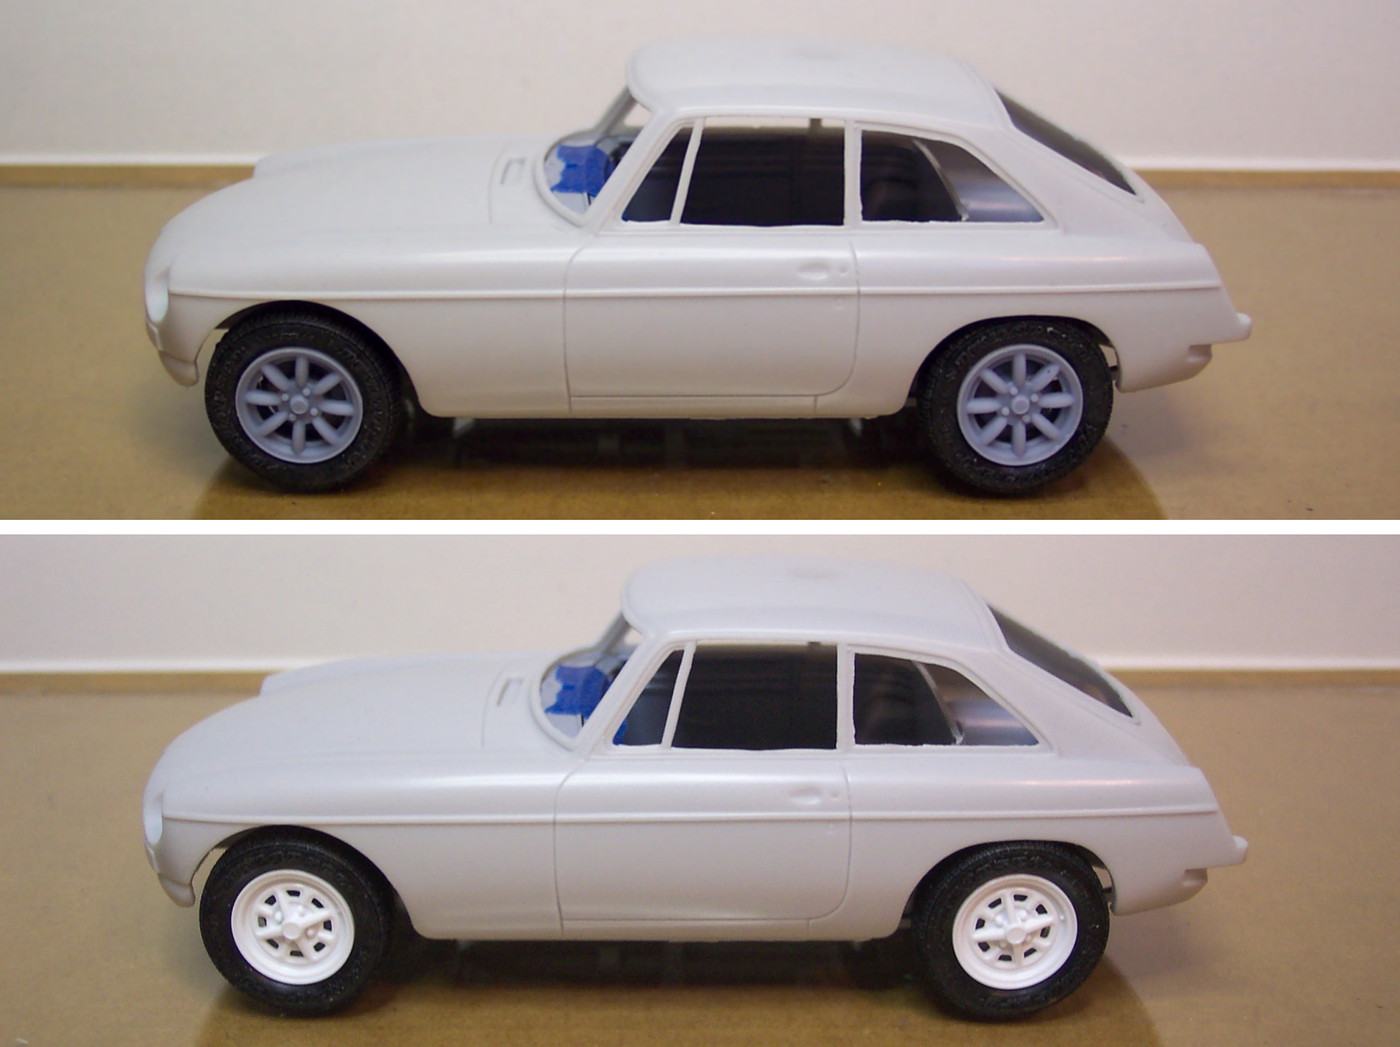 Here's the paint color I'll be going with , it's called Bronze Yellow . 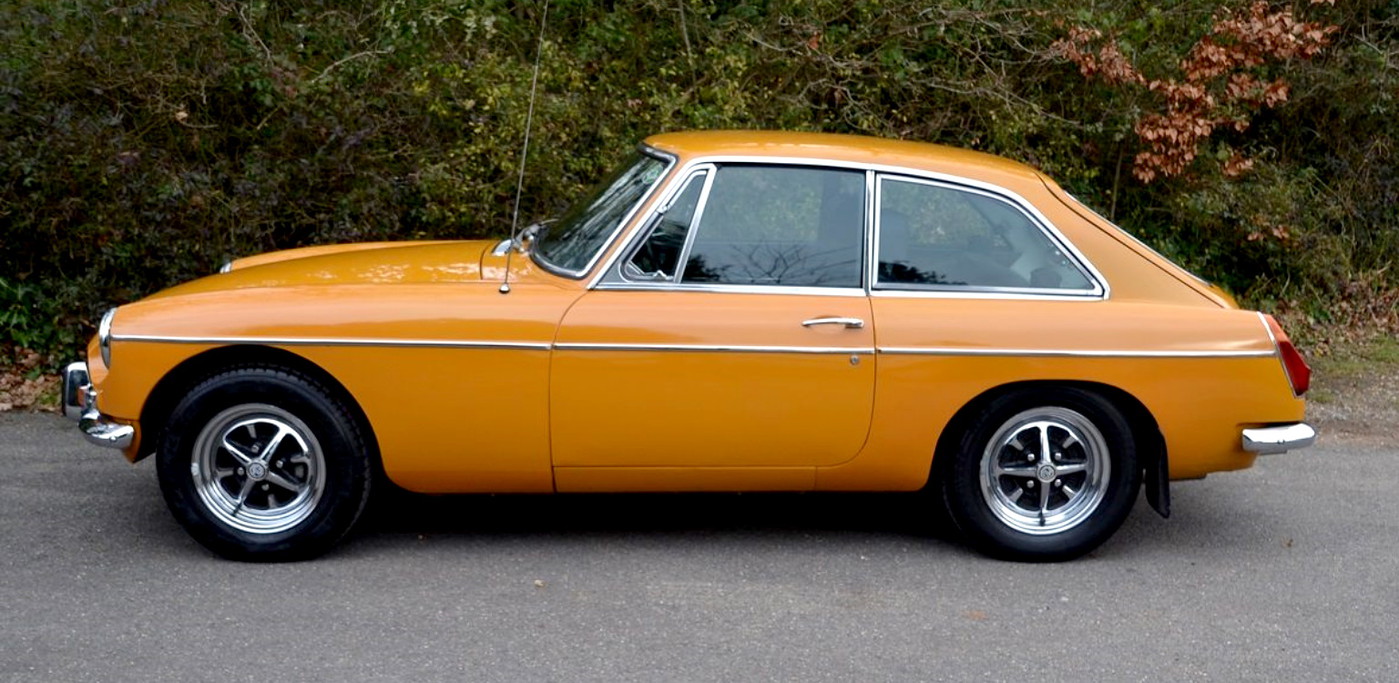 I'll start modifying the interior next , stay tuned ! |
|
|
|
Post by Pontz on Jan 23, 2022 23:36:51 GMT -5
Ah yes, Lucas - prince of darkness!
That resin body looks really nice, and looks like it captures the shape of the real car well. Wishing you good fortune that the rest of the build goes as well as the start.
|
|
|
|
Post by jbwelda on Jan 24, 2022 13:27:14 GMT -5
That whole "POD" thing is vastly overstated. In my experience owning 3 British cars (54 MGTF, 66 Spridget and 58 Lotus 7) all my electrical problems could and were traced to faulty wiring. Once the aged wiring harnesses were replaced with quality ones (NOT Moss Motors...) all the electrics worked fine until the day I sold the cars. Couldn't believe it myself, but thats what happened. All but the electric fuel pump in the TF, when that failed I replaced with a Bosch unit and used that till the day I offed the car (that one I bought in 1965 and sold in about 2001 sometime). On to the model, I bought one of the C1 MGBGT body kits too. I immediately noticed something that your photos bring back to mind: the rear of the car, from the back of the doors on back, is not at all right. Way too stubby, and the rear window angle is off. Makes it look like it was sawed off in the rear. Might look better with the bumper in place but I kind of don't think so. Thats why when I saw the actual body, I put off building it...originally I was planning on clearing the bench and going right into it, now it sits in the "probably not" pile. Regardless, I look forward to seeing what you do with it. Personally I would use the mini lites, but I would lower the car a good quarter inch all around. I built the AAM resin body some many years ago, was not at all up to the casting quality of the C1 version, but it was shaped better to my eye.   (rear wheels look a little hinkey...have since straightened them out and lowered the car a bit more than these photos show. jb |
|
|
|
Post by TooOld on Jan 25, 2022 6:09:47 GMT -5
Ah yes, Lucas - prince of darkness! That resin body looks really nice, and looks like it captures the shape of the real car well. Wishing you good fortune that the rest of the build goes as well as the start. Thanks Ponce ! |
|
|
|
Post by TooOld on Jan 25, 2022 6:31:36 GMT -5
That whole "POD" thing is vastly overstated. In my experience owning 3 British cars (54 MGTF, 66 Spridget and 58 Lotus 7) all my electrical problems could and were traced to faulty wiring. Once the aged wiring harnesses were replaced with quality ones (NOT Moss Motors...) all the electrics worked fine until the day I sold the cars. Couldn't believe it myself, but thats what happened. All but the electric fuel pump in the TF, when that failed I replaced with a Bosch unit and used that till the day I offed the car (that one I bought in 1965 and sold in about 2001 sometime). On to the model, I bought one of the C1 MGBGT body kits too. I immediately noticed something that your photos bring back to mind: the rear of the car, from the back of the doors on back, is not at all right. Way too stubby, and the rear window angle is off. Makes it look like it was sawed off in the rear. Might look better with the bumper in place but I kind of don't think so. Thats why when I saw the actual body, I put off building it...originally I was planning on clearing the bench and going right into it, now it sits in the "probably not" pile. Regardless, I look forward to seeing what you do with it. Personally I would use the mini lites, but I would lower the car a good quarter inch all around. I built the AAM resin body some many years ago, was not at all up to the casting quality of the C1 version, but it was shaped better to my eye. jb I agree that Lucas gets a bad rap , and it's probably not all deserved . I spent 19 years working on and restoring Cobras as well as building dozens of replicas and the problems I remember weren't the actual wiring but the cheaply made components like connectors , switches , lights , etc . . . And the solder connections on original Lucas connectors were horrendous . And yes Moss Motors was even worse ! As for the C1 Casting I agree the rear window and quarter window appear to be angled wrong or maybe the rear is just squished down a little bit (?) but I can live with it . I think with the taillights and bumper installed it looks okay . Foiling the window trim helps a bunch too . 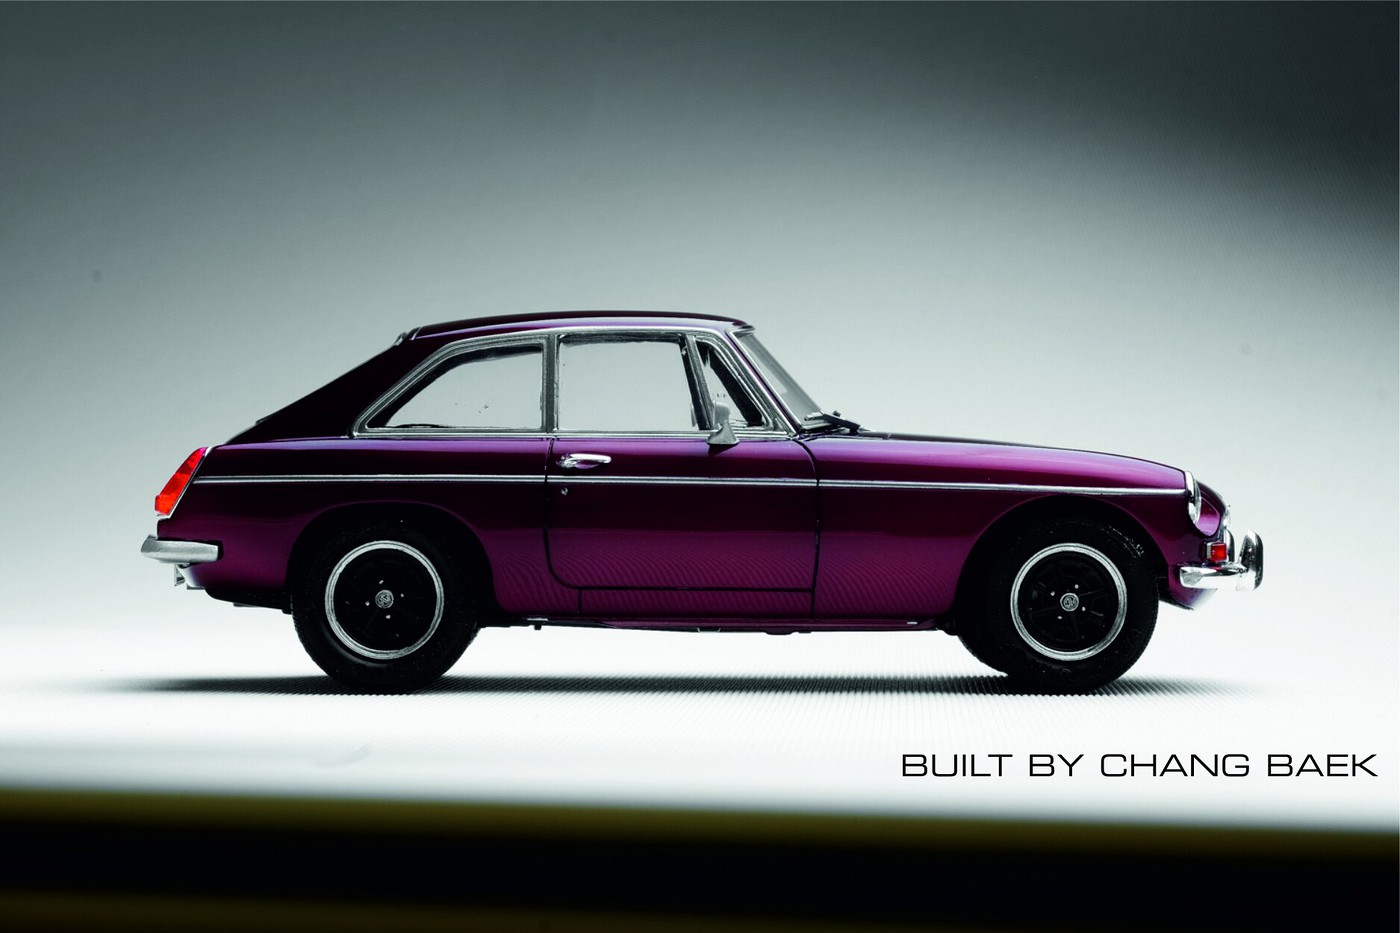 |
|
|
|
Post by TooOld on Jan 25, 2022 11:35:50 GMT -5
Here's the interior pieces from C1 , all very cleanly molded with no clean up required . Also included is a left-hand dashboard , correct mirrors , and a nice PE set . Note the folding rear seat . 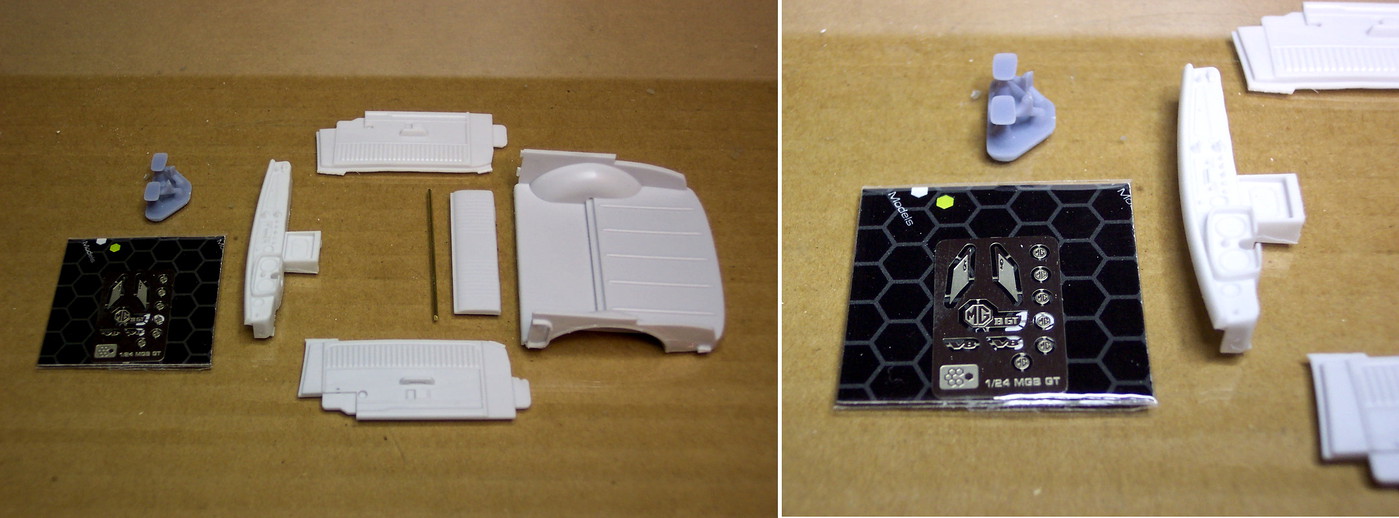 The modification to the Aoshima parts require the removal of the shaded areas on the chassis plate and removing the rear portion of the interior .  I started to use a razor saw but switched to my Dremel , more clean up but it's so much quicker . 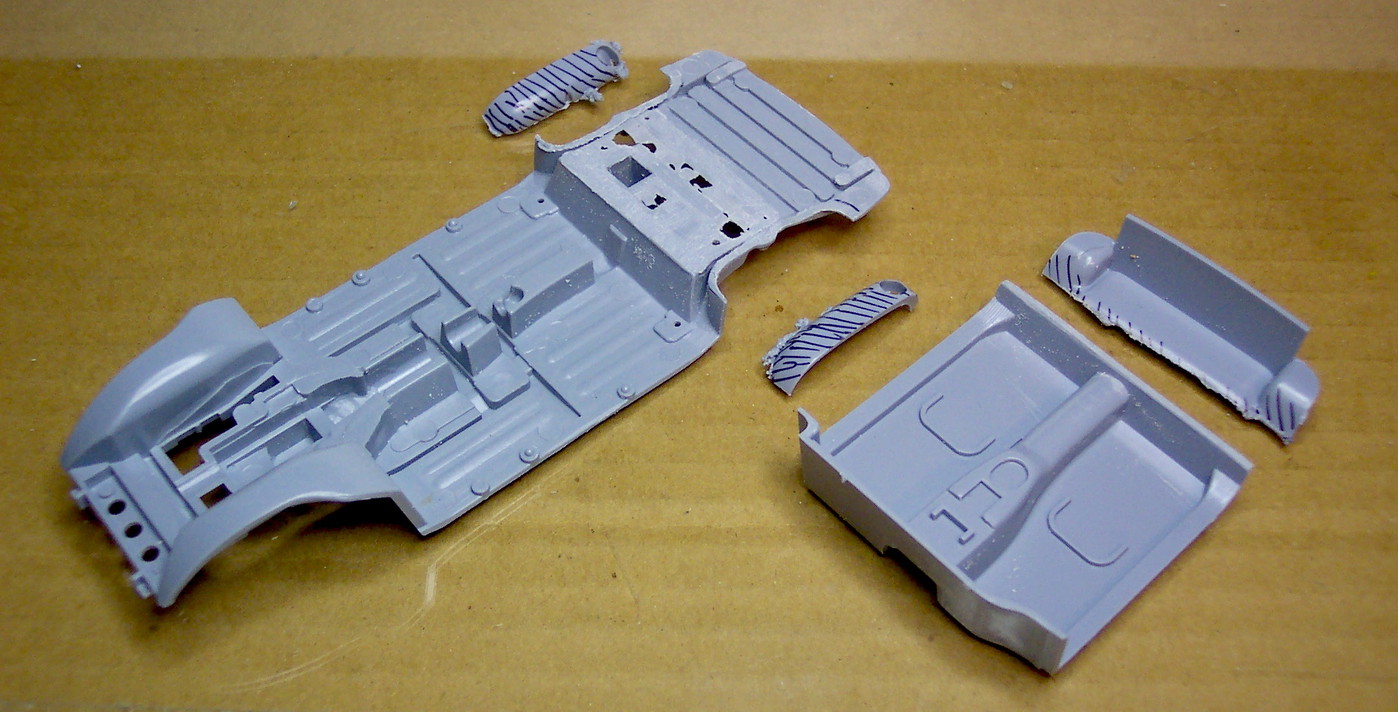 Here's the new interior taped together and sitting on the chassis . 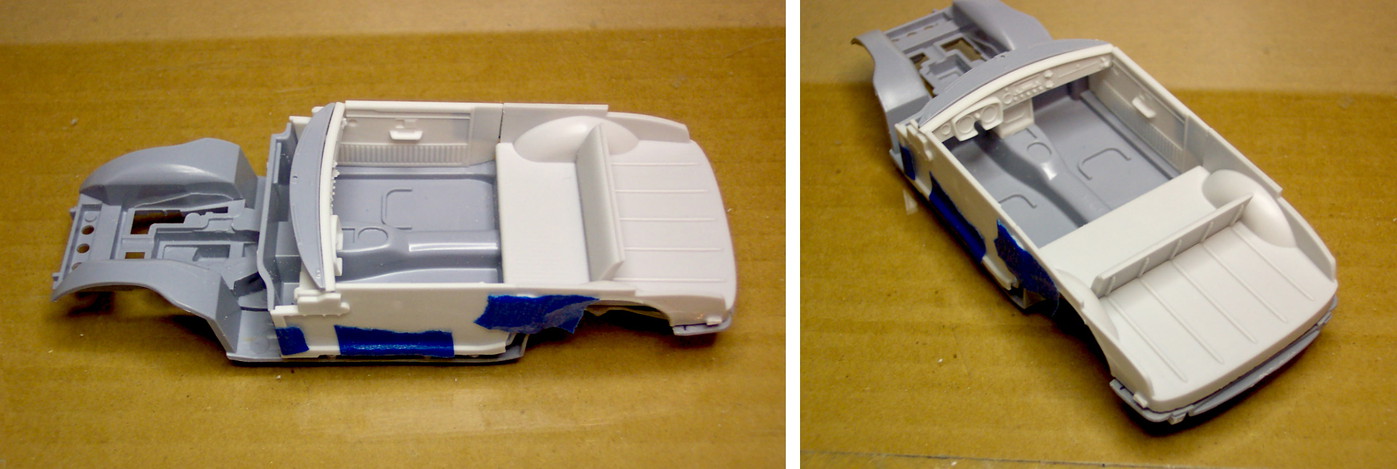 I slipped everything into the body and it fits beautifully ! 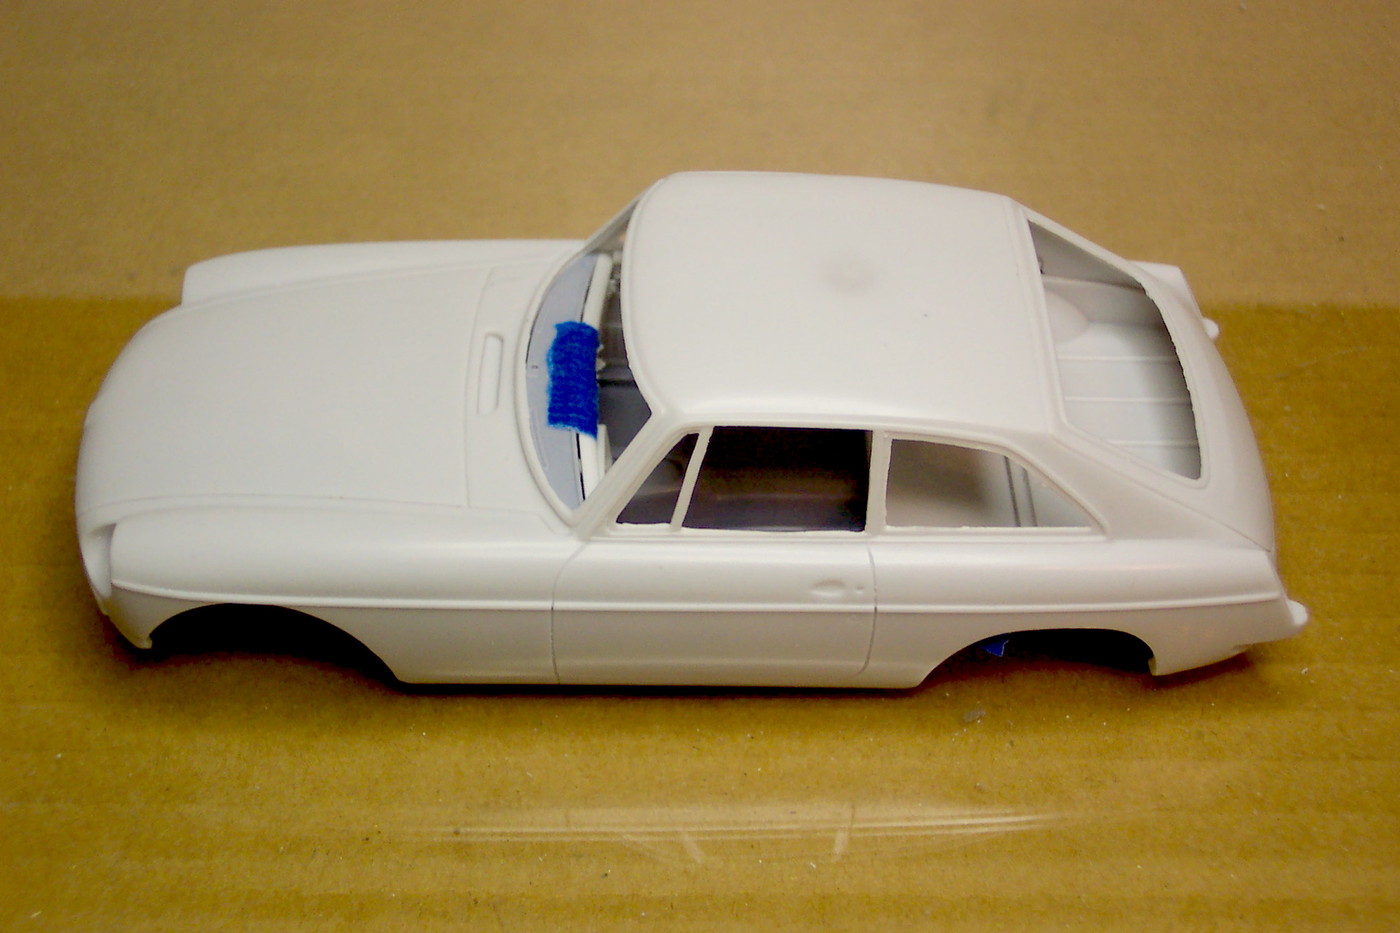 Other than cutting the windows out of the supplied sheet that's all there is to the conversion . . . very very simple ! I saw this done in a video on youtube and it seemed easy enough so I decided to lower the front ride height a little using 1mm strip . 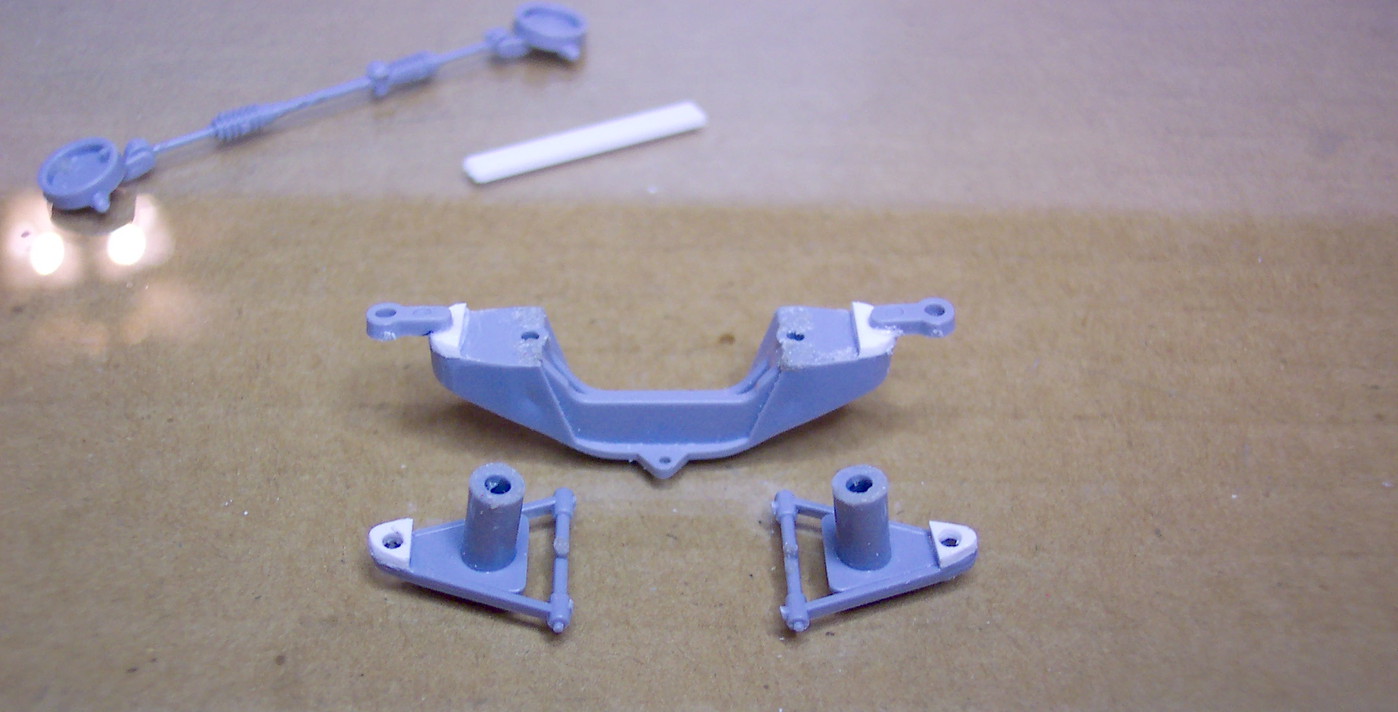 Here's a before and after . 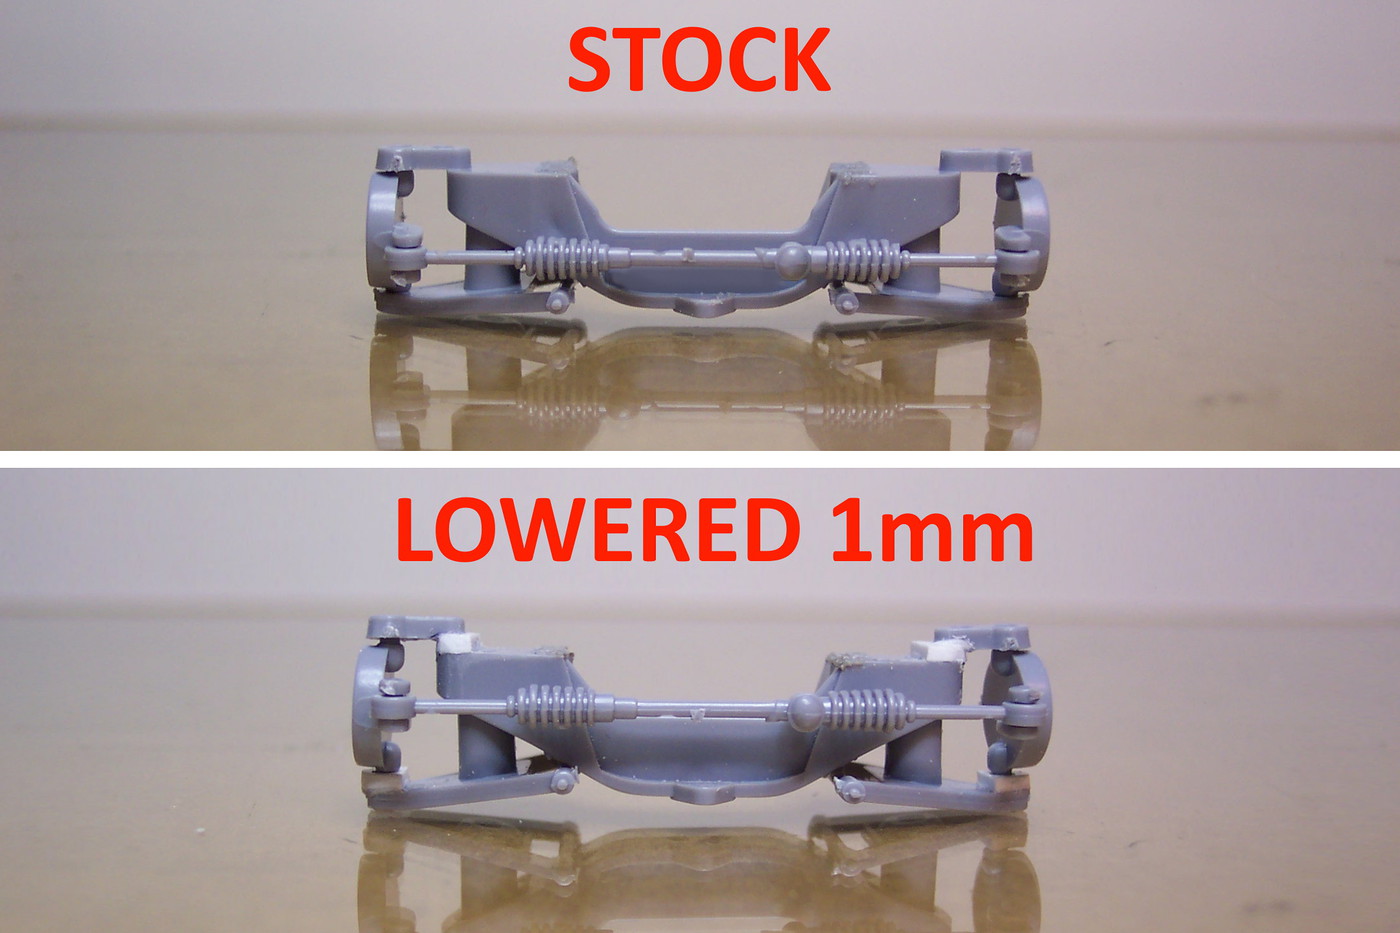 And a photo with the front lowered . Much better . 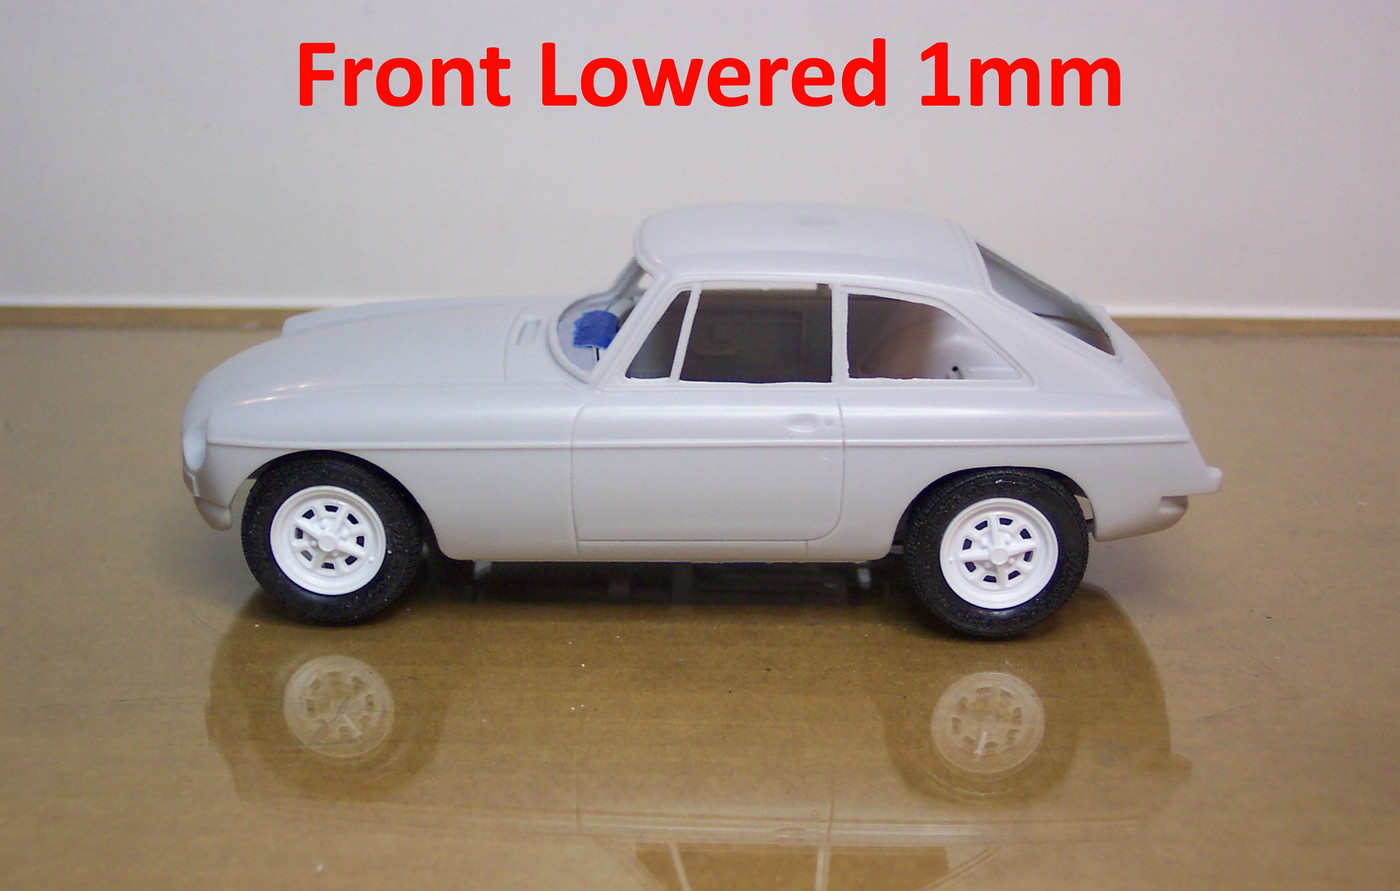 |
|
|
|
Post by Dave from Pleasanton on Jan 25, 2022 23:55:36 GMT -5
Interesting build. Can't tell for sure from the photo angle but the car still seems too high. My 2 cents.
|
|
|
|
Post by TooOld on Jan 26, 2022 16:23:21 GMT -5
Thanks for the feedback Dave . My photos are taken on a glass work surface and in the last photo it actually has a slight rake to it , the front of the body is lower than the rear (look at the beltline). I think the MGB front wheel opening is so much higher than the rear it gives an optical illusion .
|
|
|
|
Post by mack2856 on Jan 27, 2022 22:01:55 GMT -5
Still to high,  have built the roadster and to get it to sit right I had to seriously inset the rear leaf spring into the frame and cut the top of the inner wheel wells just to make it look acceptable, keep going you'll get there. |
|
|
|
Post by jbwelda on Jan 27, 2022 23:15:50 GMT -5
I think that was a big improvement and it actually makes it sit like a real one. Of course, I personally prefer it lower, but as it is, its quite acceptable in the stance department. Nice trick on lowering the front too, I am going to have to try that next time I tackle one of these.
jb
|
|
|
|
Post by TooOld on Jan 28, 2022 8:48:53 GMT -5
Still to high,  have built the roadster and to get it to sit right I had to seriously inset the rear leaf spring into the frame and cut the top of the inner wheel wells just to make it look acceptable, keep going you'll get there. I'd like to see some photos , I'm very curious about your modifications . |
|
|
|
Post by TooOld on Jan 28, 2022 8:55:04 GMT -5
I think that was a big improvement and it actually makes it sit like a real one. Of course, I personally prefer it lower, but as it is, its quite acceptable in the stance department. Nice trick on lowering the front too, I am going to have to try that next time I tackle one of these. jb Thanks JB ! That's actually what I was shooting for , to have a stance similar to the real thing . I think if I were to be using the Minilites I'd lower it some more to get a more aggressive look . Can't take credit for how I lowered the front , I saw it in a video on YouTube . |
|
|
|
Post by jbwelda on Jan 28, 2022 21:34:20 GMT -5
I posted the MGBGT I built some time ago, and here is the roadster I built around the same time. I pretty much lowered it as much as I could and still retain any kind of credible undercarriage, but I totally forget how I did it...was that long ago. But I did get it down to a realistically lowered stance even though, again, I would probably prefer it dragging on the weeds, just as far as the looks department goes.   Can't really see the stance, I neglected to take any real profile shots. One thing I think I notice though is the tires on your minilites and RoStyles (or whatever they are called) look pretty huge in the sidewall department. These on my roadster were either from the doner kit or possibly from a Tamiya kit (Jaguar sedan?) and look a little lower profile. Could just be the photos though. Either way, I am sure it will turn out looking great and I want to see how the body looks with some color on it! jb |
|
|
|
Post by constructionbob on Jan 29, 2022 12:07:19 GMT -5
These cars are fun to drive! My old man used to import a bunch from UK to Sweden by ferry and I had to drive some (poor me..) from Customs in Gothenbourg to Stockholm where he had his shop. Righthand drive, manual and a switch for overdrive close to right door.
|
|
|
|
Post by TooOld on Jan 31, 2022 7:10:57 GMT -5
I posted the MGBGT I built some time ago, and here is the roadster I built around the same time. I pretty much lowered it as much as I could and still retain any kind of credible undercarriage, but I totally forget how I did it...was that long ago. But I did get it down to a realistically lowered stance even though, again, I would probably prefer it dragging on the weeds, just as far as the looks department goes.   Can't really see the stance, I neglected to take any real profile shots. One thing I think I notice though is the tires on your minilites and RoStyles (or whatever they are called) look pretty huge in the sidewall department. These on my roadster were either from the doner kit or possibly from a Tamiya kit (Jaguar sedan?) and look a little lower profile. Could just be the photos though. Either way, I am sure it will turn out looking great and I want to see how the body looks with some color on it! jb Nice looking MGB ! I like your Minilites better than what I have , maybe it's because they're painted and mine aren't . Not sure about the tire sizes , like you said it's really hard to tell because photos can distort perspectives and such . It does appear that your ride height isn't much different than what I have , but again it's hard to tell in photos . I did discover that if the chassis isn't installed in the body correctly it raises the height by 2mm all around . This is a very easy mistake to make and I did it several times during pre-fit , it only affects the stance and not much difference in the fit of the interior . I did take some photos documenting this if anybody is interested . |
|