|
|
Post by jbwelda on Jan 24, 2020 23:11:38 GMT -5
I cleared my workbench for the new year, and have been exploring new projects to do this year. Here is the latest of the three I currently am starting, with another 3 or more in the bullpen for later on. This one is a Jimmy Flintstone rough resin body of a 34 Ford chopped coupe with a track nose and one piece body. I am going to be mating it with the Revell Pittman Willys Drag Coupe chassis and am going to otherwise try to keep it simple and source all I can from that kit, although I have deviated from that considerably already. Here is a photo of the kit box, along with some various parts I may or may not use: a straight six Chevy engine, with fuel injection and headers, some spun aluminum full wheel covers, the front axle and brakes from The Parts Box in Aussie land and some other junk. 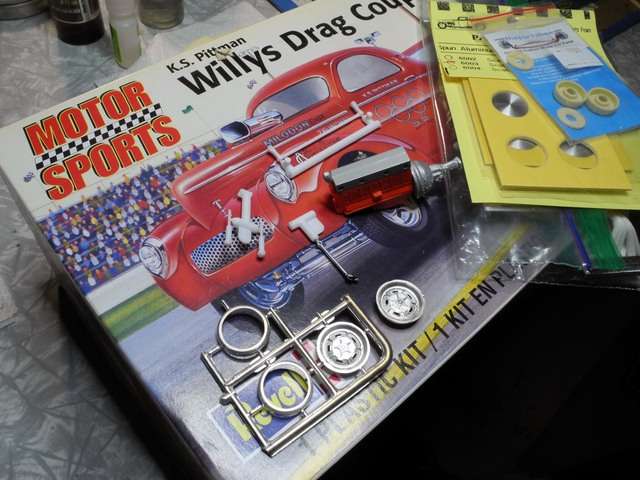 I chose the stovebolt six mostly to fit under the narrow hood. I have already test-built the chassis with white canopy glue to see how it fits the body and check wheel placement, etc. The body itself is typical Flintstone, way too thick with lots of finishing necessary around the edges, and brittle resin to boot. I relieved half a pound of resin out of the inside of the body with my Dremel and drum sander attachment, so its looking pretty thin around the front now. Too thin in fact, I went back and reinforced the area with 5 minute epoxy. Heres the chassis alongside the body, upside down to see the insides.  A shot of the chassis by itself, with wheels and tires from the Willys kit. I doubt I will be ultimately using them but for now I am using them to hold the chassis up off the ground and pose the body to get a look at the stance.  Note that originally the chassis had inline front springs with the axle under the springs for that "taken off" stance I basically hate so much. So initially I did a "spring under" conversion to get the front end down nearer the ground. That worked great but it made the wheelbase a bit short and the front end look awkward with the axle sitting back so far relative to the body. So I tore that out (beauty of using canopy glue) and took a Parts Box (Australia) dropped front axle with transverse spring and posed it against the frame crossmember. Much better, so I am going to fab a spring perch mount off that crossmember, add some shocks and radius rods. 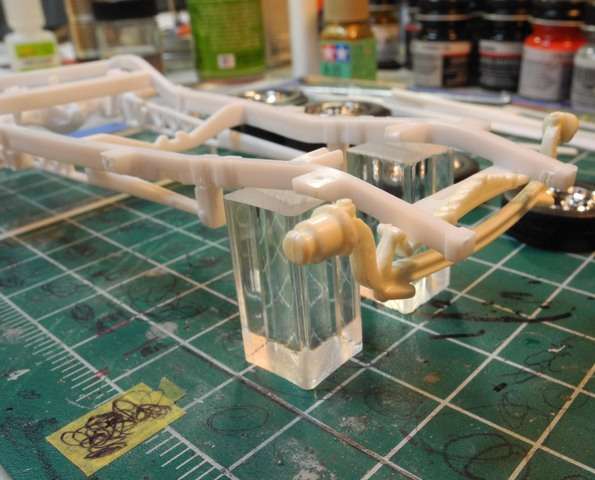 Here is the body sitting on the frame with wheels and tires posed: 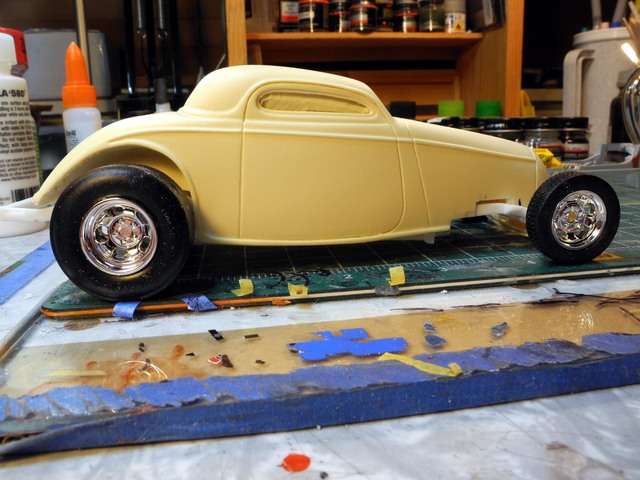 And a closer look at the front end. You can see lots of jagged edges on the body and also markings for relieving the body to sit over the frame. 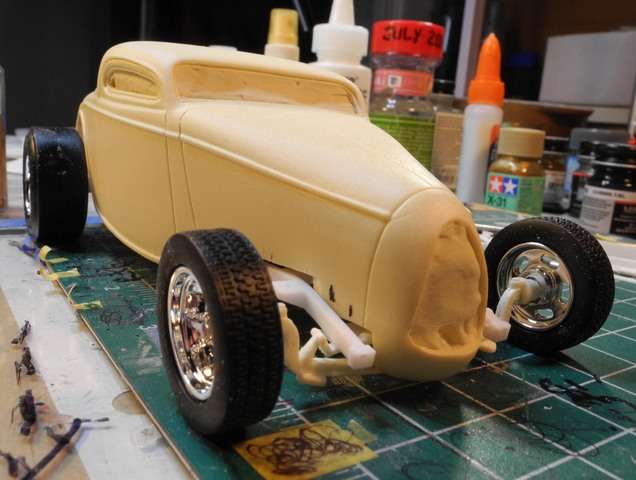 From here I am thinking about lowering the rear of the body down over the frame some more, doing some fitting of the engine and plotting escape route for the headers, on right side of car, and injector stacks on left.. The interior is yet to be imagined but like I mentioned, it would be nice if I could use more of the Willys kit without significant alterations, and I am thinking about lining the inside of the body with some sheet aluminum panels. The body is going to have to lift off, or perhaps I will push myself and hinge it or something similar. At any rate with those little bitty windows there wouldn't be much point in detailing an interior unless the body came off or away to view those details. Thanks for looking and any and all comments encouraged. jb |
|
|
|
Post by jbwelda on Feb 9, 2020 22:28:19 GMT -5
Some work going on with this one. Building a Chevy inline 6 powerplant, injectors out one side and headers out the other. I think the engine originally came with the AMT 51 Chevy Bel Air, but I got it on ebay all by itself. Got the frame pretty much finished, I moved the rear axle up about 3/16", and rearward about 1/8", that will lower the body/chassis down 4 scale inches and the rear wheel backward by 3 scale inches, making it fit into the wheel well area better. Adapted a front end perch from some old Revell parts pack chassis. Ready to pull the front axle off and paint the rest of the chassis, but want to hold off until I figure out what to do about an interior. Heres some pics: Engine is set into chassis under the body, checking for clearance between engine top and body inside. All looks pretty good at this point.  You can see the exhaust pipes coming out from under the body...the engine is tipped a little this way so they will actually be up a bit more. I might bend them a bit to help it along. I am thinking about chopping off that extra frame sticking out the rear and ending it even with the back of the body. Next project in fact.  You can see in this photo where I have been clearancing the inside of the body to allow the engine to not foul it. Still some more to go and actually the entire inside of the body is a real mess. I may fab some aluminum panels to fit over the lumpiness. 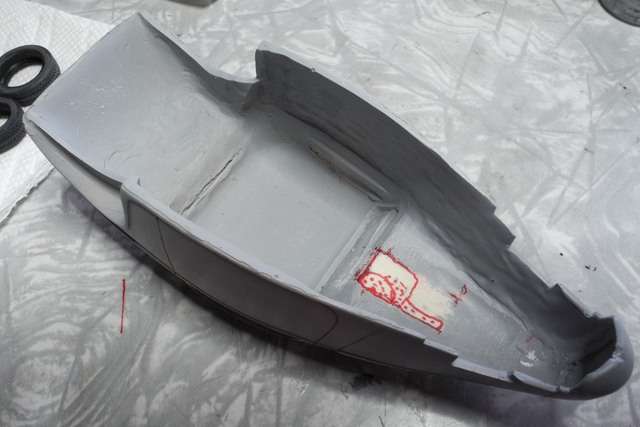 I cut some notches in the body to fit around the frame in front, but there were some notches in it when I got it and I am going to fill and reshape that area, shown in red in the next photo. 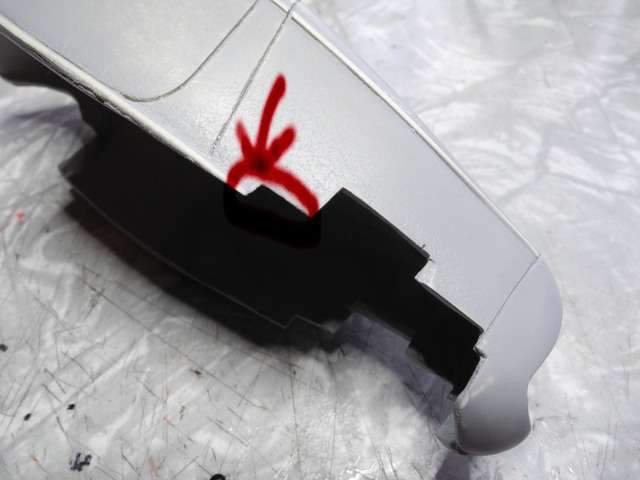 Theres actually a lot of work to be done on the body to make it anything other than a rough race car...which is what is kinda in mind to tell the truth. So heres what is under the hood so to speak, Chevrolet inline 6, from a fairly recent kit I believe, with period hot rod equipment: Fisher head, fuel injection, long 6-into-2 exhaust header. Skipped the dual plug ignition that was offered in the kit but used the other stuff. Did some research and turned out the head is pretty genuine, if kind of crudely cast. I did have to lower it about 1/8" to get it to nestle down a little better, and it actually looks a little more to scale like that. I am going to have a crankshaft drive fuel pump that is going to pin the front of the engine to the engine front mount (which is actually the front of the Revell 29 Ford RPU rat rod frame, chopped off and reshaped a little).   Finally, heres a look at the fuel injection unit with some intakes I made from shoelace ferrels, and a fuel log I will run fuel lines out of to the injector bodies. 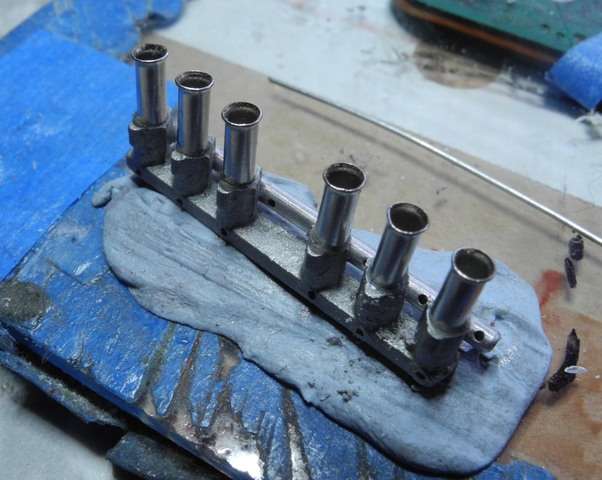 OK thanks for looking and all comments encouraged! jb |
|
|
|
Post by mustang1989 on Feb 10, 2020 10:28:10 GMT -5
Good idea about the shoelace ferrels. Lookin' good so far.
|
|
|
|
Post by TooOld on Feb 10, 2020 17:47:45 GMT -5
Dang , you've got three started and I'm barely working on my first of the year . . . go for it ! I'll be watching this one ! That Willys chassis is a nice one and I bet that JF body will clean up and look great when you're done !  |
|
|
|
Post by jbwelda on Feb 13, 2020 1:11:31 GMT -5
Thanks you guys, not so sure about how well this body is going to clean up, but at least it looks pretty nice on the outside. Opened up the holes and did some more body thinning with the Dremel and the dust flying. Also shortening the frame so it will end at edge of body. Heres where its at...   I stripped the Ansen style wheels in the first photos and hit them with magnesium Metalizer, drilled valve stem holes and everything but then pretty much decided to go with Moon disk wheel covers. I am not sure if I will run front brakes or not, maybe just rears with a chute attached to the new end of chassis. And might go with straight tread front tires and cheater slicks in the rear, on steel wheels with the Moon disks...still a long ways off before I have to commit to anything. jb |
|
|
|
Post by Mr.409 on Feb 25, 2020 5:06:47 GMT -5
This looks really good so far! I like how the full moon hubcaps look together with that body so I'd say go with them.  Also gotta love that Chevy straight six with the Fisher head. I have one similar engine in progress for another project, so glad to see another one being built. |
|
|
|
Post by mustang1989 on Feb 25, 2020 9:45:21 GMT -5
Man that looks great JB. Keep up the good work.
|
|
|
|
Post by jbwelda on Feb 26, 2020 15:15:54 GMT -5
Thanks you guys, means a lot right now, got some other challenges in life going on. Pets just don't live as long as pet owners, unfortunately, no matter how much you wish they would. Despite that, have made some more progress on this one, nothing enough to post new photos of, but the injection rig is on the engine and everything fits so that's a plus. Will keep updating thread as more significant progress gets made!
jb
|
|
|
|
Post by fordrodnkustom on Feb 26, 2020 16:50:01 GMT -5
Looks great. Low and sleek, you nailed the stance. I dig the inline six and those spun discs are perfect for it.
|
|
|
|
Post by jbwelda on Mar 6, 2020 19:37:16 GMT -5
Thanks again, here is some progress, got the FI installed and mostly detailed, might still add some throttle linkage.  Painted the chassis (and then immediately realized I had some other stuff to add to it). Am currently trying to figure out some suitable floorboard, started with the one from the Revell Willys kit that supplied the chassis, had to modify it some and there is more to come. 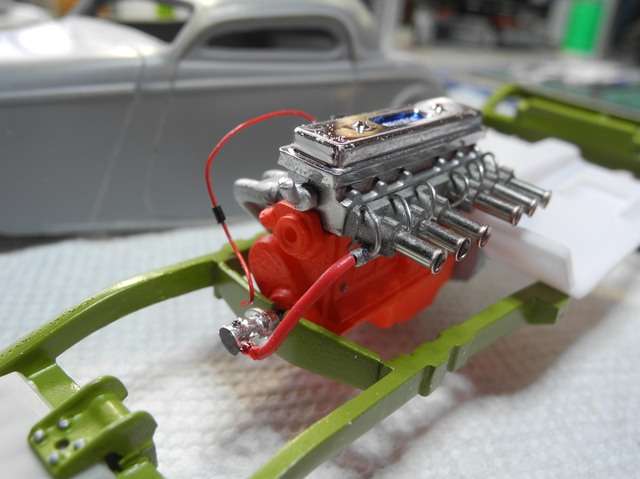  a shot at the back of the frame, started detail painting it but its pretty much as its gonna stay 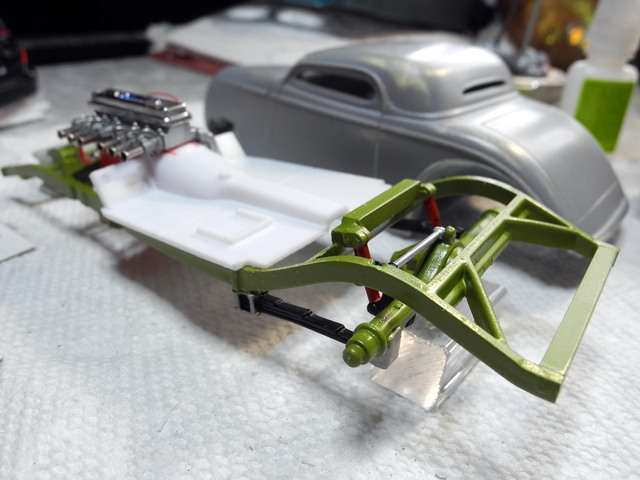 Fitting floorboard on chassis into body. Drilled four holes at corners of floorboard through into frame so can pin it to same position after disassembling and painting the floor. Am about to construct a rear bulkhead, again with Revell Willys piece as the basis, that's working out pretty well so far. 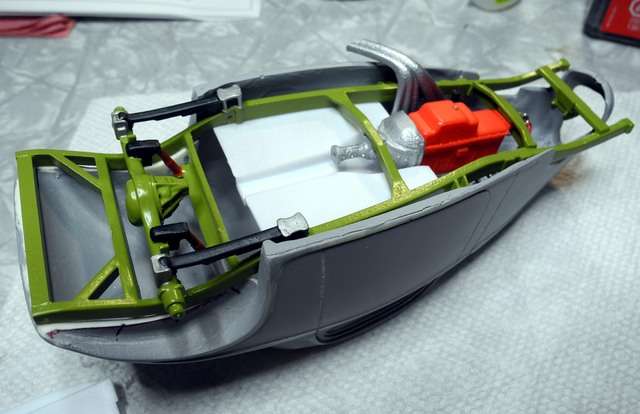  Thanks again for looking, any comments actively solicited. jb |
|
|
|
Post by jbwelda on Mar 15, 2020 1:30:51 GMT -5
Small update: got the floorboard painted and a rollbar being constructed, mostly just out of the Revell Willys kit heavily modified.  And installed the front axle and spring, deep drop assembly from the Parts Box, Australia, wire reinforced as recommended by Bernard, and the rear ladder bars. Shown here posed in the body shell to check clearances...know those body fills I did earlier? Looks like I might be cutting them out to fit front radius rods. Its always something. You can also see the rear bulkhead I made to match up to the floorboard (at least it did on test fitting). That way the body can come off and have the bulkhead go with it.  Its gonna get to be time to get serious with the body pretty soon. I am painting the same strange green as the chassis unless I change my mind on that before I actually start spraying color. And maybe some striping too, but minimal decaling. Thanks again for looking and as always comments welcomed! jb |
|
|
|
Post by jbwelda on Mar 24, 2020 22:48:20 GMT -5
Some progress to report, in fact all that is really left to get a rolling chassis and floorboard is to do the brakes and wheels, and the couple things I am attending to right now: fabbing a driveline and mounting some knee action friction shocks on the front end. Oh, and finishing up some steering linkage. 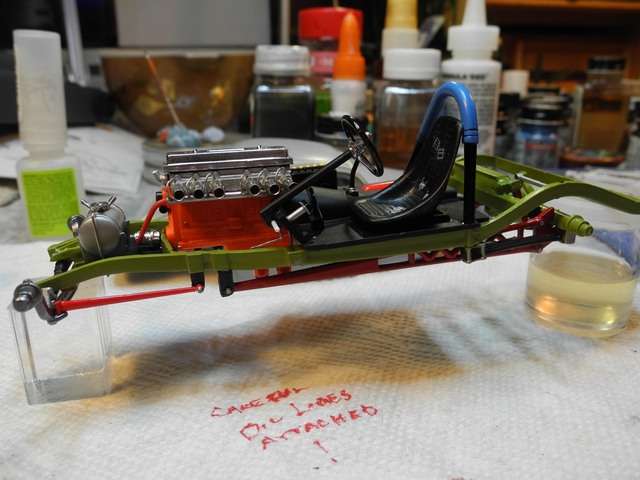 Fabricated a simple floorboard and equally simple accoutrements and also a floorboard for the Moon tank up front. All this is glued in at this point including the engine. 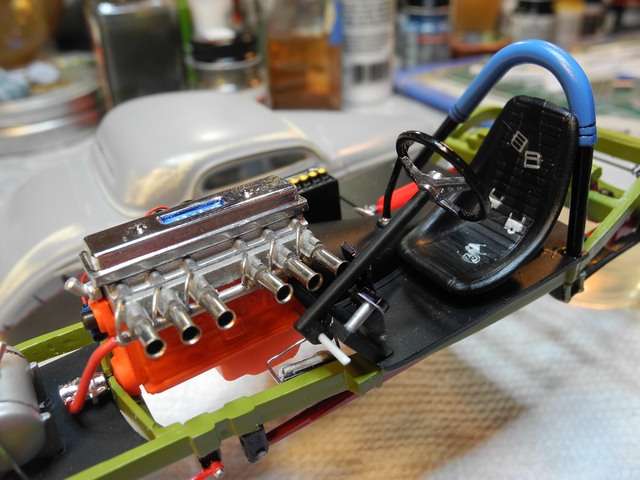 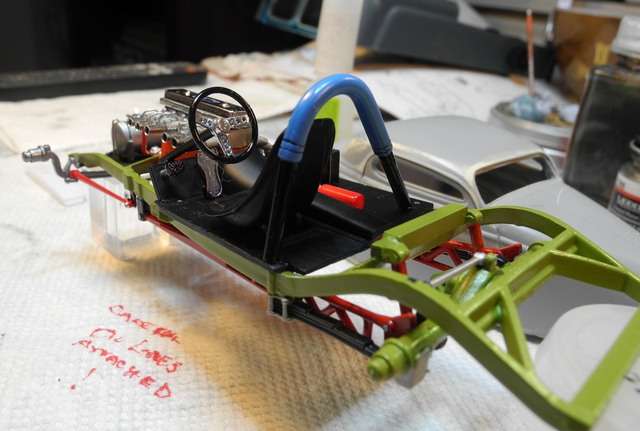 A look at the chassis with the body behind it. Body fits over the floorboard like the glove fit OJ. 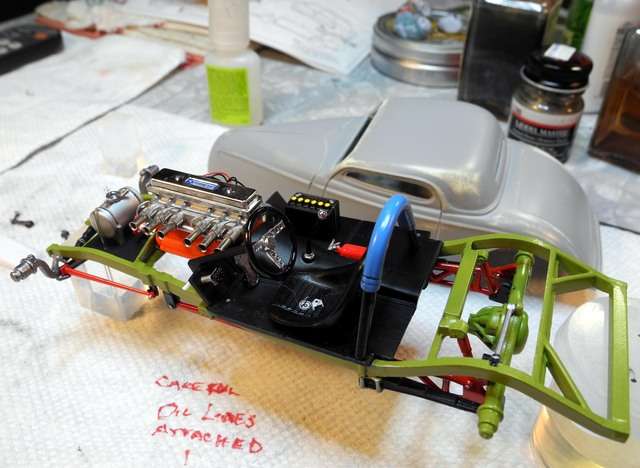 Measuring for the driveshaft, using u-joints from the Willys kit. 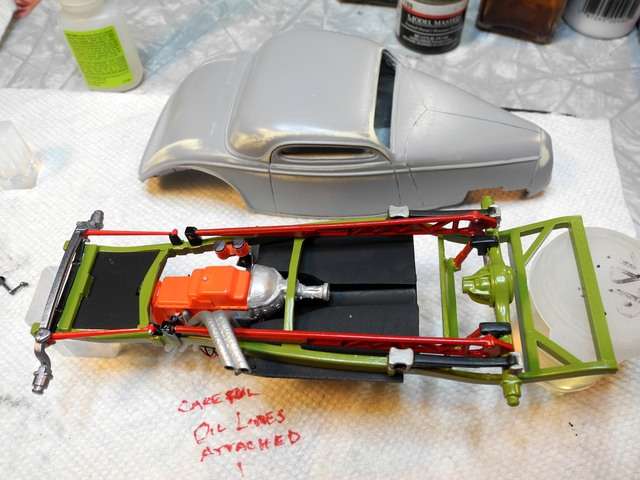 So, like I said, pretty much just a matter of tying up a couple details and mounting the wheels and tires and I can move on to the body. Comments appreciated, as always! jb |
|
|
|
Post by jbwelda on Mar 31, 2020 23:49:05 GMT -5
Fitting the wheels and tires, I found a taller set for the front because as it was things were going to drag on the ground. Photos were taken during front test fitting and there will be backing plates inside the finned brake drums, and of course full wheel covers on the front wheels. Looking pretty kool, pretty much down to the paint now, but more details first, making a tie rod and steering linkage looming large. 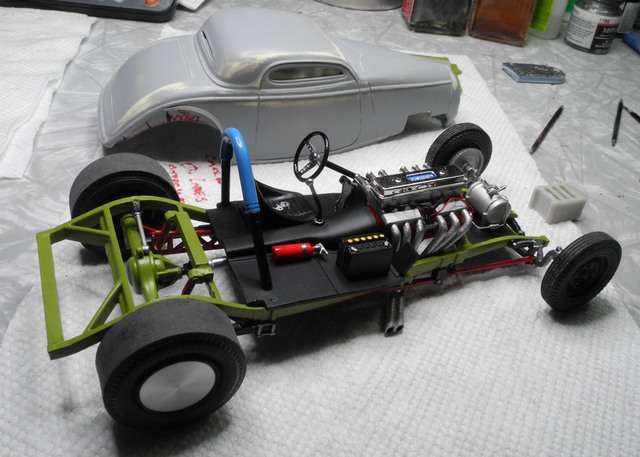  Also cut down the dashboard to fit on one side of the deeply set back engine, and also made some interior door panels. Some more work still to be done smoothing the inside of the body. 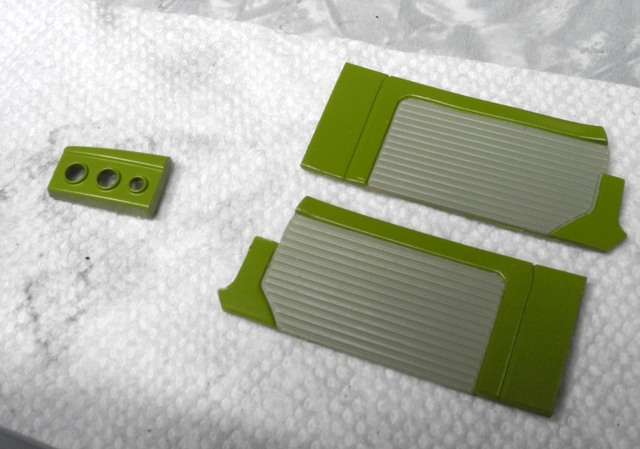 jb |
|
|
|
Post by fordrodnkustom on Apr 1, 2020 18:02:51 GMT -5
Coming along great JB. Again I dig that inliner and and all your clean detail work. Will you leave the front wheels open or fit discs to them?
|
|
|
|
Post by jbwelda on Apr 23, 2020 1:12:03 GMT -5
This one is moving along, some shots of the completed chassis, then some with the painted and polished body posed on it. Just needs a windshield and a few more details and I am gonna call it done. 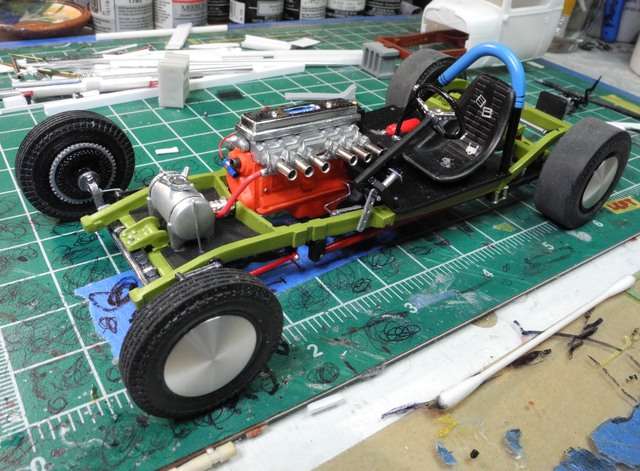 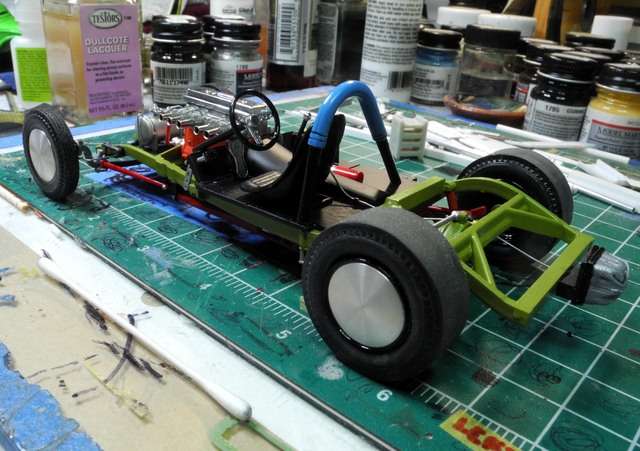 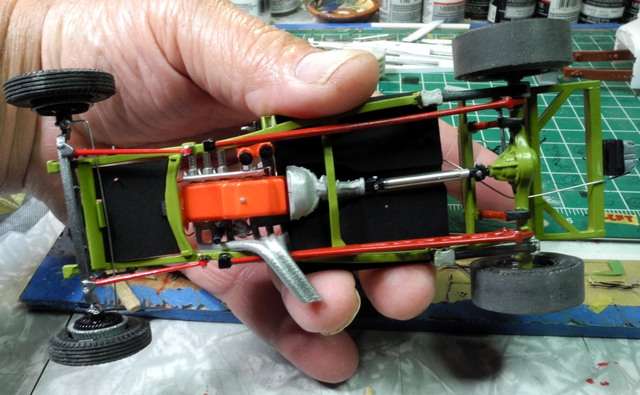 Paint is Tamiya Light Green over Tamiya Silver Leaf to lighten it up a bit, and a coat or two of Pearl Clear, followed by a couple more of plain TS13 Clear. Was going to paint it the same color as the frame (and the underside of the body) but decided to add some pizazz to what would otherwise be pretty monochrome. 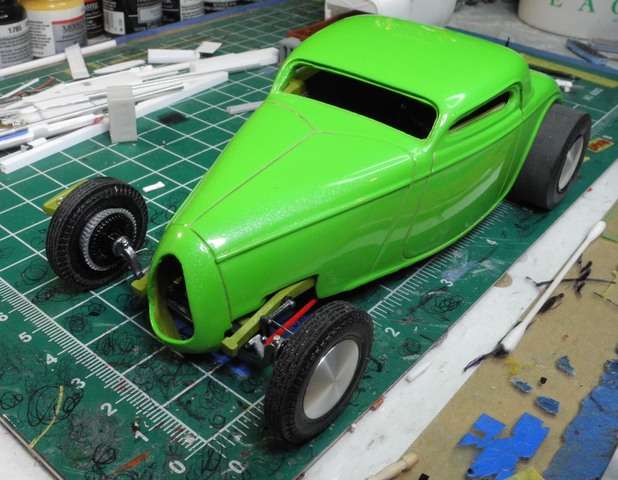 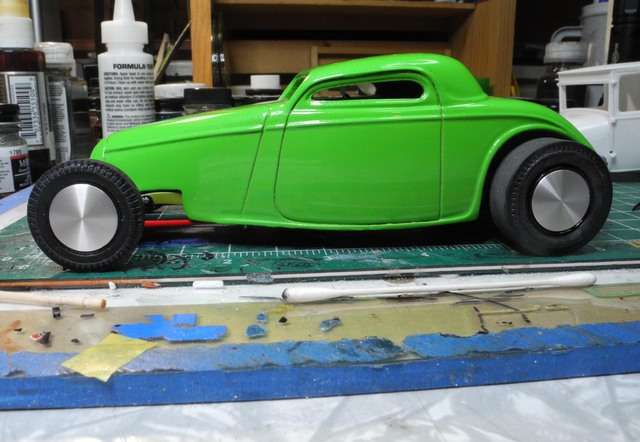 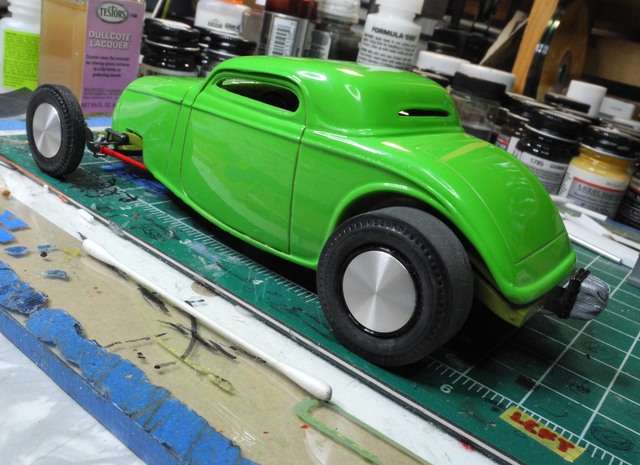 Not one of my best builds, I took a number of liberties both big and small, but it was and remains a pretty fun little project, some engineering but everything just seemed to fit together pretty well without really stressing it. Also note I figured out its actually a 34 Ford, not a 32 as I had assumed, so I changed the title of the thread to reflect that. Thanks for looking as always and feel free to throw a comment down! jb |
|




 Also gotta love that Chevy straight six with the Fisher head. I have one similar engine in progress for another project, so glad to see another one being built.


 It's an interweb thing.....