|
|
Post by patw on Apr 25, 2019 23:49:54 GMT -5
Thanks Ron, do you (or anyone) happen to know what that thing is hanging off the bottom of the oil pan? I cannot for the life of me figure it out. I don't think its the coil (what a weird place to put a coil!) and its not a starter of course, so not sure what that leaves? I just painted it and let it go but it always puzzled me. jb It was/is some sort of filter or scavenger pump in the racing engines to run what they call 'a dry sump system' so that the oil circulates constantly so as not to starve any of the engine of oil. It was used in racing to stop oil surge on corners or under heavy braking when the oil runs into one side or all to the front or rear of the sump, starving bearings of lubrication. I think! |
|
|
|
Post by modelcarfan on Apr 26, 2019 5:50:02 GMT -5
This uncertain T rod is a legend. I built this one from scratch in a cartoon version. The color you used which is orange metallic by boyd is the one I use. I hope you have found one in e bay.. I have seen a couple in the past. Maybe you have already gotten one. Like TooOld said its a cartoon version. I have to agree with him because I have analyze the concept and the creation Steve Scott did. Doing something a bit rebellious and different with the engine , gear works and chassis system does make difference. Making it stand out and using an orange color which is not common in that era. Building an odd body shapes with large windows on side and front.. shrinking the back of the car showing its tires out as almost a focal point. I get confused when I look for a focal point of a whole car.. engine?, body? chassis? or what? I think thats what attracts people to its work. Even with other famous car designer trying to out beat his work. they did but this unct blew through. Its very subtle yet strong and stands out. Heres a link to my work in cartoon version if youre curious ..... car-toons.proboards.com/thread/1393/finished-most-certain-rod |
|
|
|
Post by fordrodnkustom on Apr 26, 2019 17:28:47 GMT -5
Thanks Ron, do you (or anyone) happen to know what that thing is hanging off the bottom of the oil pan? I cannot for the life of me figure it out. I don't think its the coil (what a weird place to put a coil!) and its not a starter of course, so not sure what that leaves? I just painted it and let it go but it always puzzled me. jb Geez I have no idea, never seen anything like that. Guess it could be a coil or maybe an oil filter or external pump of some sort?  |
|
|
|
Post by jbwelda on Apr 26, 2019 22:09:18 GMT -5
Yes, modelcarfan, you are correct: its hard to figure out what to focus on when you view the Uncertain T, I had never thought about it that way, but it is true! Very astute observation.
And Pat, I know about dry sump systems but in this case there isn't any other indication of that, like an external oil tank or anything, so I am not sure I follow that. On the other hand, the coil does seem to be missing, so unlikely a place as it might be, what with the very small firewall, maybe it was the only place to put it. I do seem to recall reading something about what it was, I will go back and try to find that article.
Thanks again for the interest, and now something different...
jb
|
|
|
|
Post by jbwelda on Apr 26, 2019 22:14:20 GMT -5
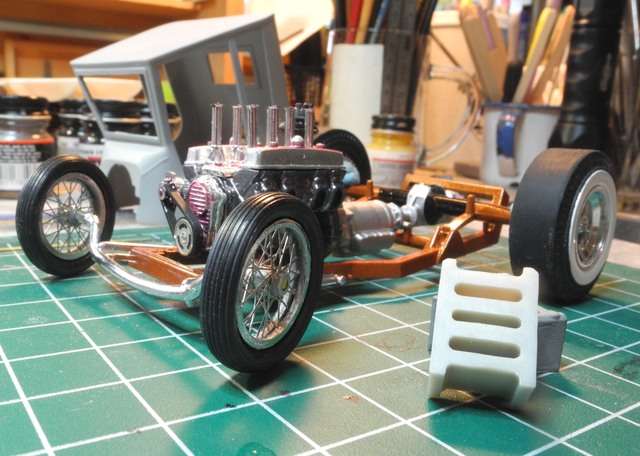
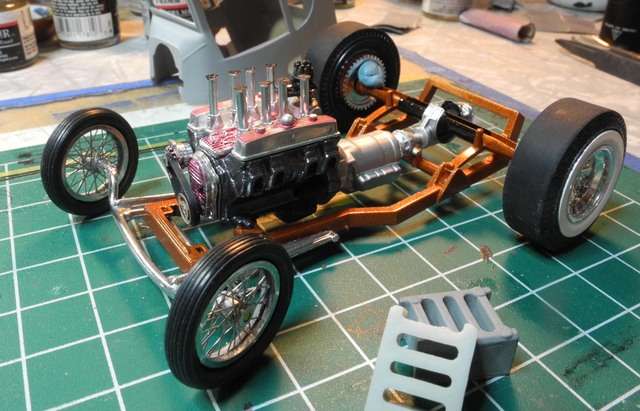
So, was daydreaming with this junk in front of me and an idea came to me  Had a cab sitting on my pile of interesting pieces, and decided to see what it looked like on an Uncertain T chassis.  Almost looks like it would fit: 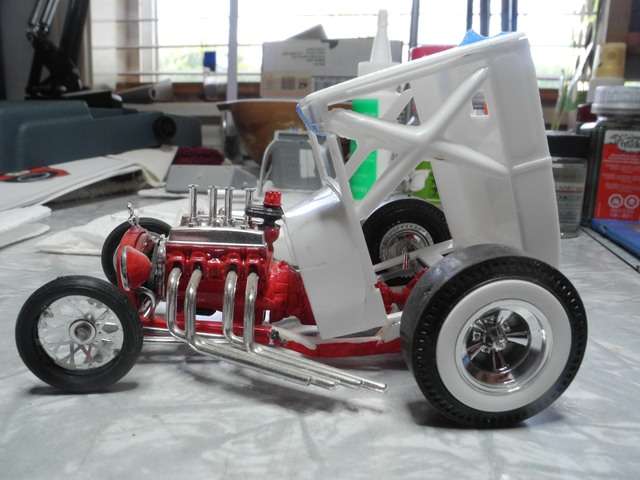 Hmmm this shows some promise. And certainly gives clues as to a possible source of inspiration for the T. Lets look again: 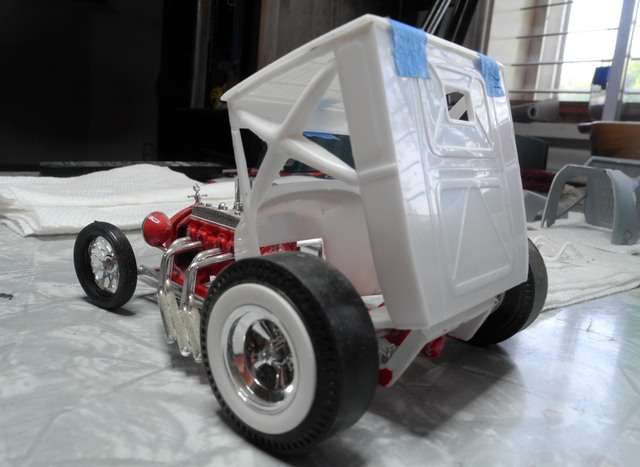 And if one were to cut away the partial floorboard in the body, and glue in the doors to retain the cab shape, the body would fit down nicely over the rear of the chassis, right down to the level of the axle. Might have to pursue this with a virgin chassis...I see a shortened pickup bed off the back, really shortened like Tweedy Pie shortened. jb |
|
|
|
Post by jbwelda on Apr 27, 2019 23:19:53 GMT -5
So I just emailed Steve Scott and asked about what that is under the oilpan (magneto ignition so coil is out), and he got right back to me with this explanation:
"Since I didn't want to have a fan that would ruin the look, it's an electric water pump to pump the water from the radiator into and around the aluminum frame and back into the radiator "
I think by "frame" he meant the aluminum Buick engine block. And not sure why it would have anything to do with a fan, I would think it would be a mechanical water pump under the front cover, but at least its clear what its purpose is: electric water pump. And it kinda explains why you do not see any water lines coming out of the radiator in any photos I can find, I guess they are smaller gauge tubing and somehow hidden down below. Gonna have to look into that part, just for my own curiosity.
So that solves that mystery! Its amazing what you can do on this interweb thing.
jb
|
|
|
|
Post by jbwelda on Jun 14, 2019 0:06:30 GMT -5
After trying to find a mint front end piece (which consists of the front axle, tie rod, and radius rods) and coming up empty handed I decided to just clean up what I had and then try flooding it with the good ole Molotow chrome pen, then let it sit for a good month now. It really doesn't look half bad, the worst parts about it were where I couldn't remove some roughness. Plus I broke it while trying to get to some of the roughness, so I got real gunshy about screwing around with it any further. So, for all that, I think it turned out pretty good. Just in case though, I used only semi permanent glue, that canopy glue from Pacer that someone introduced me to recently. Love that stuff, dries clear and strong yet will come apart if soaked in water for an hour or two. Anyway, a quick pic, and later this evening I might mount up the tires for some photos, and will finish up the body soon too.  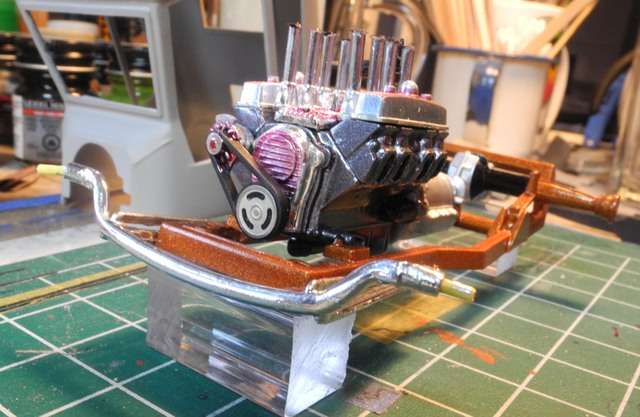 thanks again! jb |
|
|
|
Post by constructionbob on Jun 14, 2019 12:00:24 GMT -5
Cool build, jb.. I have ever had any one of them sadly.. but there is a Swedish 1/1 I'd like to make as model.. also.. Here is some inspiration, ..I hope!!    |
|
|
|
Post by jbwelda on Jun 20, 2019 21:12:20 GMT -5
  jb |
|
|
|
Post by jbwelda on Aug 5, 2019 20:24:46 GMT -5
Got the body painted and cleared, not sure I am going to polish it since I polished the clear and then shot some more over the smoothed top...looks pretty excellent even in good light. Color is kind of hard to capture, its Testors "Extreme Lacquer" (not usually something I want to hear about the paint I am about to spray over my bodywork, but nonetheless, onward) Fiery Orange, with a light coat of Tamiya Clear Orange topped with the normal Tamiya TS13 clear. Am currently detailing the headliner pattern, which unfortunately came already well affixed to this model's roof, so I have to paint it in place. Other than that the interior is pretty simple paint wise: flat black does most of it. 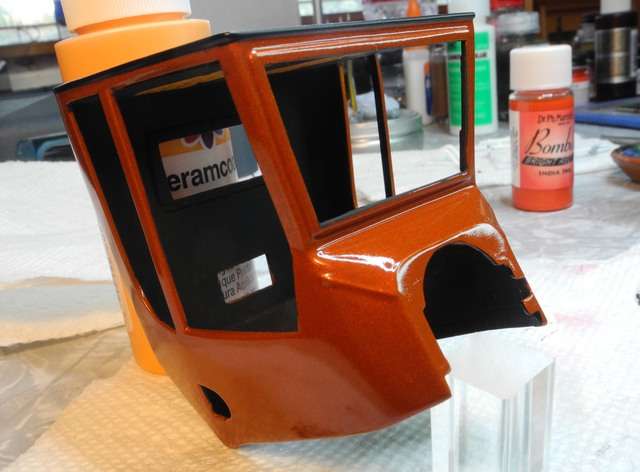 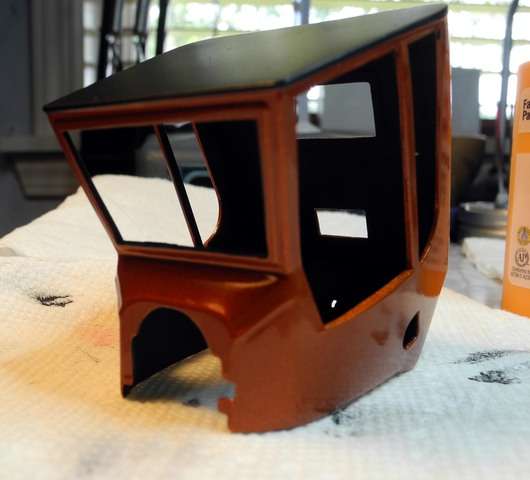 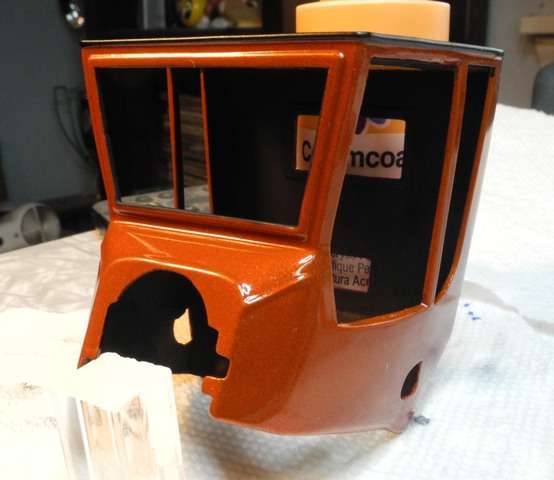 Saving the best for last, eventually I will have to cut off one rear axle end to slip the body and interior over it, then reaffix the axle stub to the axle itself, probably with wheel and tire attached. Really looking forward to that I can tell you. But meanwhile aside from touching up the interior, and the continuing nightmare with the headers, and the cutting of a windscreen and rear window, this baby is seeing the light at the end of the vintage victim tunnel! jb |
|
|
|
Post by TooOld on Aug 22, 2019 6:25:53 GMT -5
Great color JB ! I used the same combination on a UCT I was working on , not quite as dark as the real thing but it sure looks sweet !  |
|
|
|
Post by jbwelda on Sept 7, 2019 17:15:56 GMT -5
A bit of progress to report, interior done and in the body shell, windscreen and rear window and license plate in, and windscreen surround metal foiled. Pretty much all that needs to be done now is the hard part: cutting rear axle to maneuver body onto chassis and then repair the damage. Then the headers, a major project in themselves. I didn't have perfect ones so had to make do, including making extensions to make up for a broken pipe, and as I am doing that might as well do it for all of them so I can have nicely opened exhaust pipes (learned this trick from someone here...thanks again!) Problem is they are very delicate and I have to feel delicately inclined to finish them up so I can "chrome" them via Molotow chrome tank. But that's all that remains to do aside from some minor parts attachment and, oh yeah, the headlamps which are going to cause some drama by themselves. Anyway heres how the body looks: 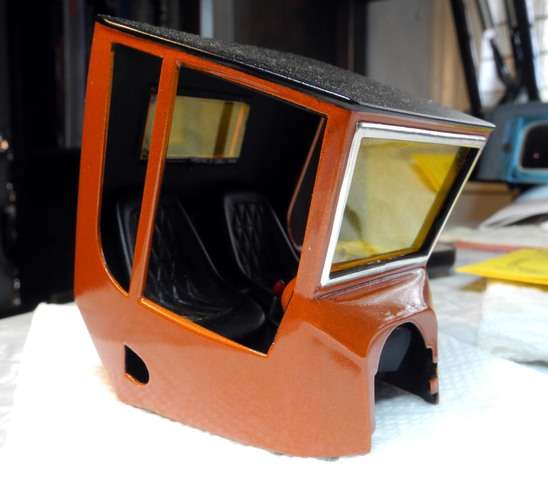 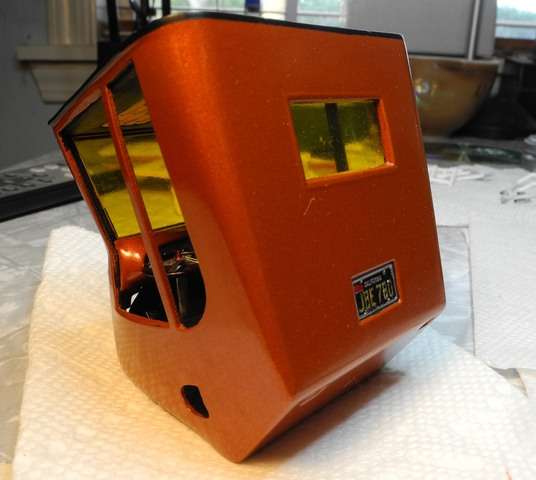 And a couple peeks inside the body to see what we can of the interior. Added embossing powder carpet and detailed the gauge faces a bit but otherwise pretty much right out of the box (or parts collection as it may be). Got a bit sloppy on the windscreen in places but turned out to not show much. 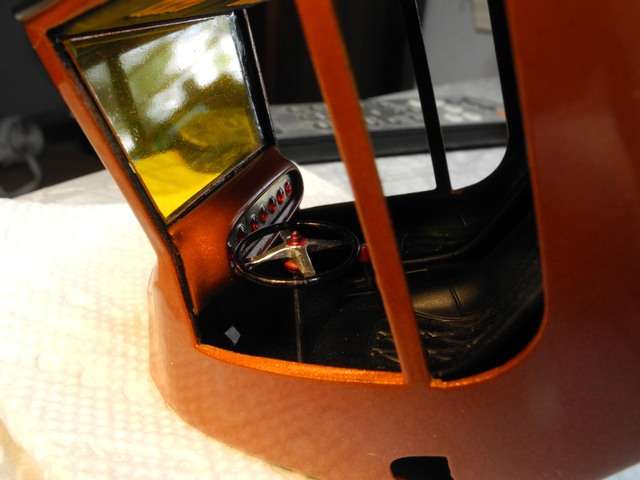 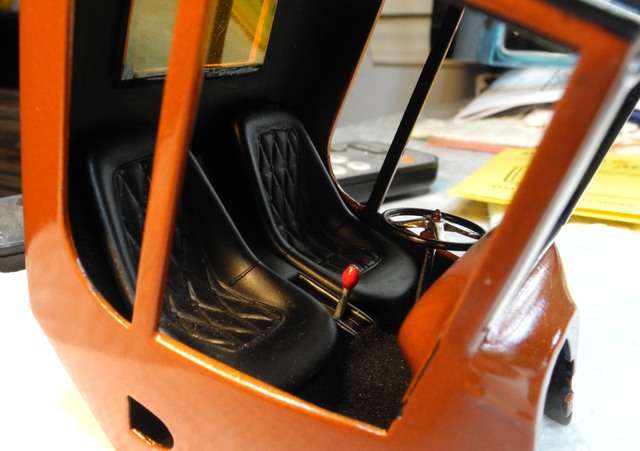 OK hit me back! jb |
|
|
|
Post by TooOld on Sept 9, 2019 15:09:24 GMT -5
Looks really good JB ! All kinds of stuff shows up in close up shots like that so if all you have to worry about is a little glue on one side of the windshield you did much better than I ever do . The inside looks just as clean as the outside to me !  |
|
|
|
Post by jbwelda on Sept 14, 2019 23:19:38 GMT -5
Thank you Bob, I hadn't seen your comment until just now! I might have mentioned the need for a little surgery earlier. The thing about this kit is that it is designed to have the body clamshell around the chassis. This is particularly necessary due to the extreme Z of the rear part of the chassis, where it kicks up quite a bit and interferes with the underside of the floorboard. But of course that makes it pretty darn hard to assemble it without ugly seams and such, impossible almost I would say. So the alternative is to figure out some way of being able to assemble, finish and paint the body and then be able to put it onto the chassis. At first I thought I would cut slots in the side of the body that wouldn't be seen somehow (that old hoped-for magic that never really pans out) but upon checking the reality of that out, found out it ain't gonna work and had to think of a plan B (and fill the slots I had cut into the body halves in the process). So with some study it occurred to me I could chop off part of the rear axle, slip the other side through the hole in the side of the body (see prior photos), position the chassis properly and then either glue it down or let it stay loose for now, and then put that chopped off piece of the axle back on. If done neatly, could be mostly invisible, since it would be sitting inside and under the cab. After a couple of test fittings with the axle in one piece, I decided to go this route. The thing is, if I were working with this knowledge and a new chassis and rear ends, I would have done this all before I assembled it. But in this case I was working with used pieces and the axle was firmly attached to the chassis. Actually its the goofiest rear suspension I have ever seen, with the axle and springs mounted ABOVE the chassis frame (think about that for a second). But I digress, the point is, if you are doing this model, figure out this puzzle well ahead of time and if what I am doing works out, and I think it will, you can use it for a template if you cannot come up with anything better. Anyway, enough words, here are a couple photos of the victim, and hopefully the rest of the surgery will go as well... 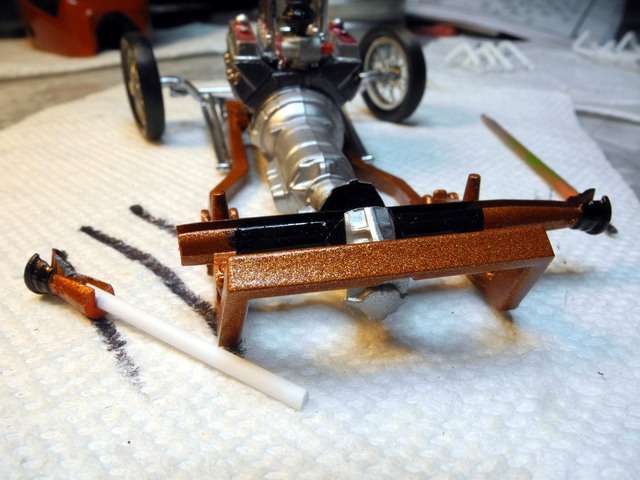 You can see I glued a piece of plastic into the groove of the open, upper part of the axle, with the idea that it will be used to engage it to the axle again after the body is fitted. 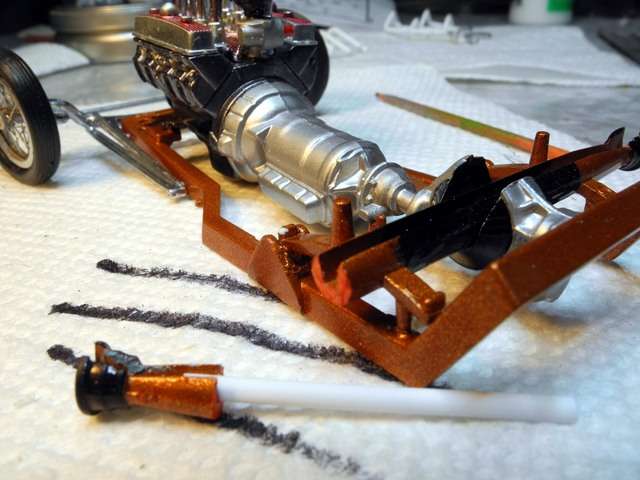 Finish this up and then its on to the headers...which is going to be a whole other struggle. thanks for looking in! jb |
|
|
|
Post by jbwelda on Nov 30, 2019 23:27:08 GMT -5
And certainly not to forget this one, its pretty much ready for the shelf, original base, trophy (all like 16 pieces of it) and girl included. Here we see it having the headlamps posed before final gluing, sporting a new set of headers. 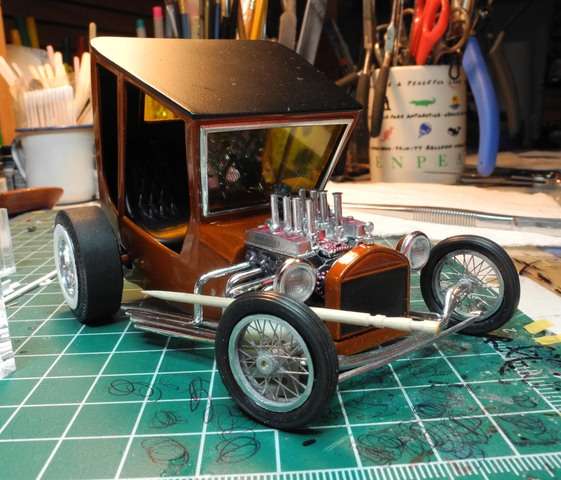 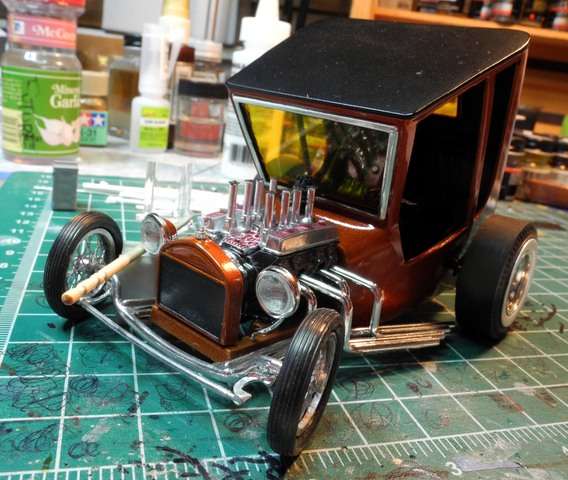 jb |
|